The Slideshow block lets content creators build a sequence of slides combining text and media to present information to learners. Learners can navigate through the slideshow at their own pace using simple controls to move between slides. The block is informational only and is not graded.
- Navigate to the page and select Edit this Page. Find the position you want to add a block and select the plus (+) icon.

- From the dropdown, select Add Block.

- In the Add Block modal, you can either:
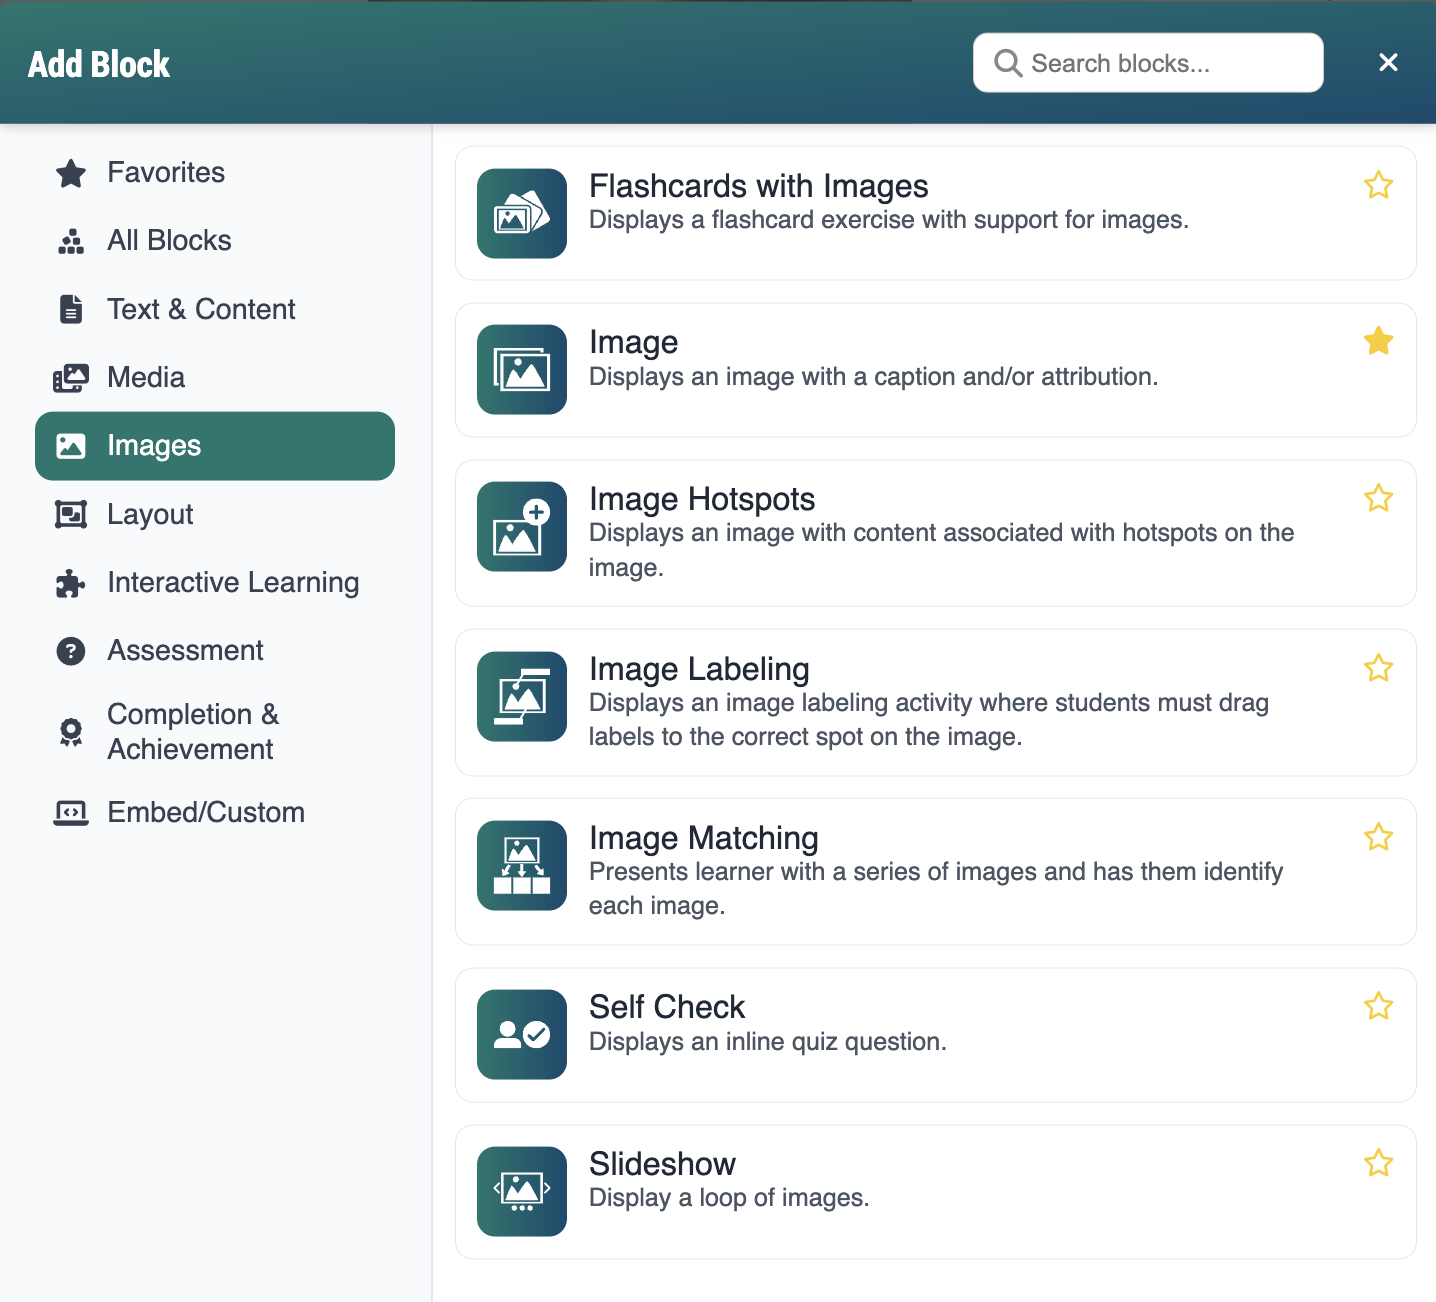
- Use the Search field to find a block by keyword
- Select a block from your custom list of Favorites
- Scroll through the list of All Blocks to select one
- Use the various categories in the side panel to filter by block type
- Select the star icon to add or remove blocks in your Favorites list
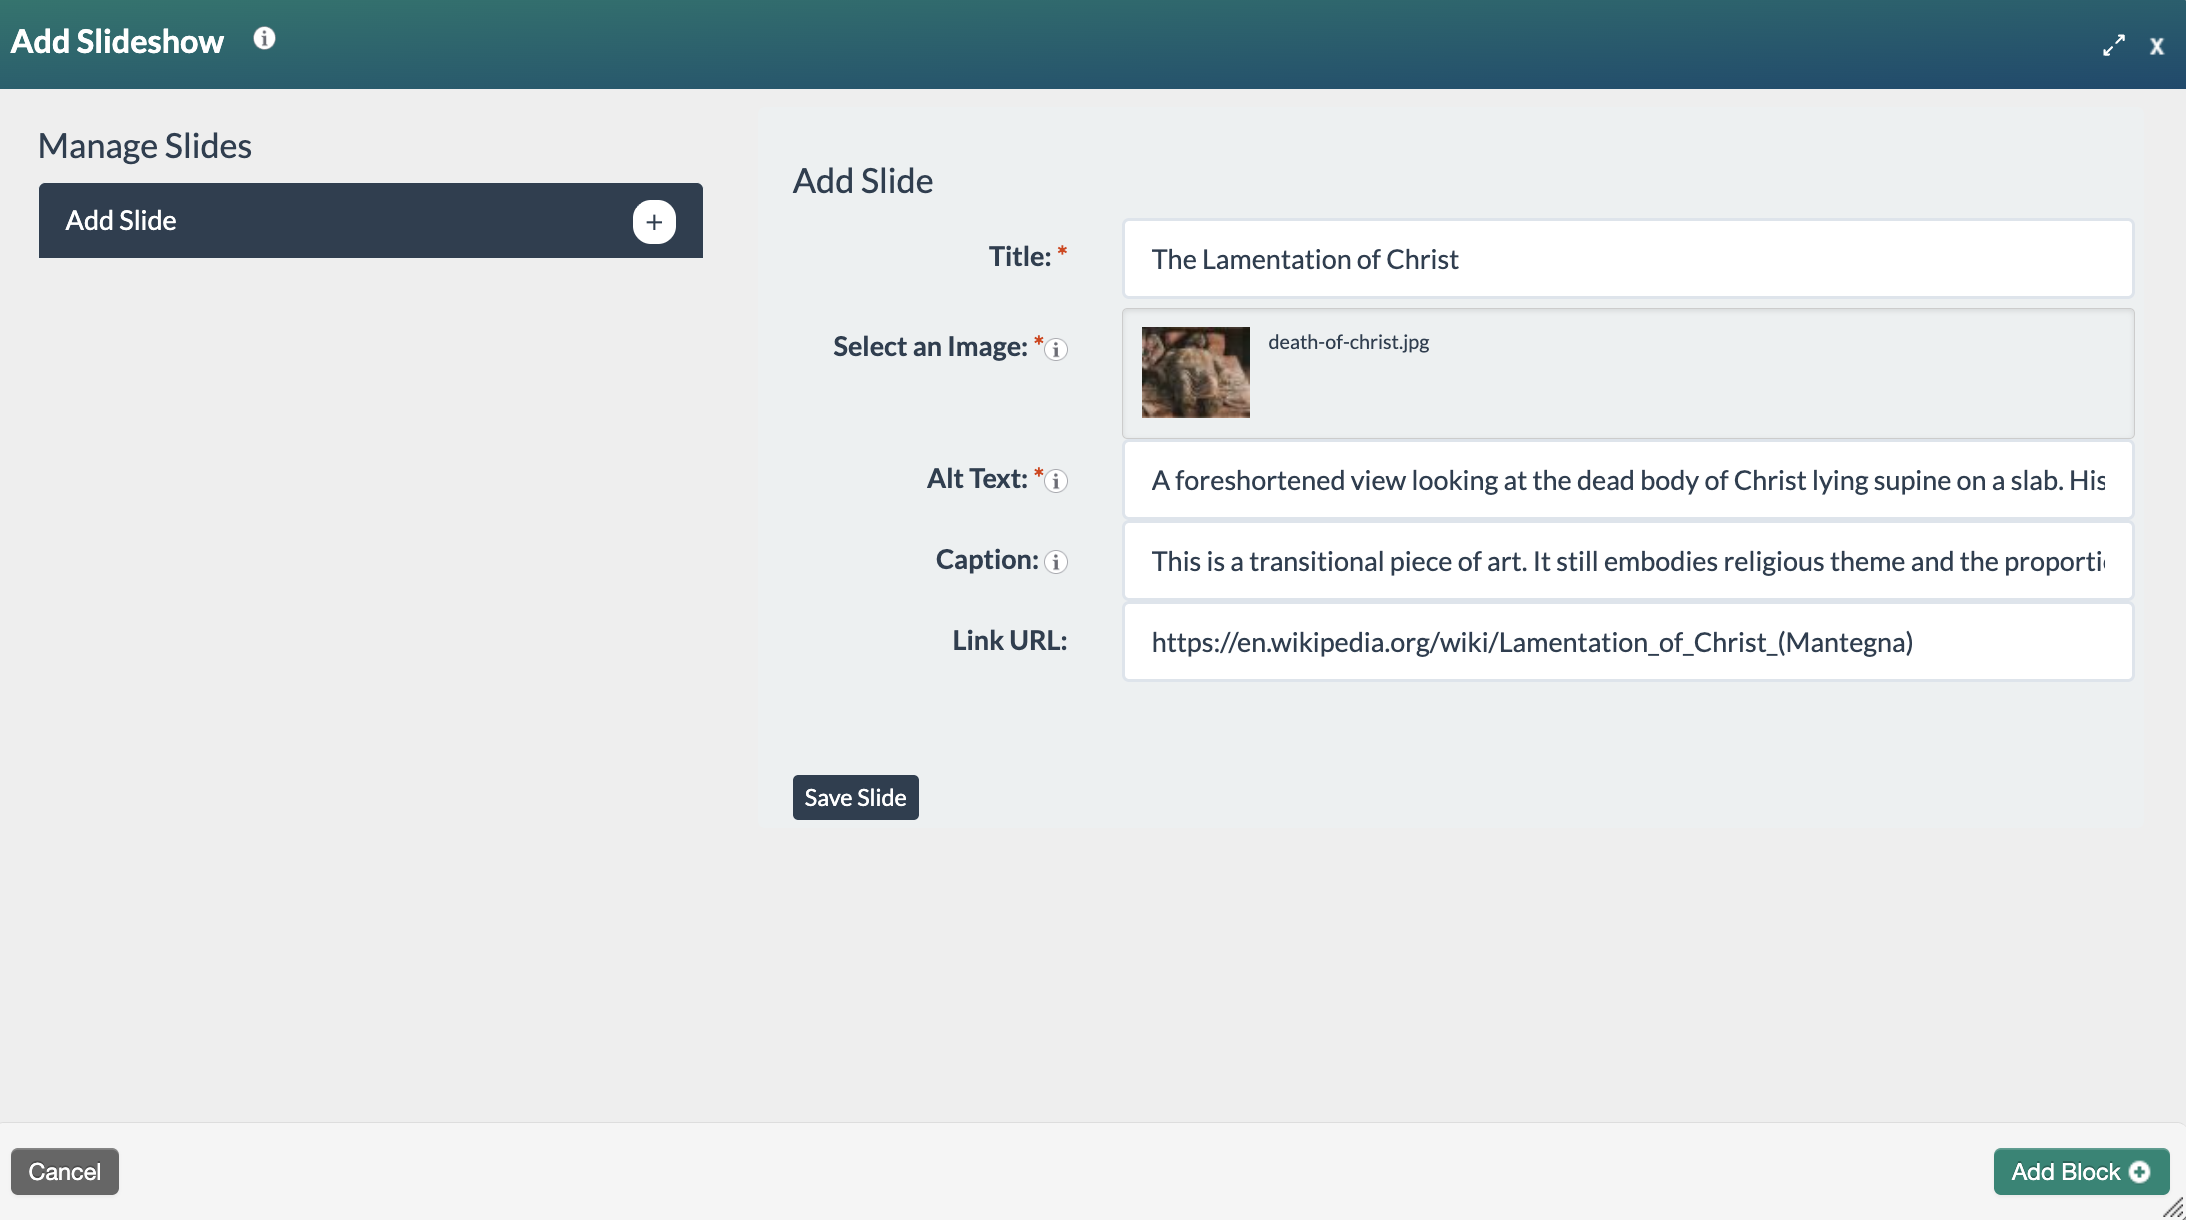
- Select the Slideshow block. The Add Slideshow form will open. To add a slide:
- Title:* Enter a title for the slide. The title is limited to 50 characters and is used to identify individual slides in the Manage Slides section—it is not displayed to learners.
- Select an Image:* Click the field to add an image from the File Manager.
- Alt Text:* Describe the content and function of the image using as few words as possible. Alt text may contain up to 255 characters. Alternative text is read by screen readers, allowing the content and function of an image to be accessible to those with visual or certain cognitive disabilities. To learn more about alternative text, visit WebAIM's Alternative Text.
- Caption (Optional): If populated, the caption displays below the image (and above the slideshow counter). The caption may contain up to 500 characters.
- Link URL (Optional): Enter a URL to link the slide to another web page. When configured, the entire slide serves as a link to the designated page, which opens in a new browser tab.
Note: configured links are not visible in Slideshow block slides.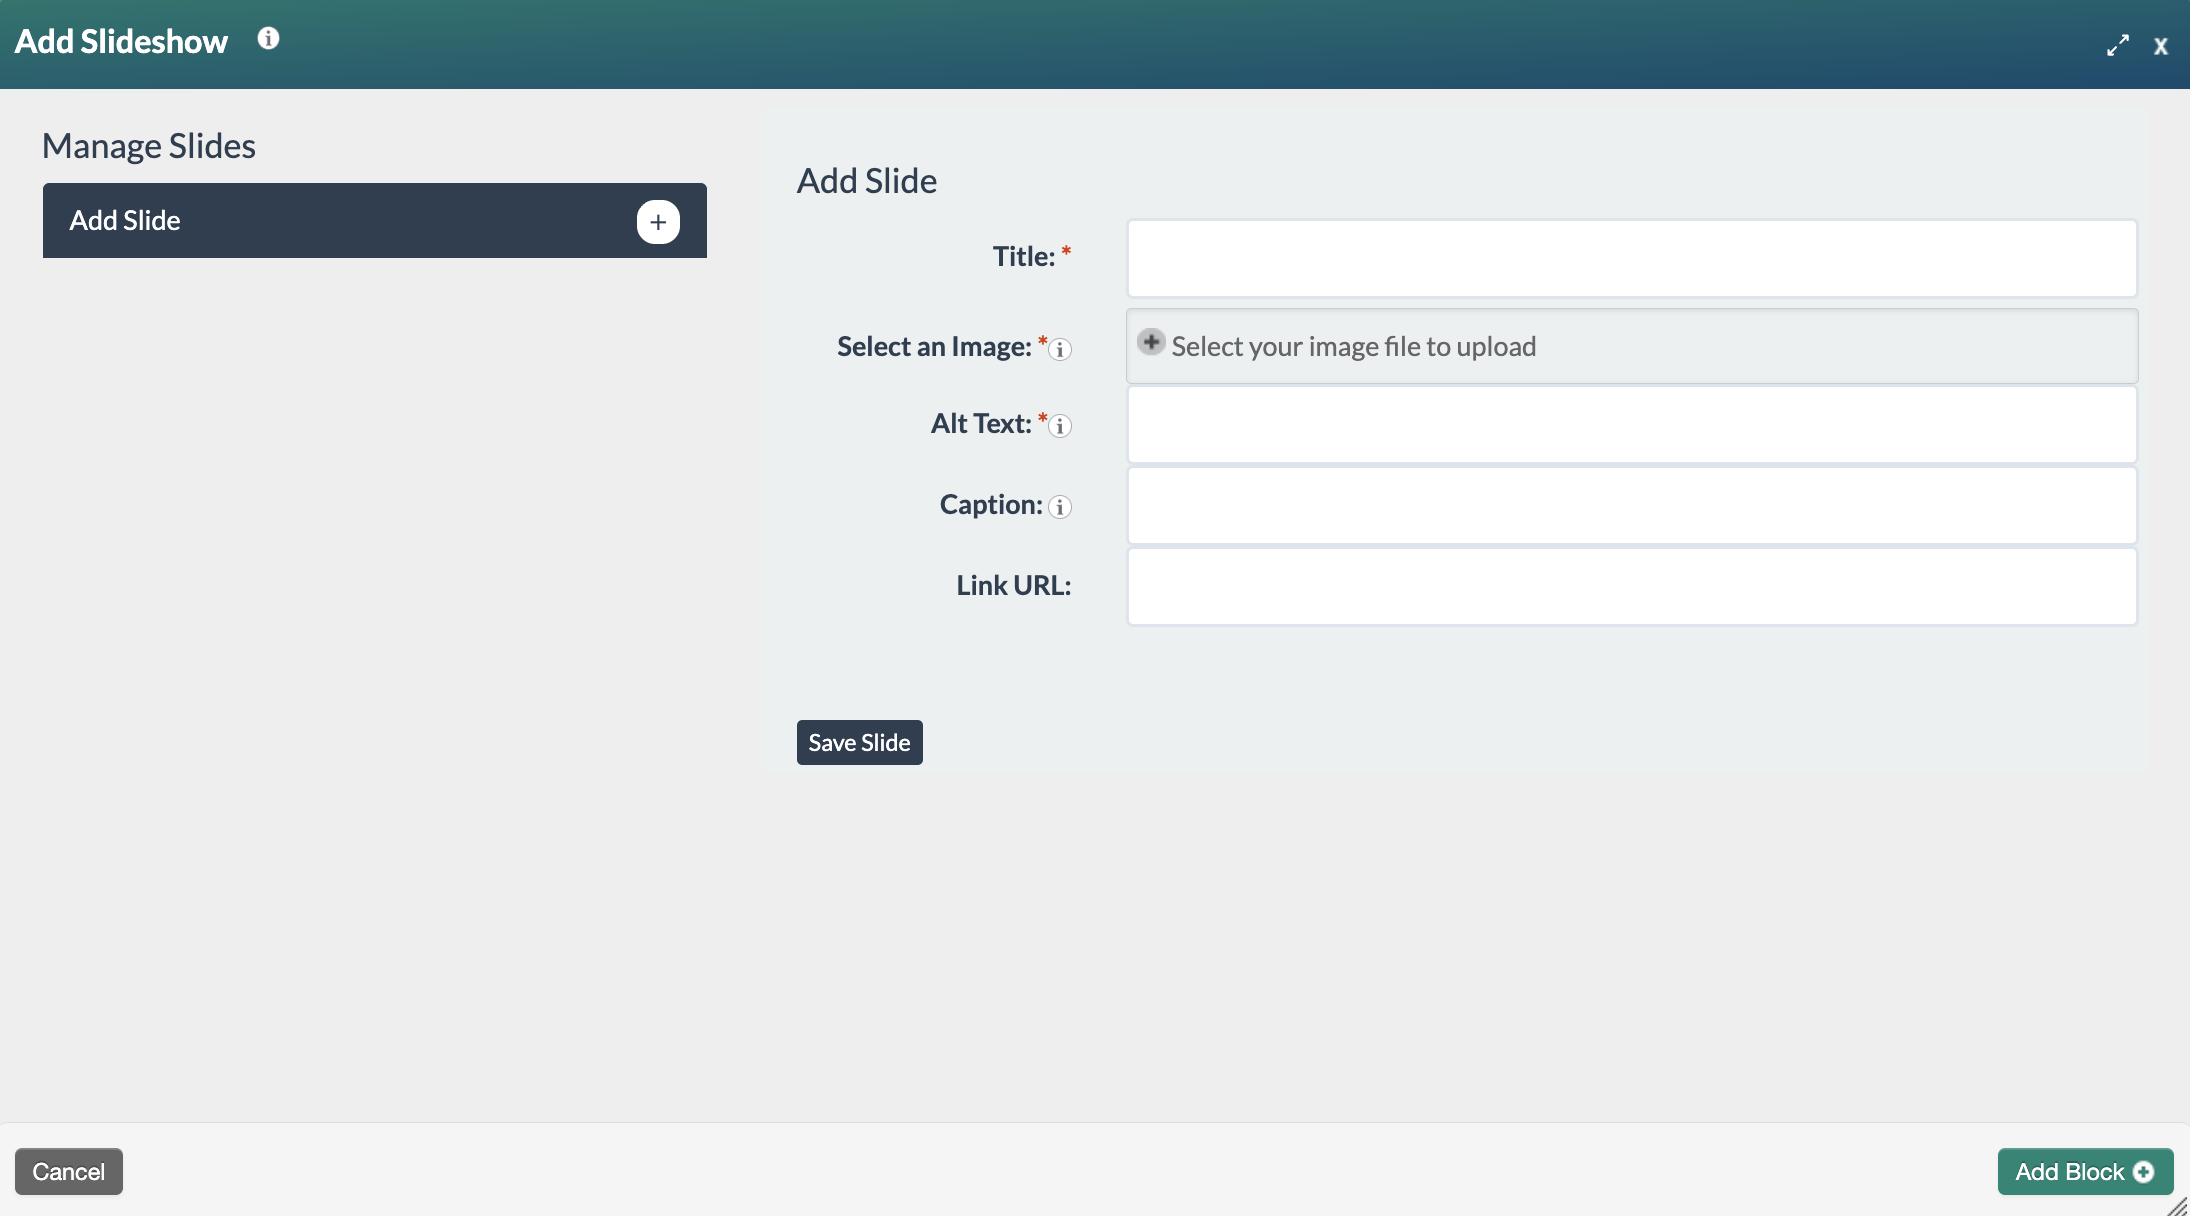
- Once all the required sections have been completed, select the Save button. Repeat until all items have been added. Once all the required sections have been saved, select the Add Block+ button to save the block to the page.
- The new block will appear on the page in Edit Modewith a red, dotted outline indicating it's editable.

- Select the Publish My Edits button to save the block to the course page and see the content as it will appear to learners.

If a slide needs to be edited, click the slide title under Manage Slides. Make the required changes and click the Save Slide button. When slide editing is complete, click the Save✔ button to save all changes made to the Slideshow block.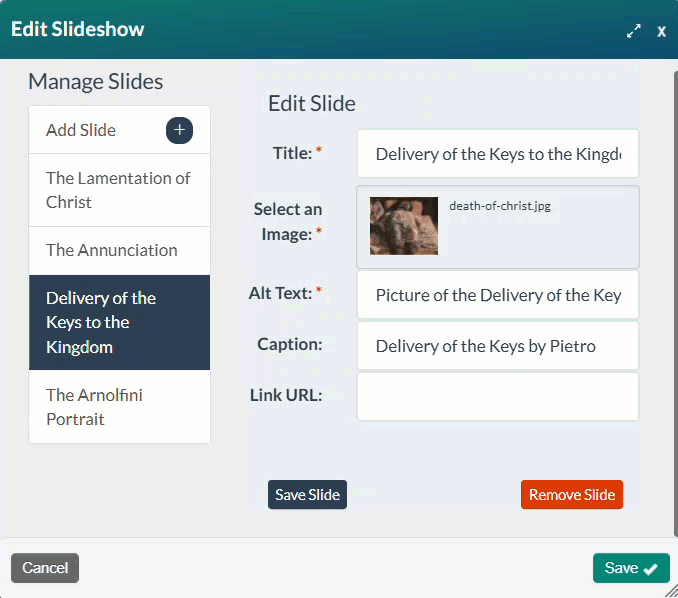
To change the order of the slides, hover the cursor over the slide titles under Manage Slides. The cursor becomes a four-headed arrow that can change the order of the slides via drag and drop. Click the Save✔ button to save any changes made to the order of the slides.If a slide's Link URL: field is configured, clicking the slide will open the link in a new browser tab.Note:If a slide's Link URL: field is not configured, learners can mouse over slides until the cursor turns into magnifying glass and then select the image to open a zoomed view of the image in a new browser tab.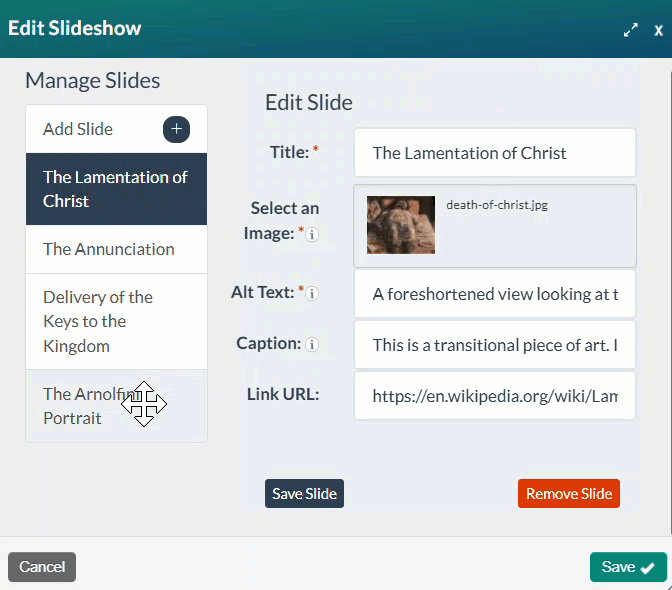
Slide with the Link URL: field configured
Was this article helpful?
That’s Great!
Thank you for your feedback
Sorry! We couldn't be helpful
Thank you for your feedback
Feedback sent
We appreciate your effort and will try to fix the article