The Graphing block allows content creators to build interactive coordinate grid activities where learners can plot points, lines, and shapes. Learners engage directly with the graph by placing and manipulating elements on the grid, making it an effective tool for assessing spatial reasoning and mathematical understanding. This block can be scored, allowing instructors and learners to evaluate learner accuracy against a defined correct answer.
- Navigate to the page and select Edit this Page. Find the position where you want to add a block and select the plus (+) icon.
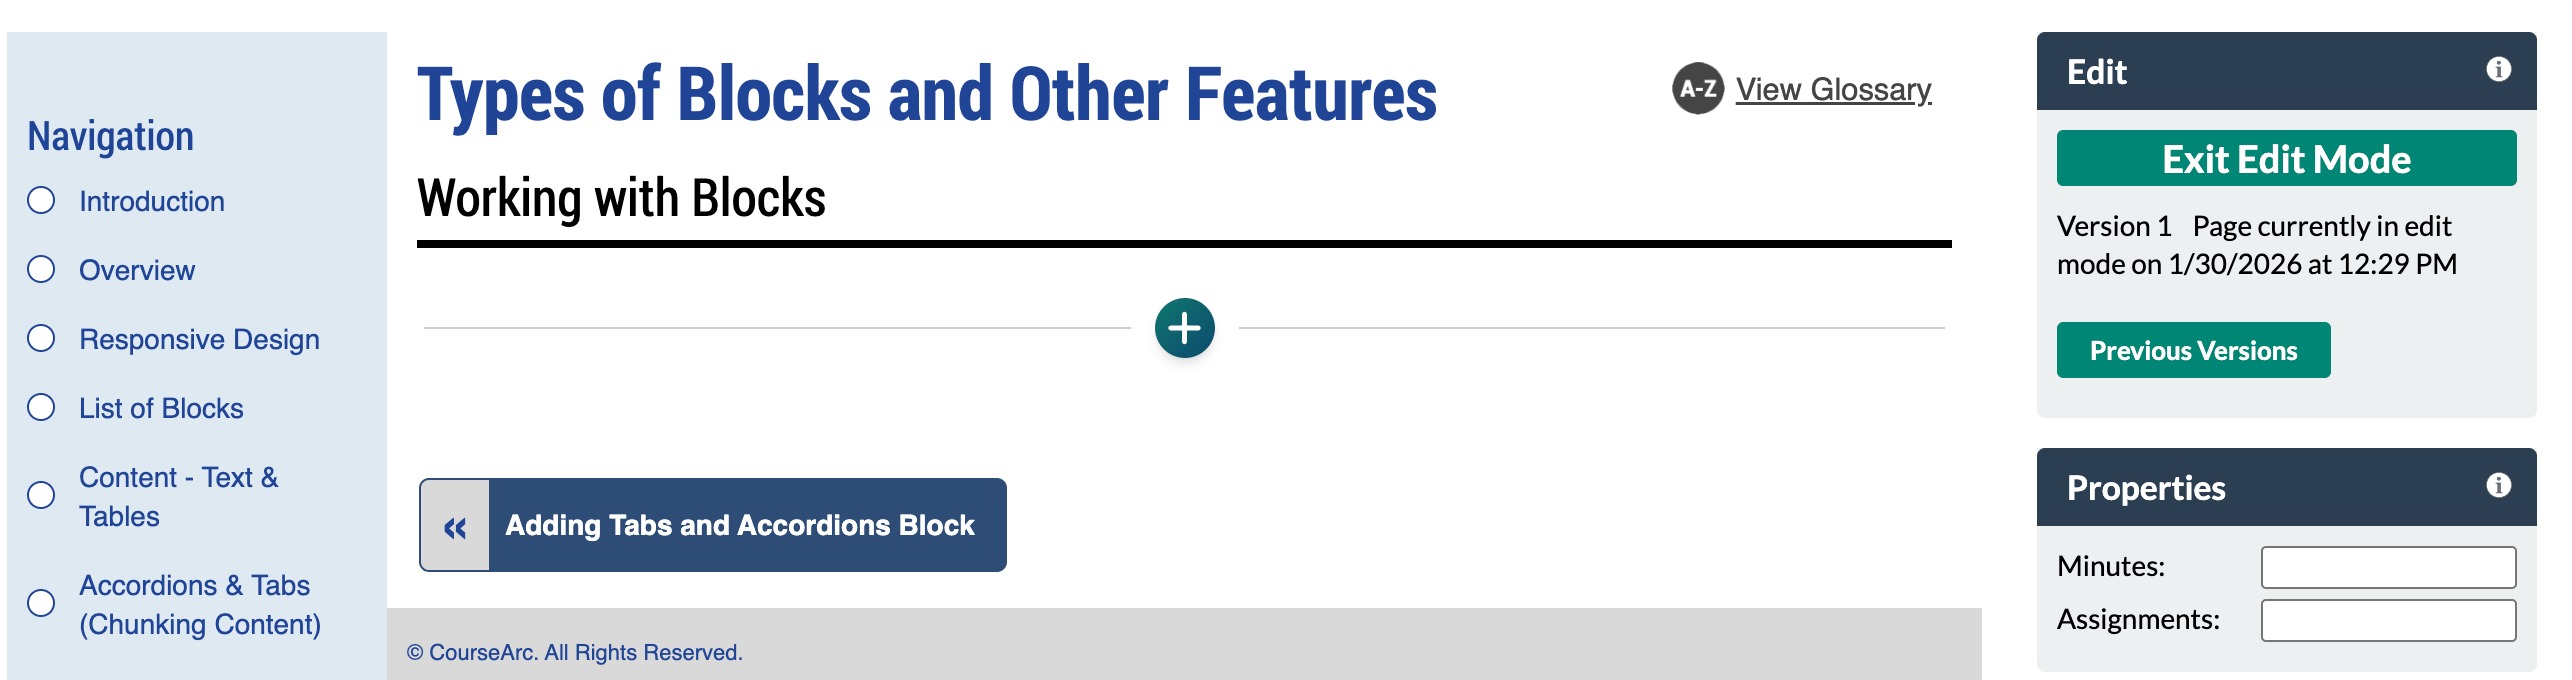
- From the dropdown, select Add Block.
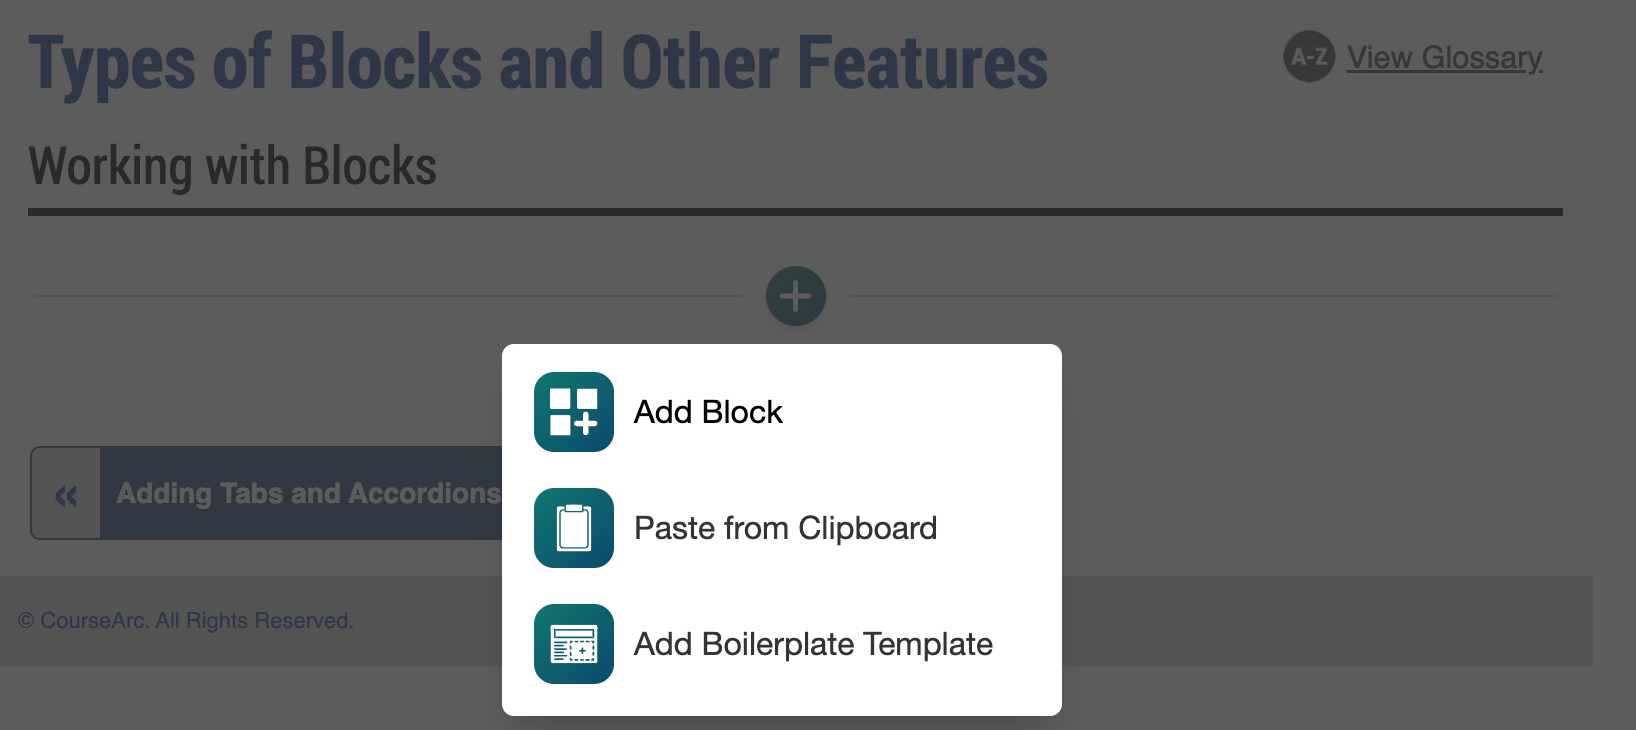
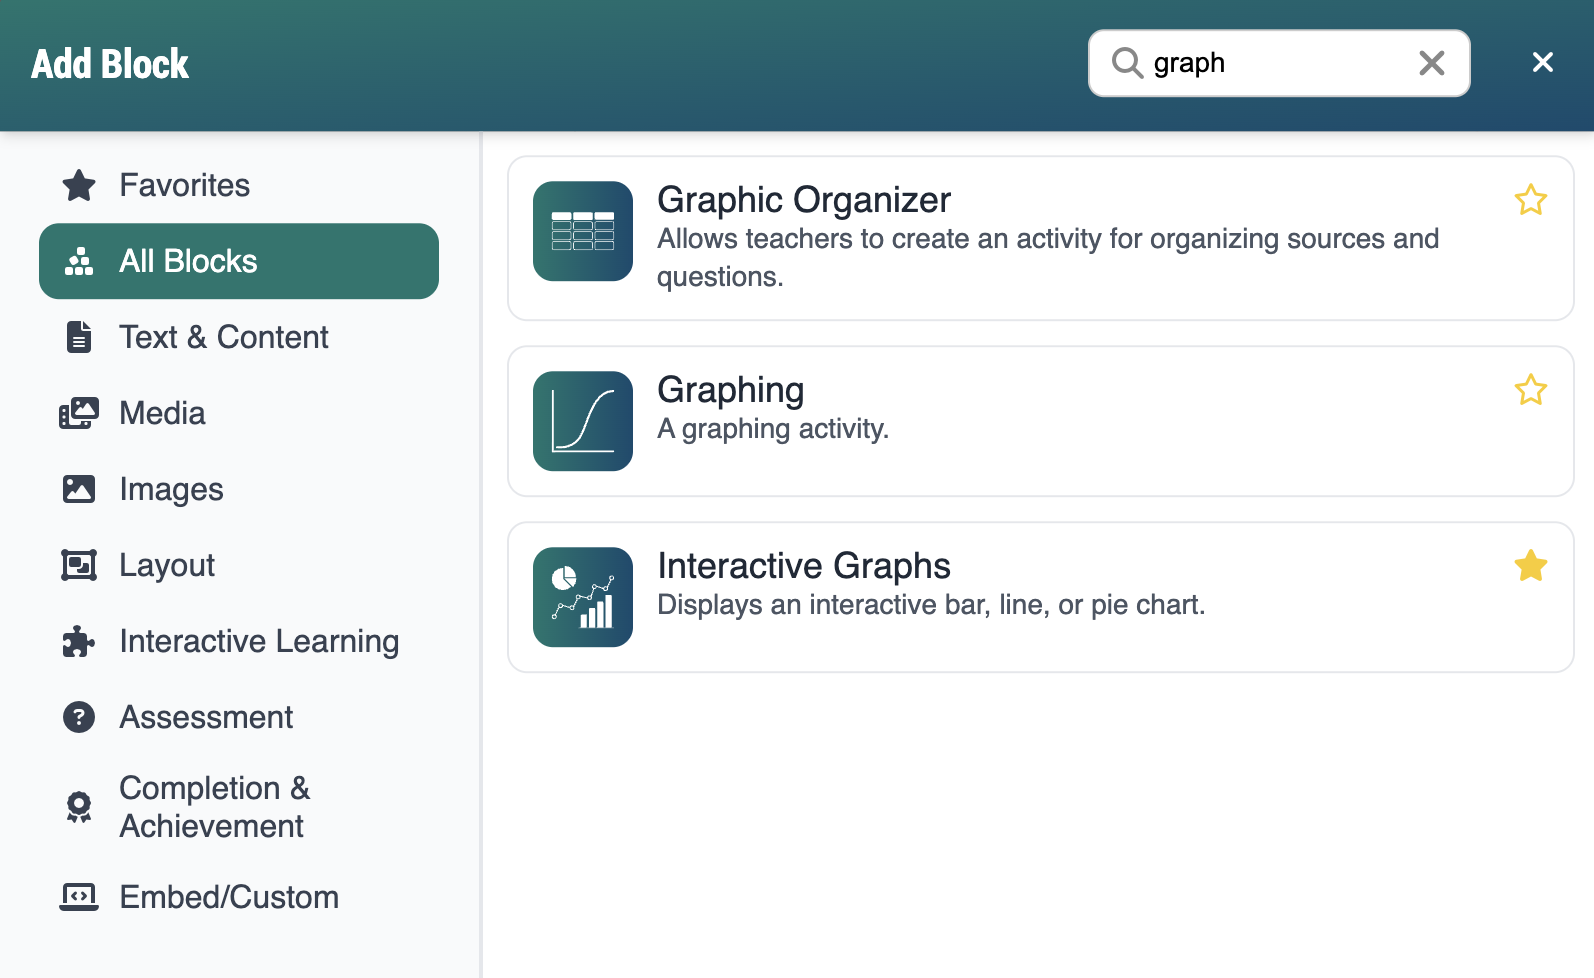
- In the Add Block modal, either:
- Use the Search field to find a block by keyword
- Select a block from your custom list of Favorites
- Scroll through the list of All Blocks to select one
- Use the various Categories to filter by block type
- Select a star icon to add or remove blocks in your Favorites list
- Select the Graphing block. The Add Graphing form will open. The form has two areas: the editing pane and the preview pane. Changes made in the editing pane will show in the preview pane so that the activity can be visualized as it is being built.
- There are two tabs in the editing pane: Graph Settings and Advanced Grid Settings.
- There are three tabs in the preview pane by default: Initial View, Correct Answer, and Add Correct Answer.
- More tabs can appear by adding additional correct answers.
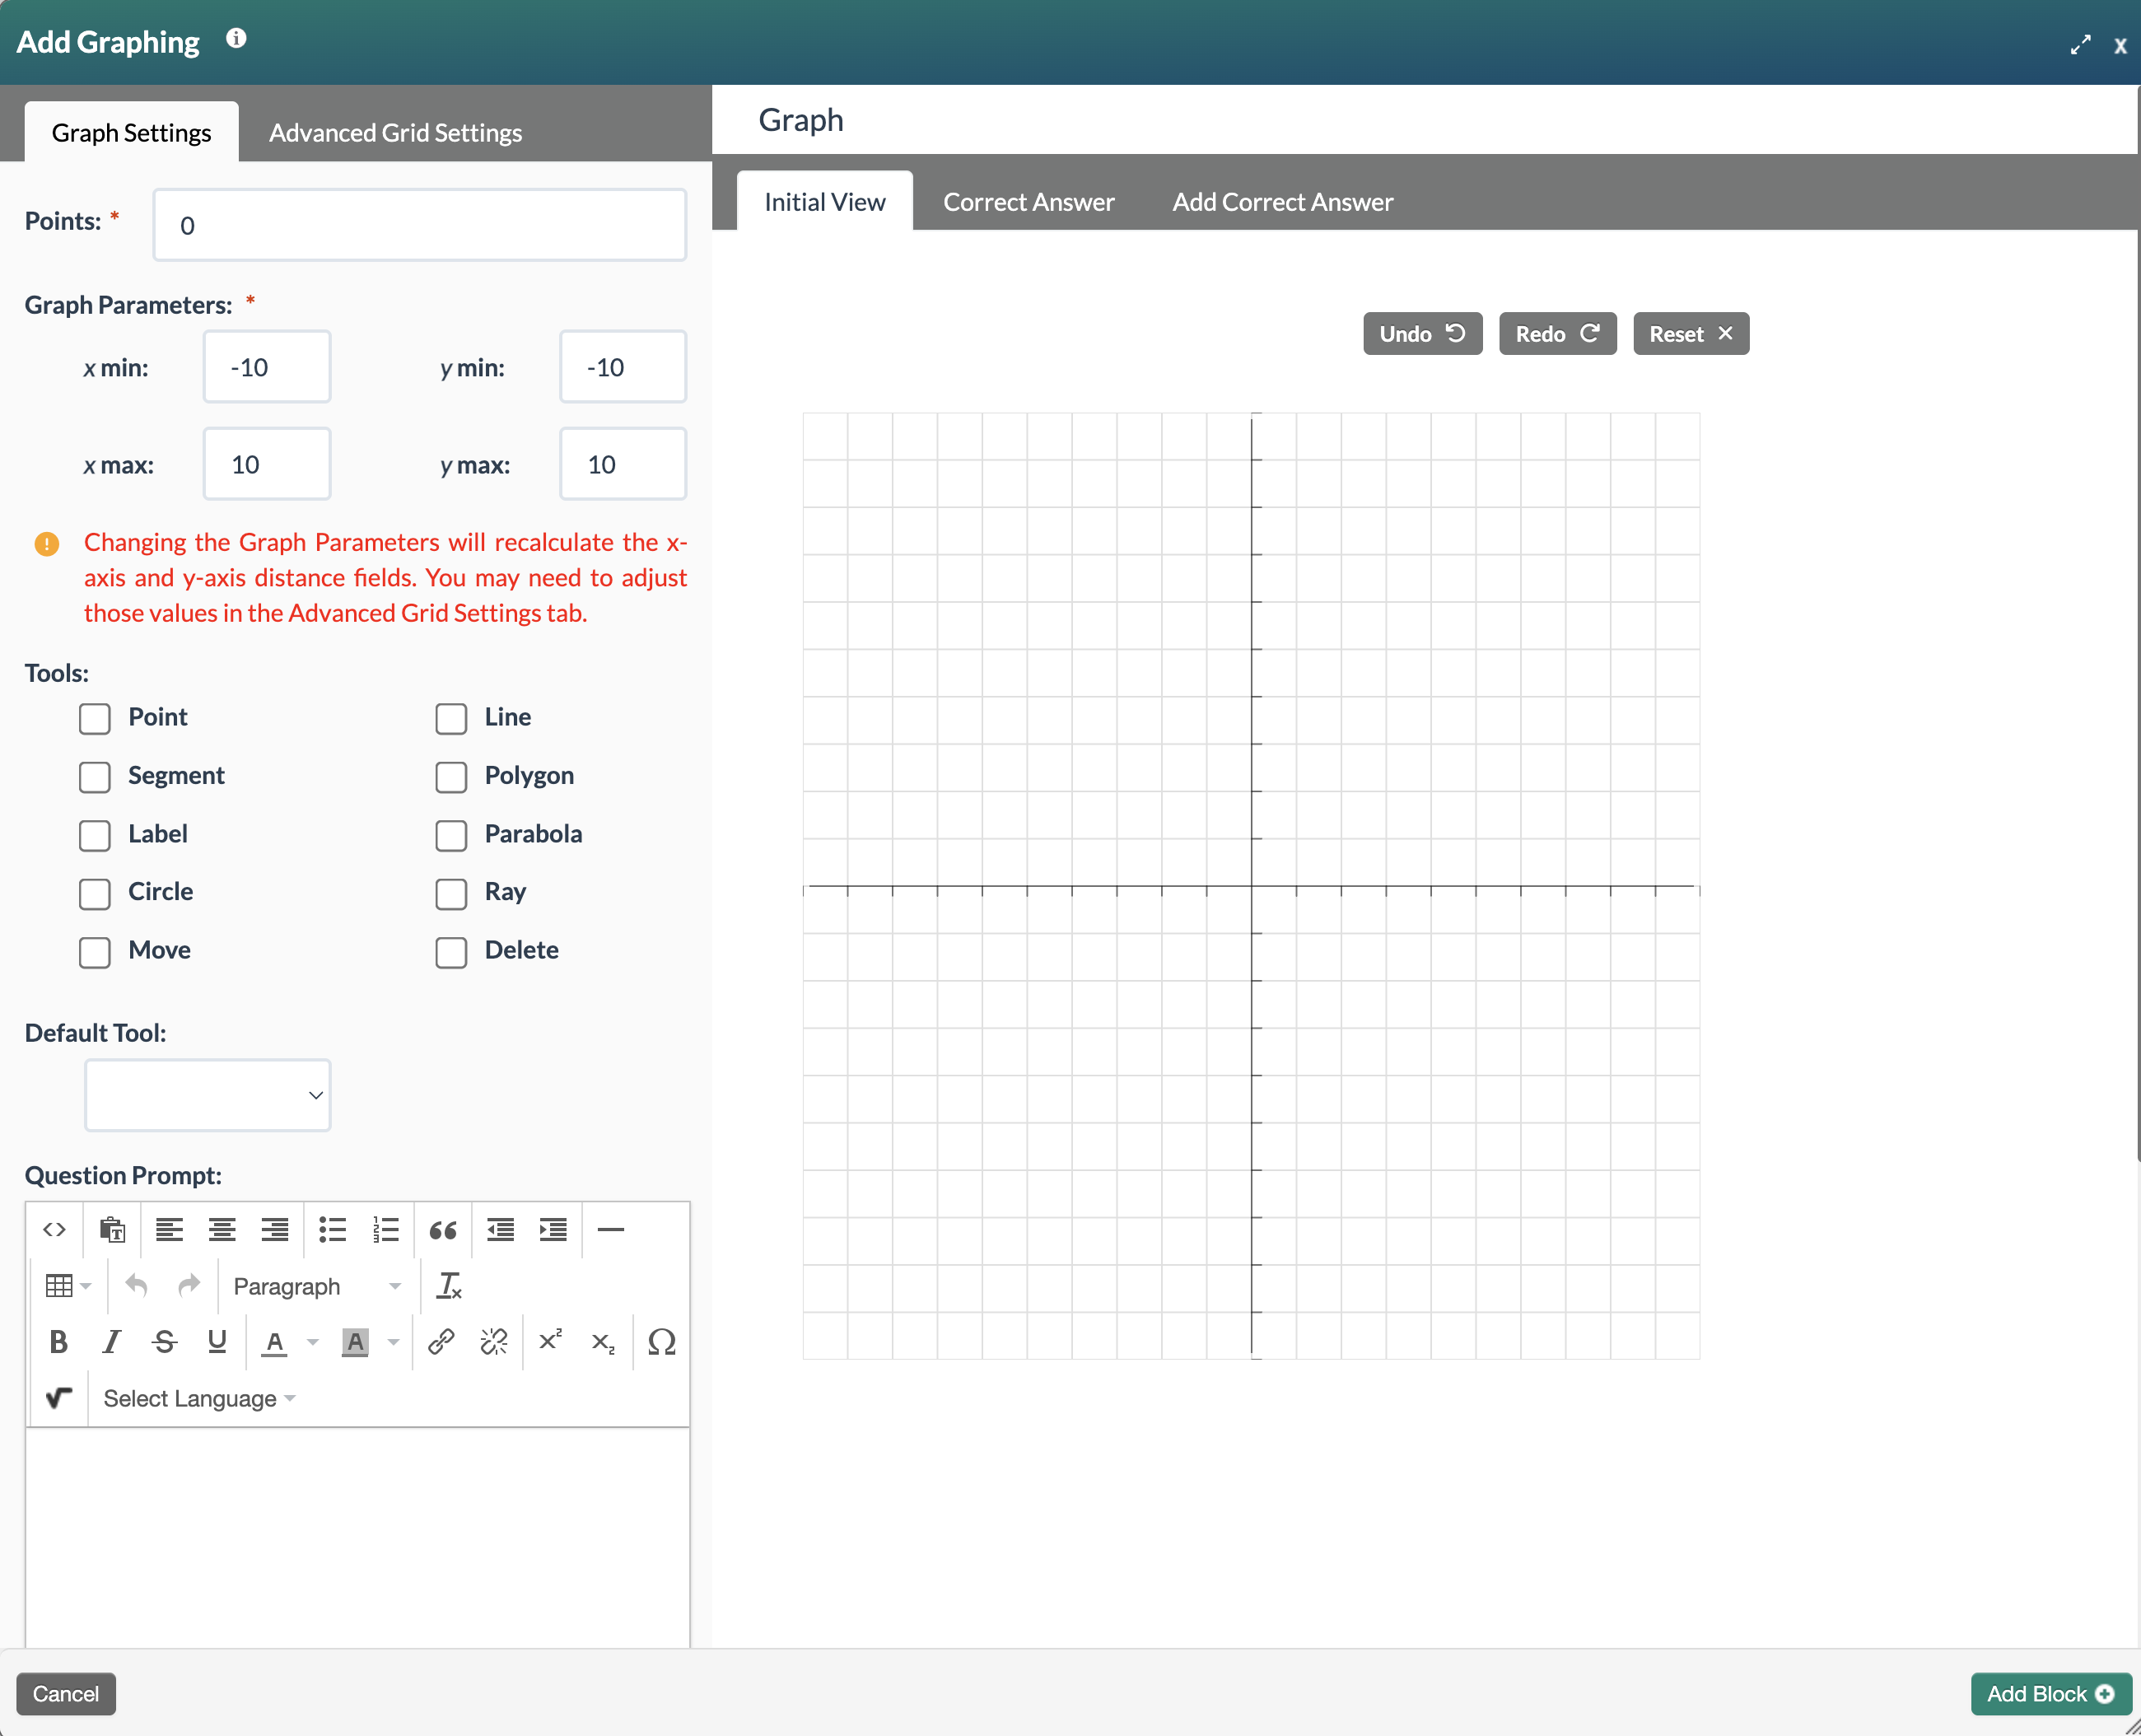
- Complete the Graph Settings tab with the following information:
- Points:* The points field will only be displayed if the module is being graded. As a default, the point value is set to 0. Change the point value if needed.
- Graph Parameters:* Define the coordinate plane settings, including the axis range and scale.
- Tools: Select which tools learners can use to build their graph. Enabled tools appear in a toolbar above the graphing area. The available tools are: point, segment, label, circle, move, line, polygon, parabola, ray, and delete.
- Default Tool: Sets the tool that is automatically active when a learner loads the page. For example, if Line is set as the default, clicking on the graph will immediately begin drawing a line. Learners can switch tools at any time using the toolbar.
- Question Prompt: Use the text editor to write a prompt or instructions describing what learners should graph.
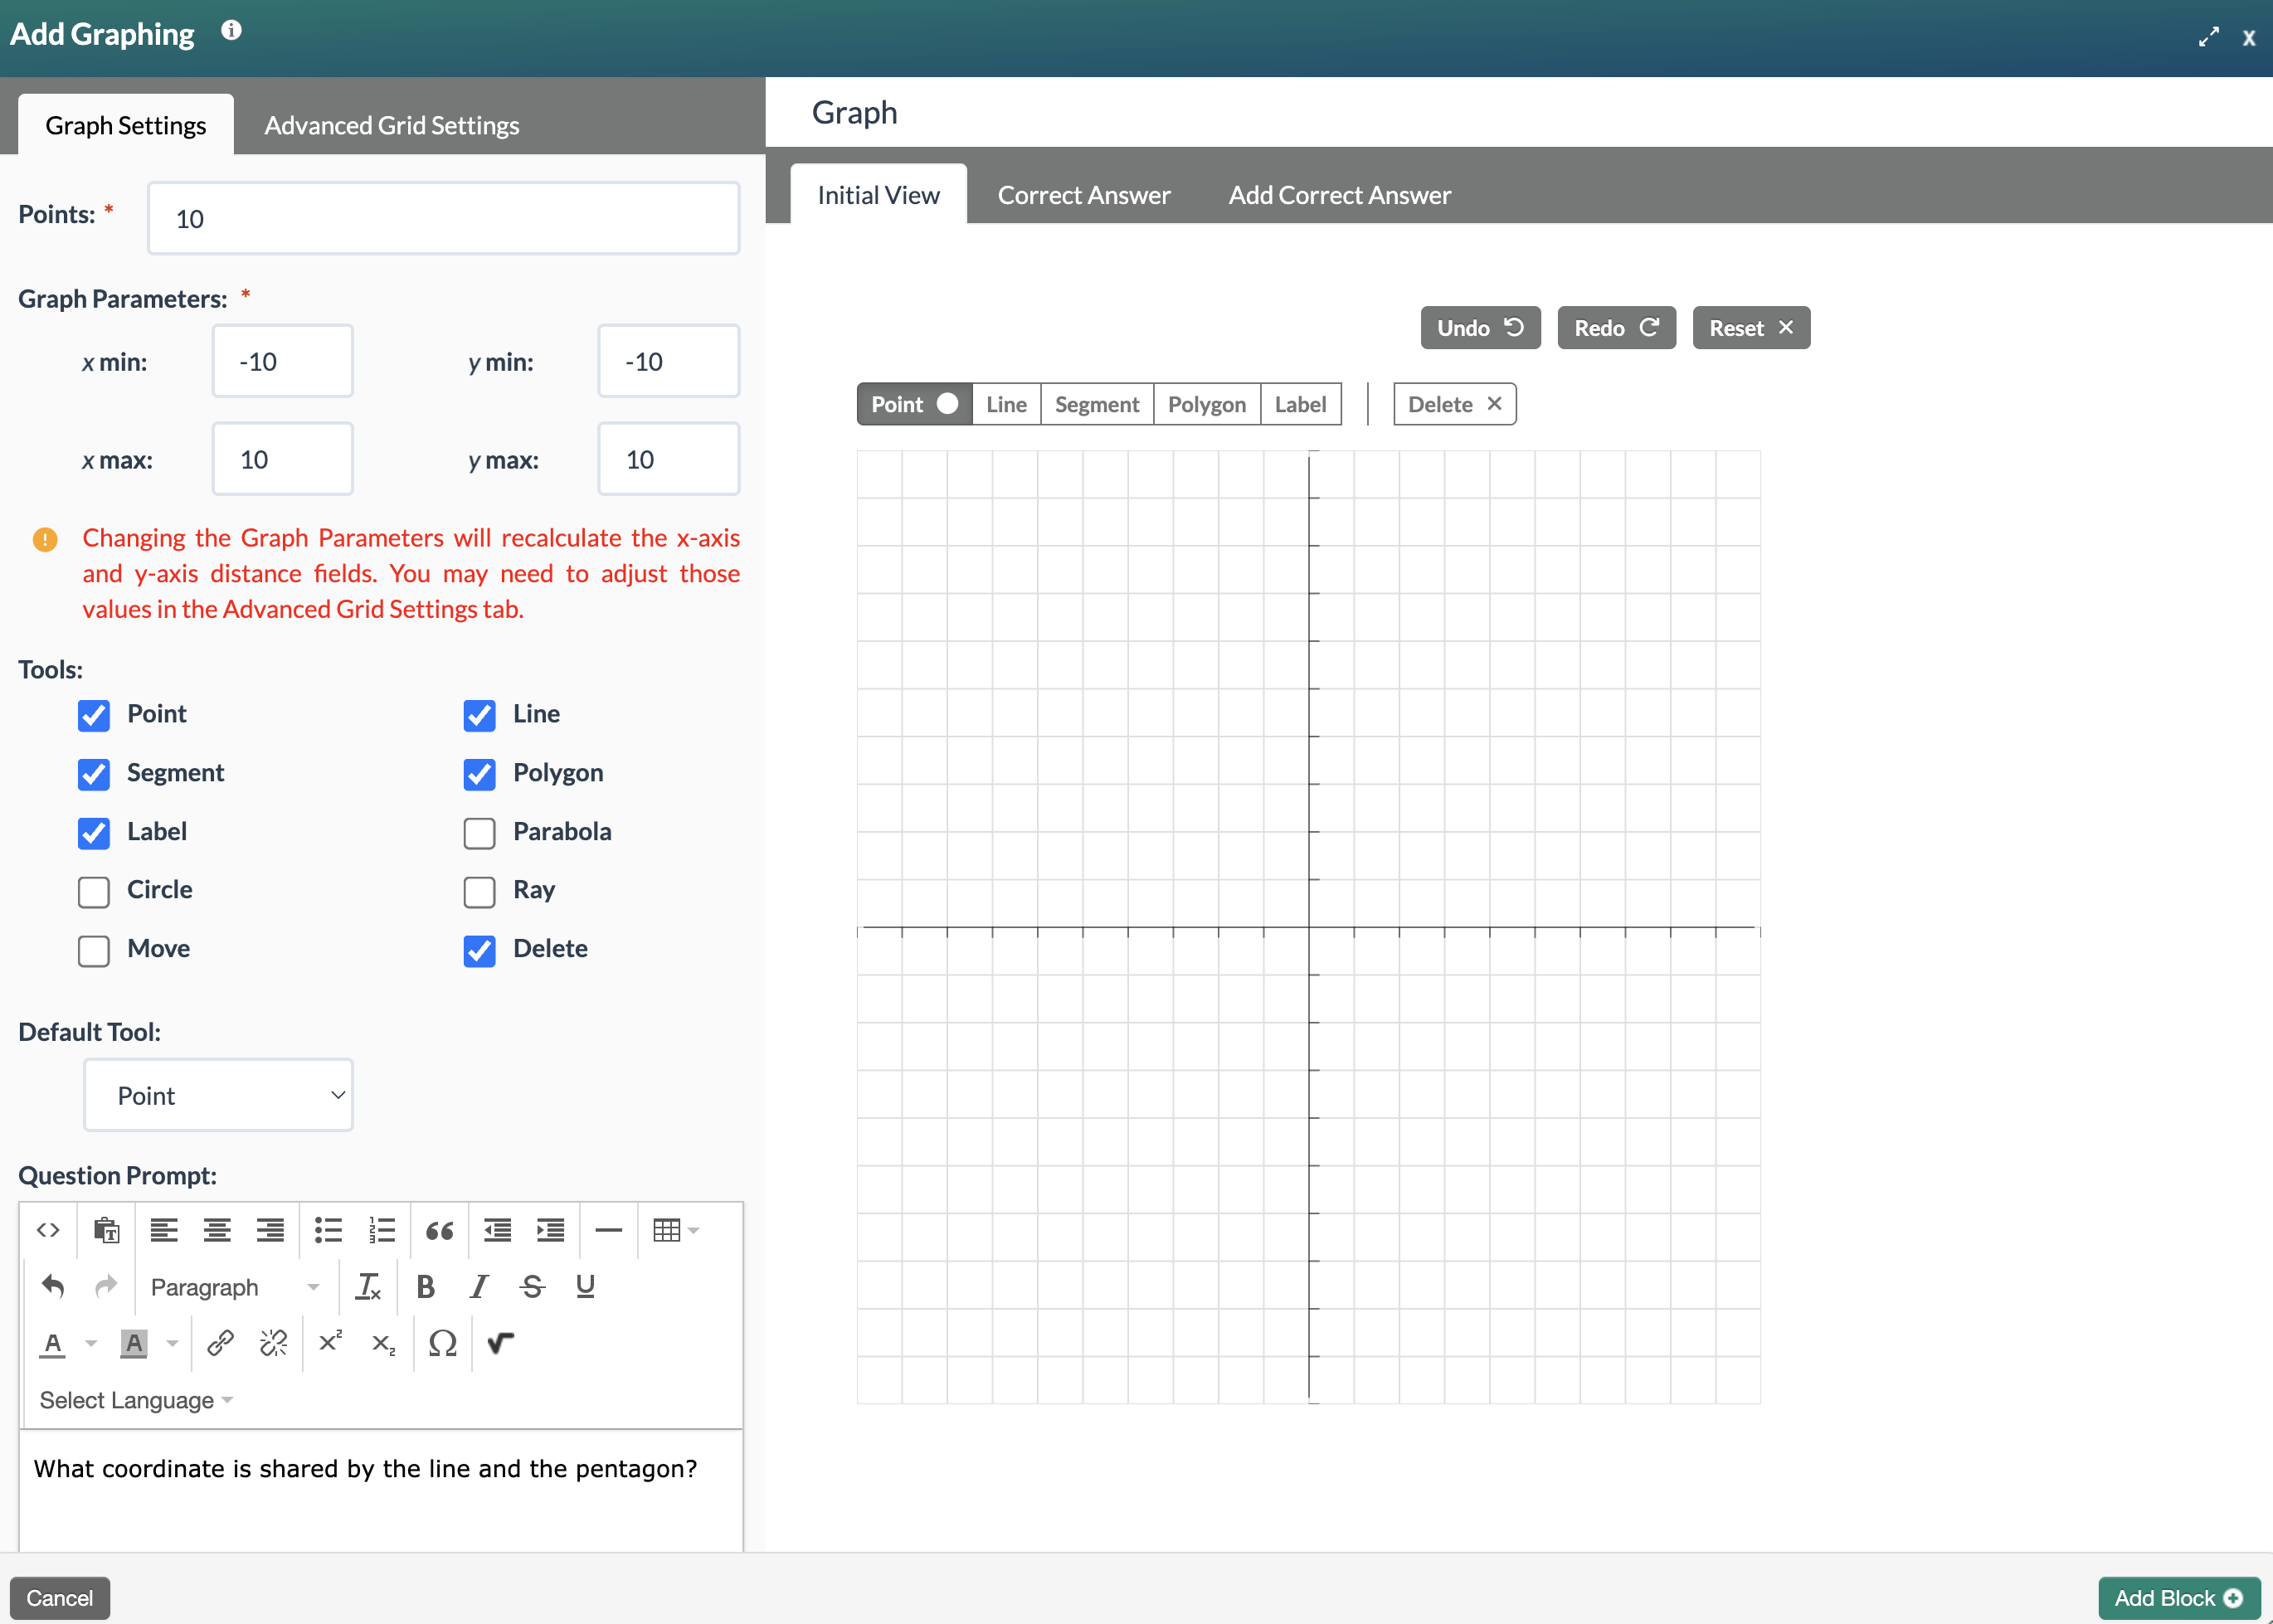
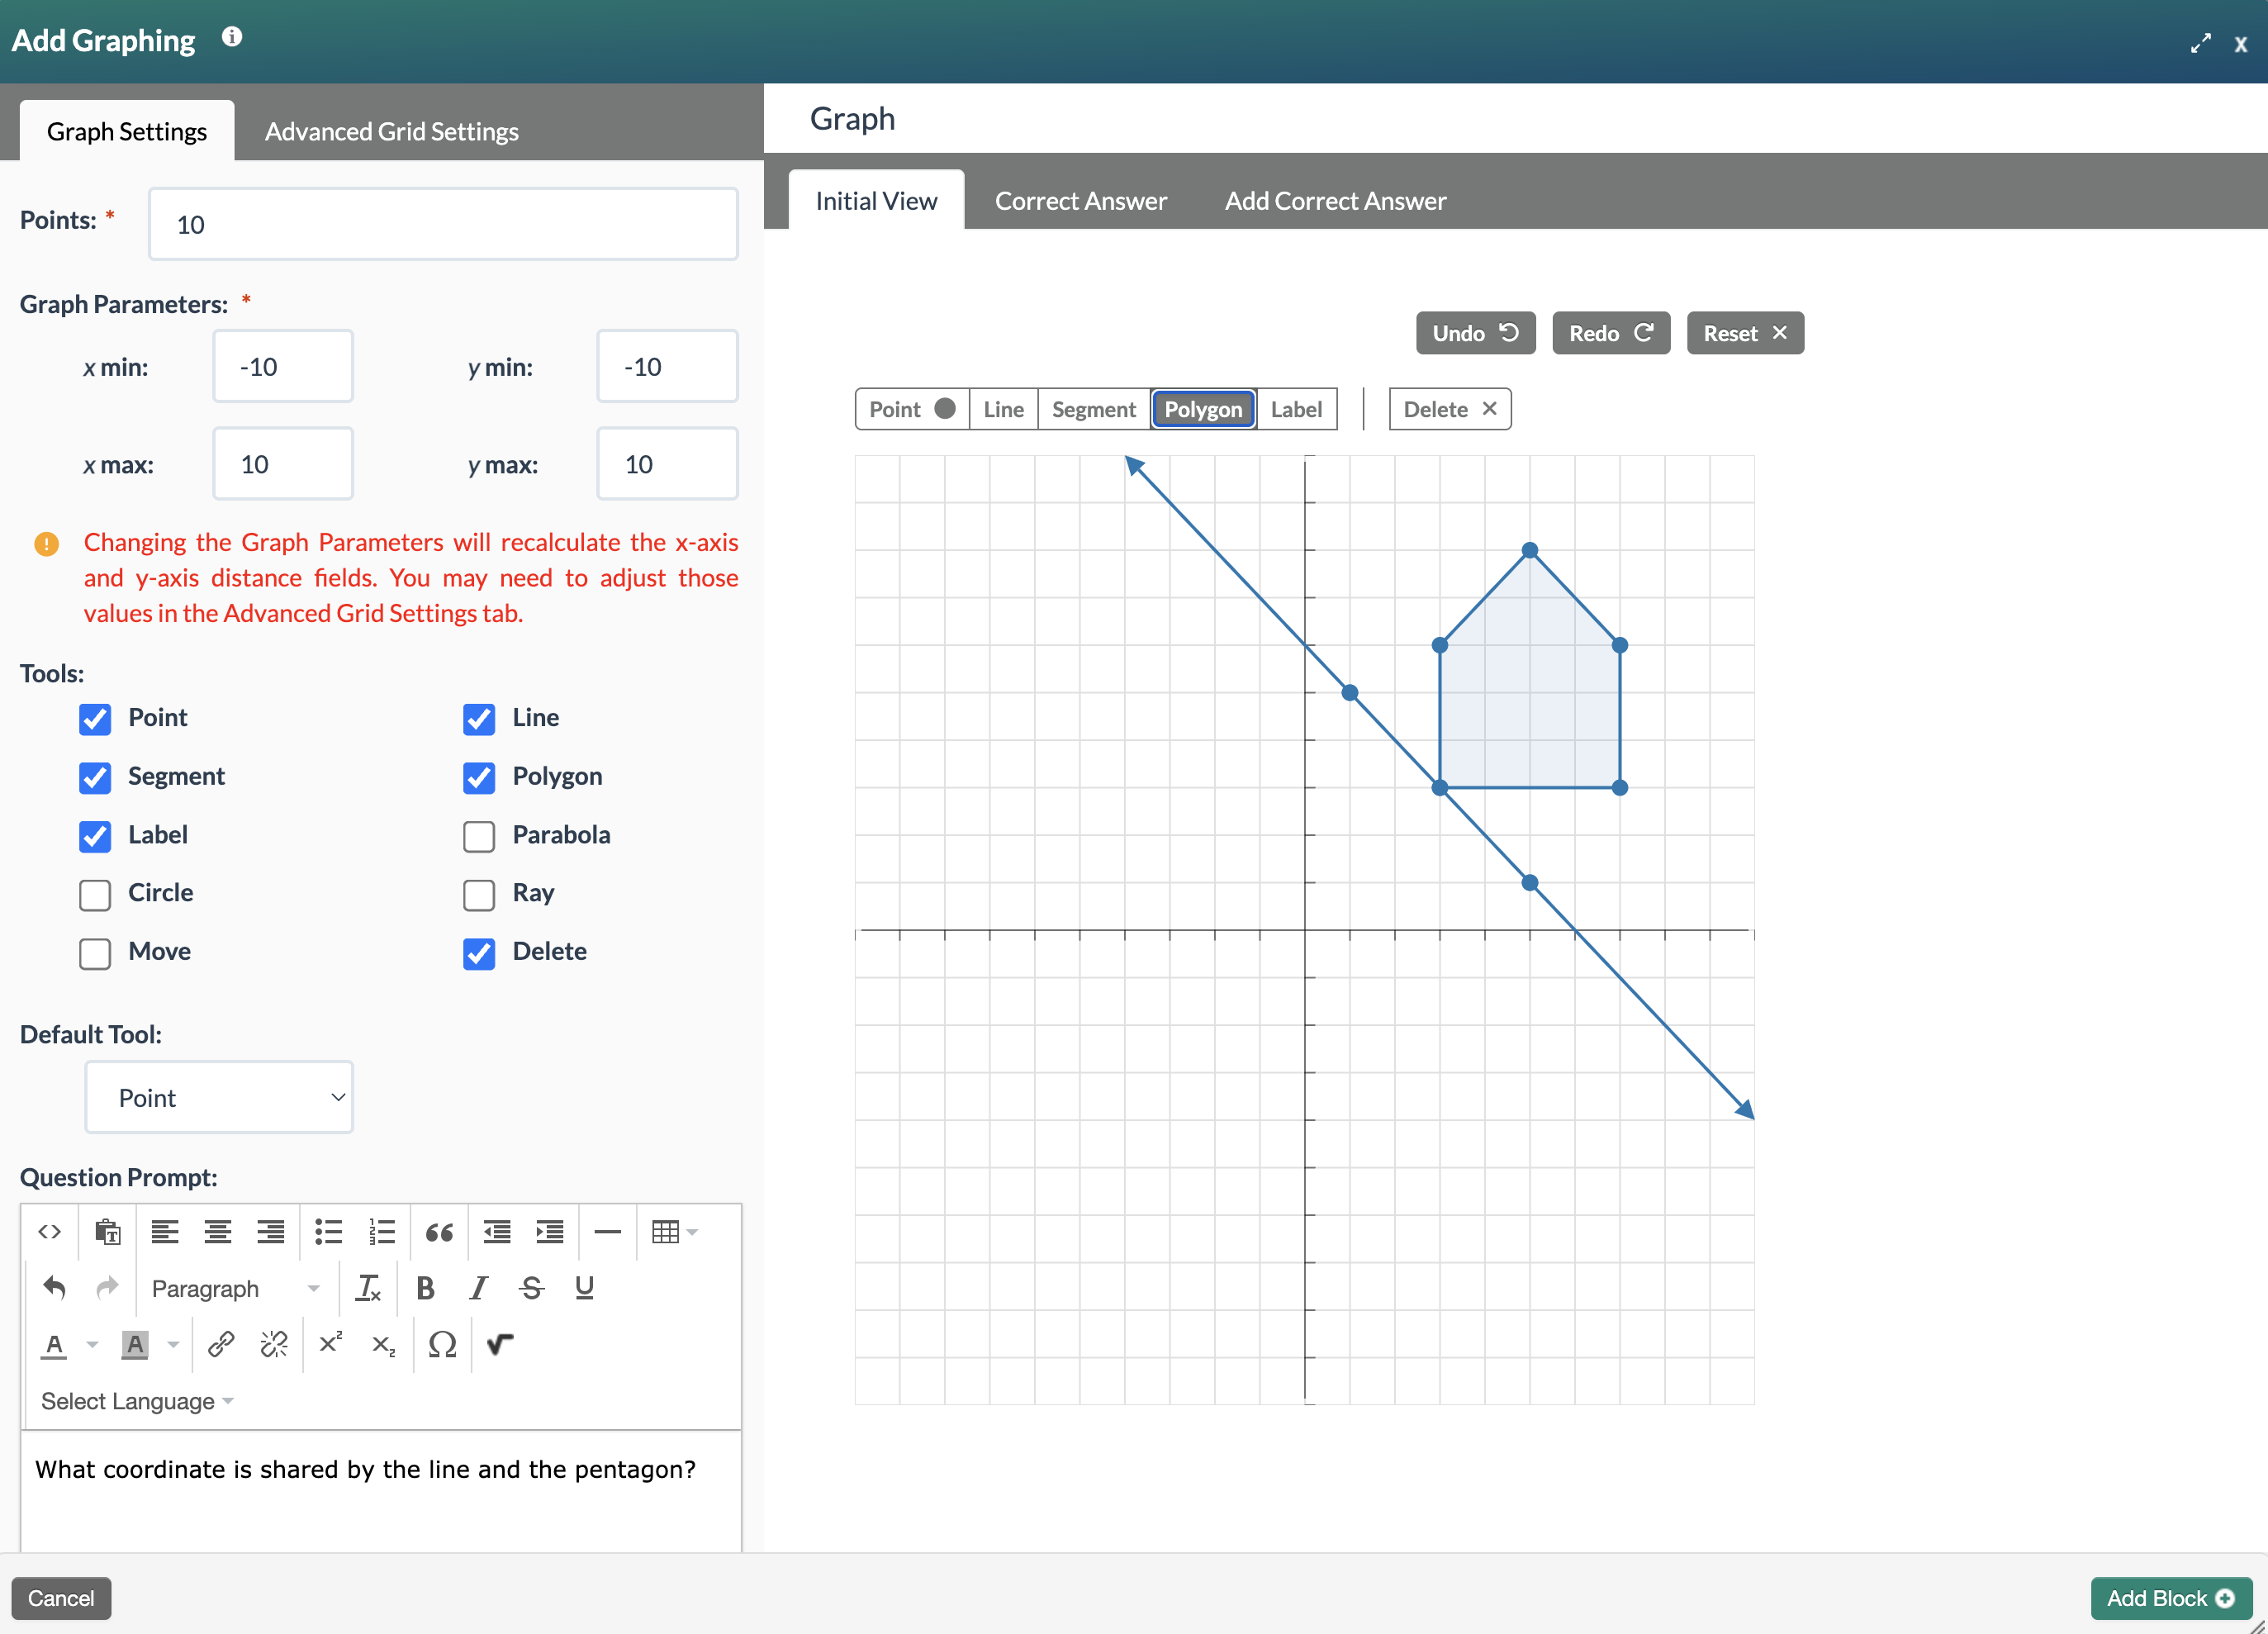
- Configure the Initial View tab as needed using the available tools. The Initial View tab shows what learners will see when viewing the content.
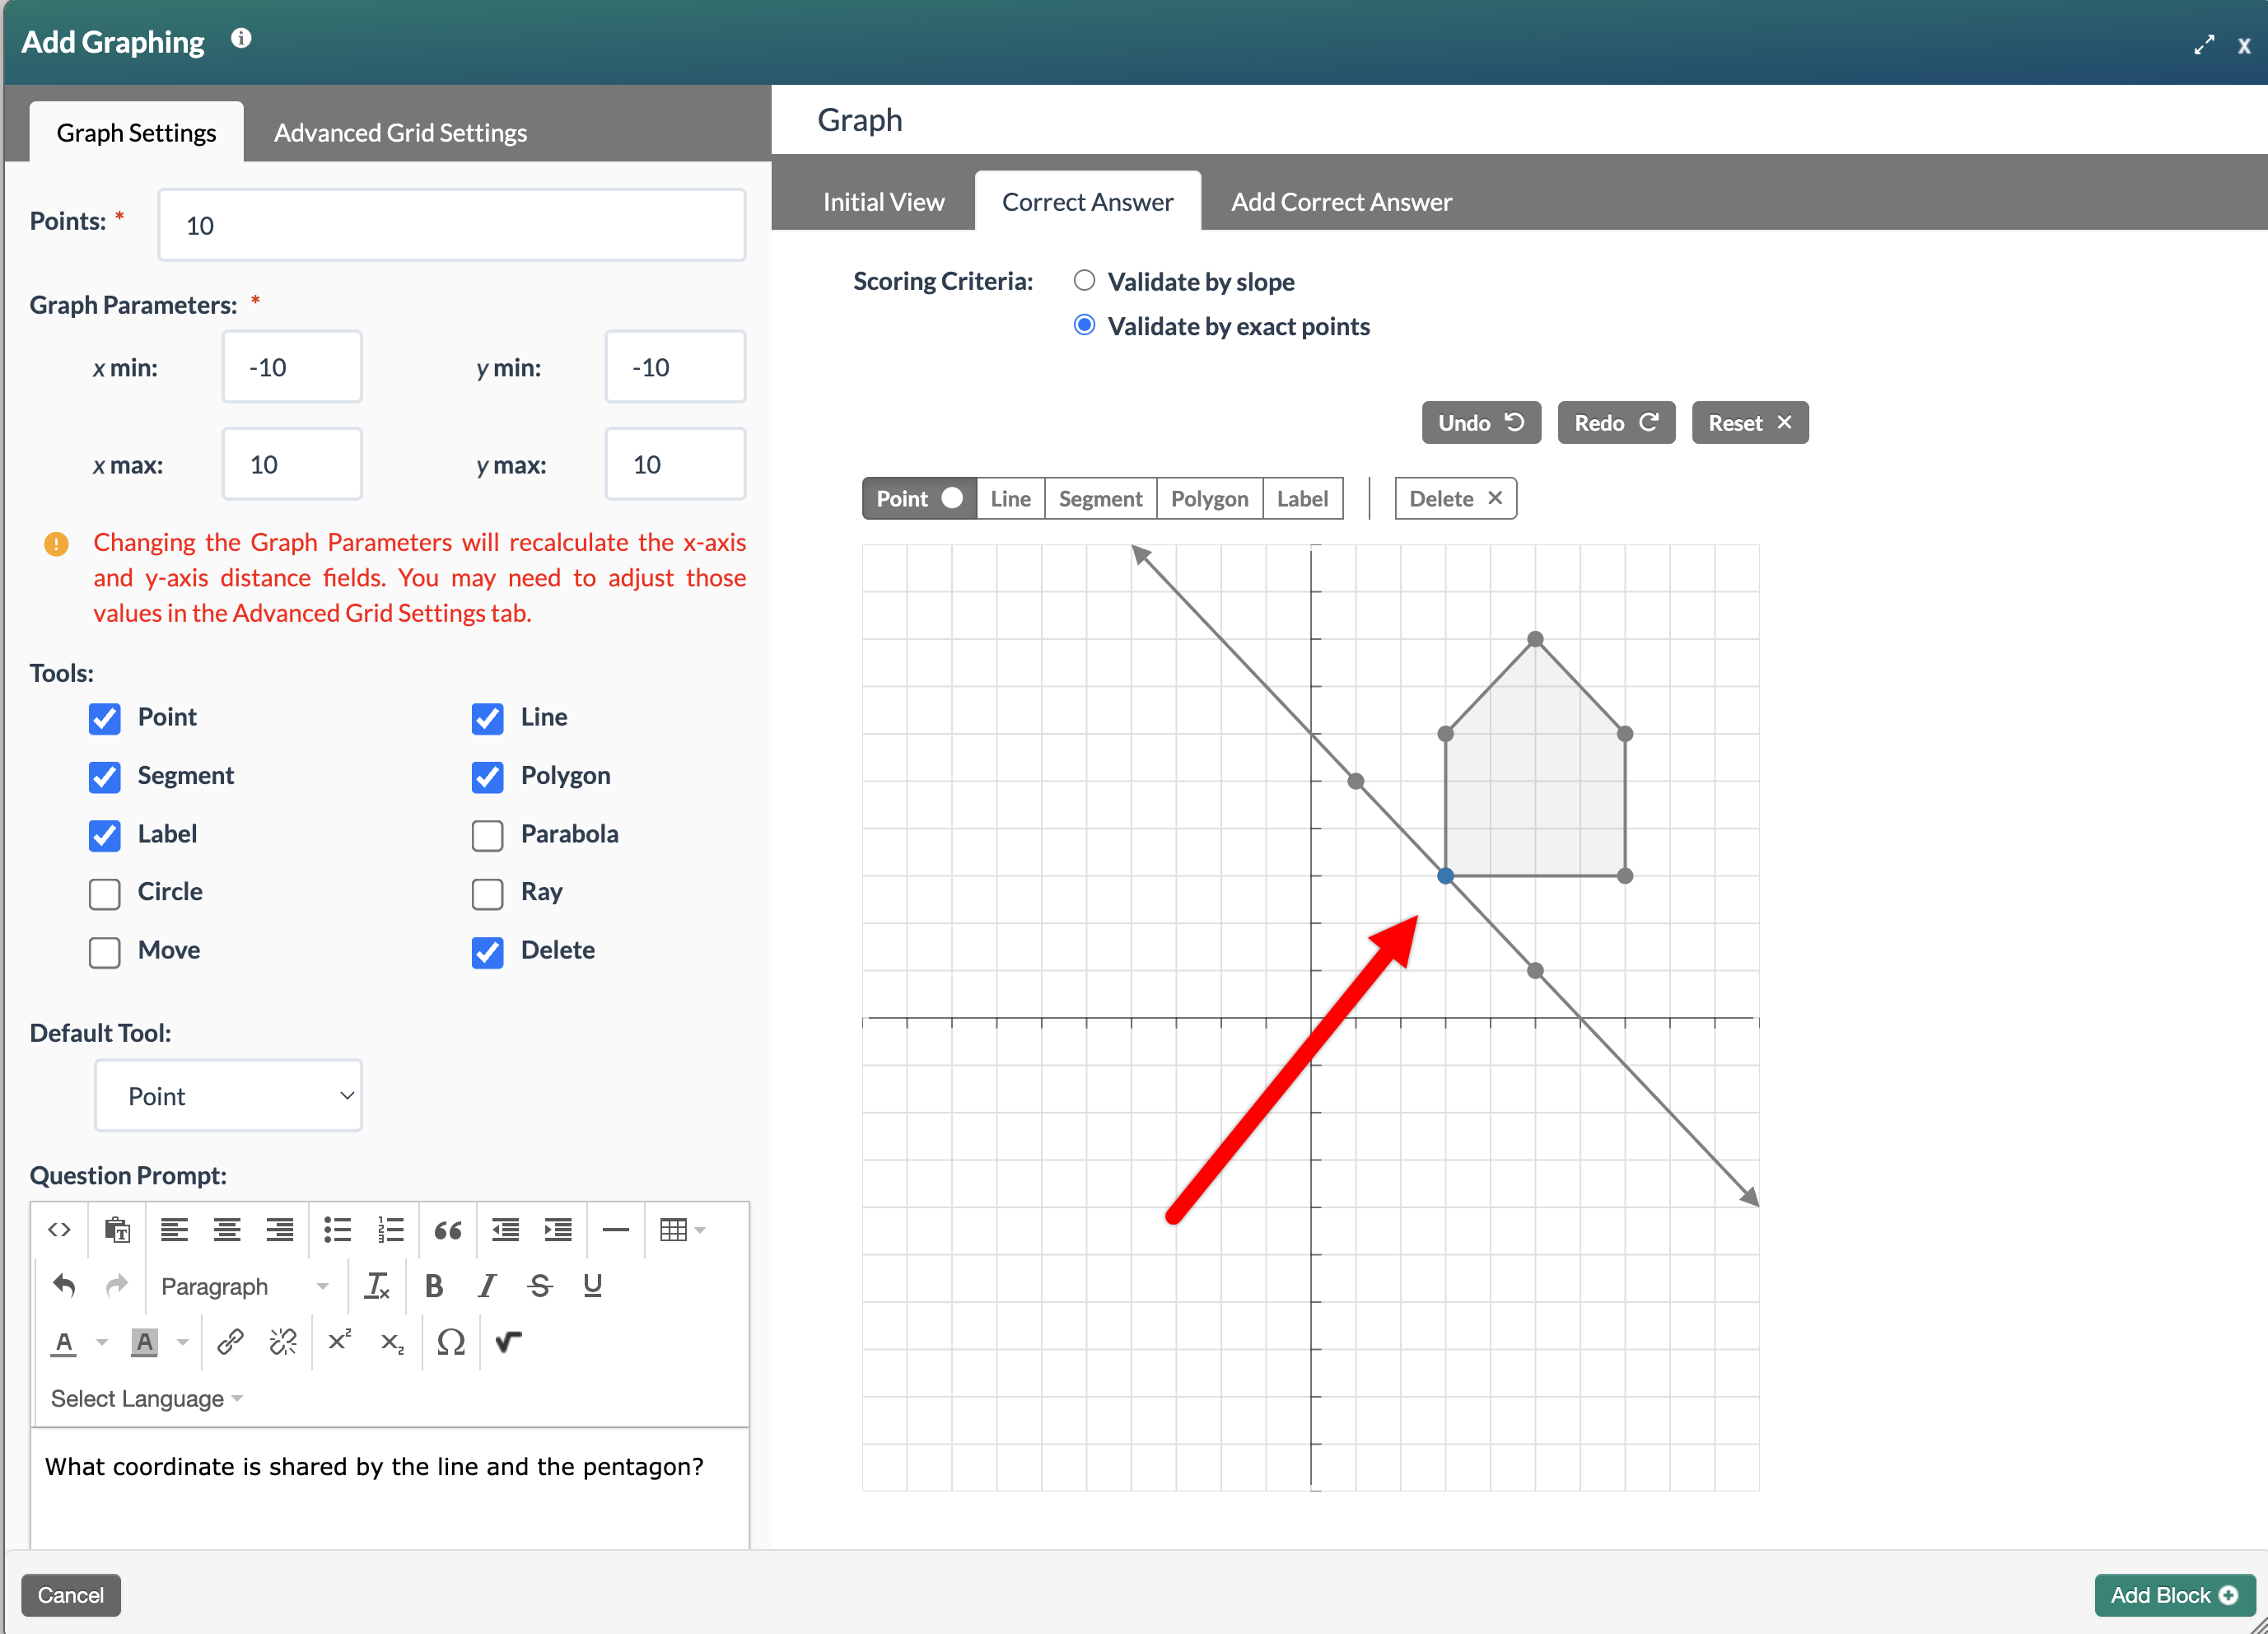
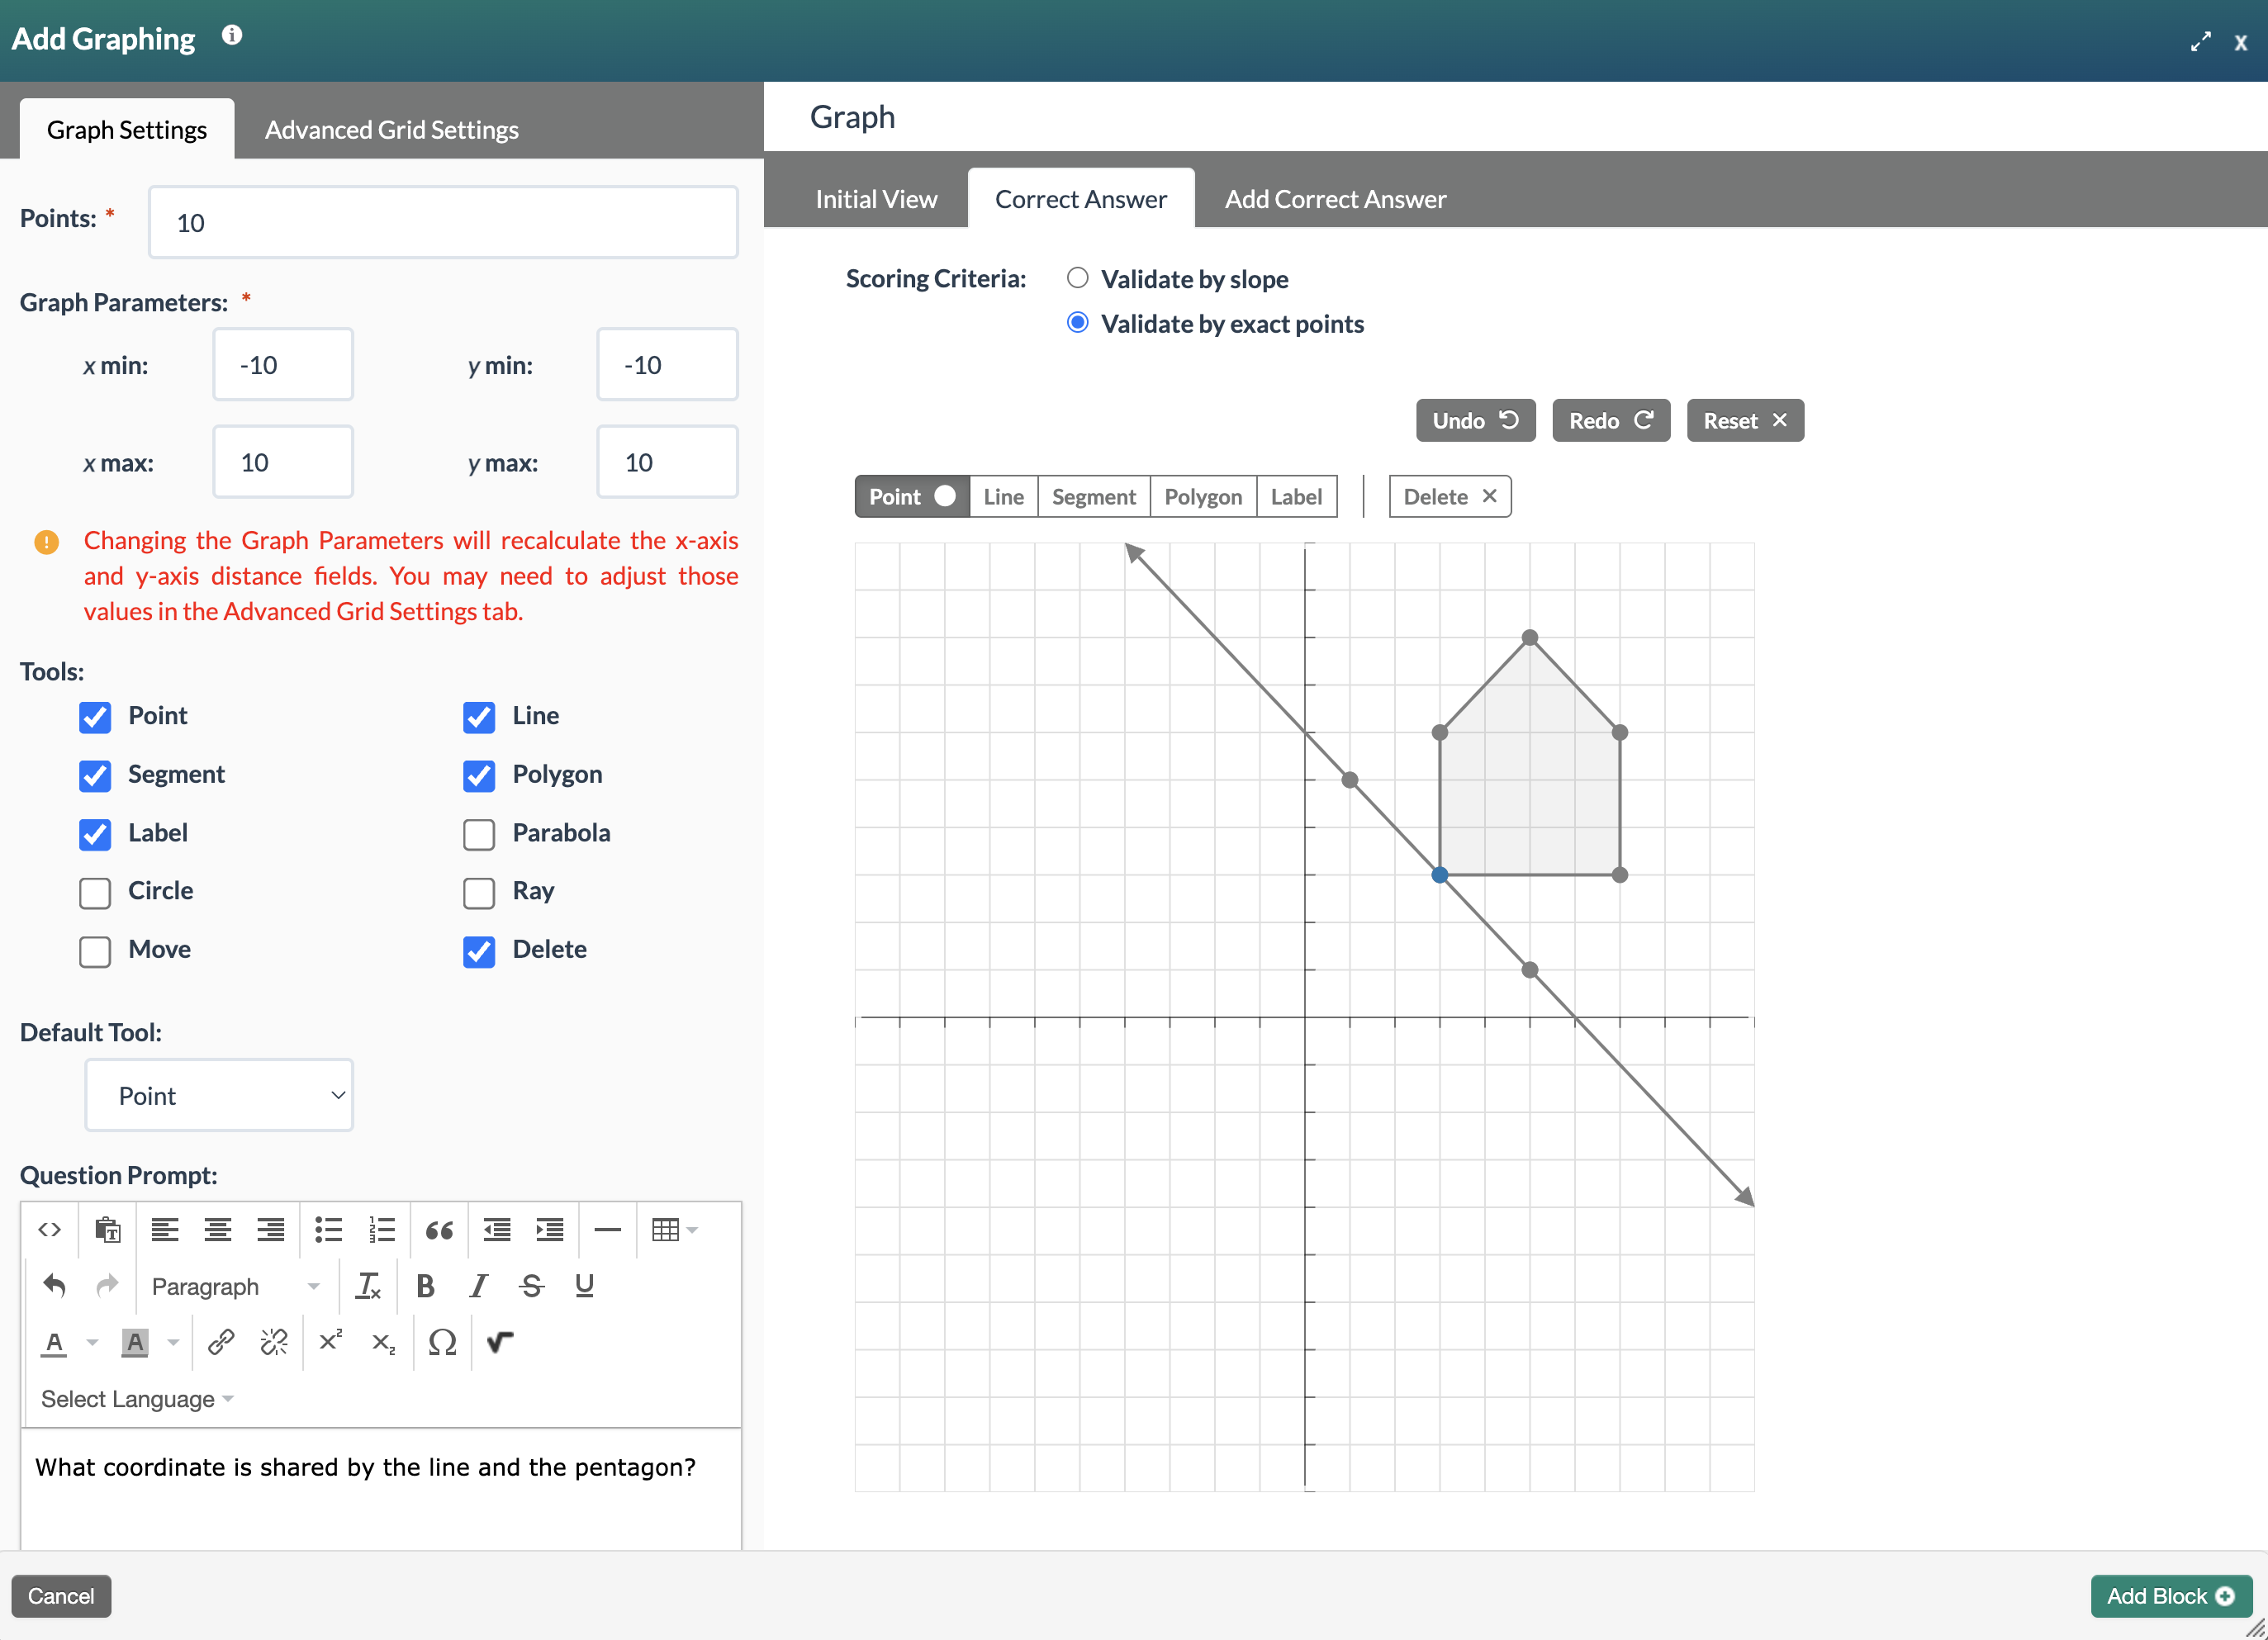
- To identify the correct answer for the activity, select the Correct Answer tab. In this example, Scoring Criteria is set to validate by exact points. Identify the correct answer by selecting the corresponding element or location on the graph. The Correct Answer (3,3) is highlighted in blue. Use Add Correct Answer to add additional correct answers.
- When the Graphing block configuration is complete, select the Add Block+ button to add the block to the page.
- The new block will appear on the page in Edit Mode with a red, dotted outline indicating it's editable.
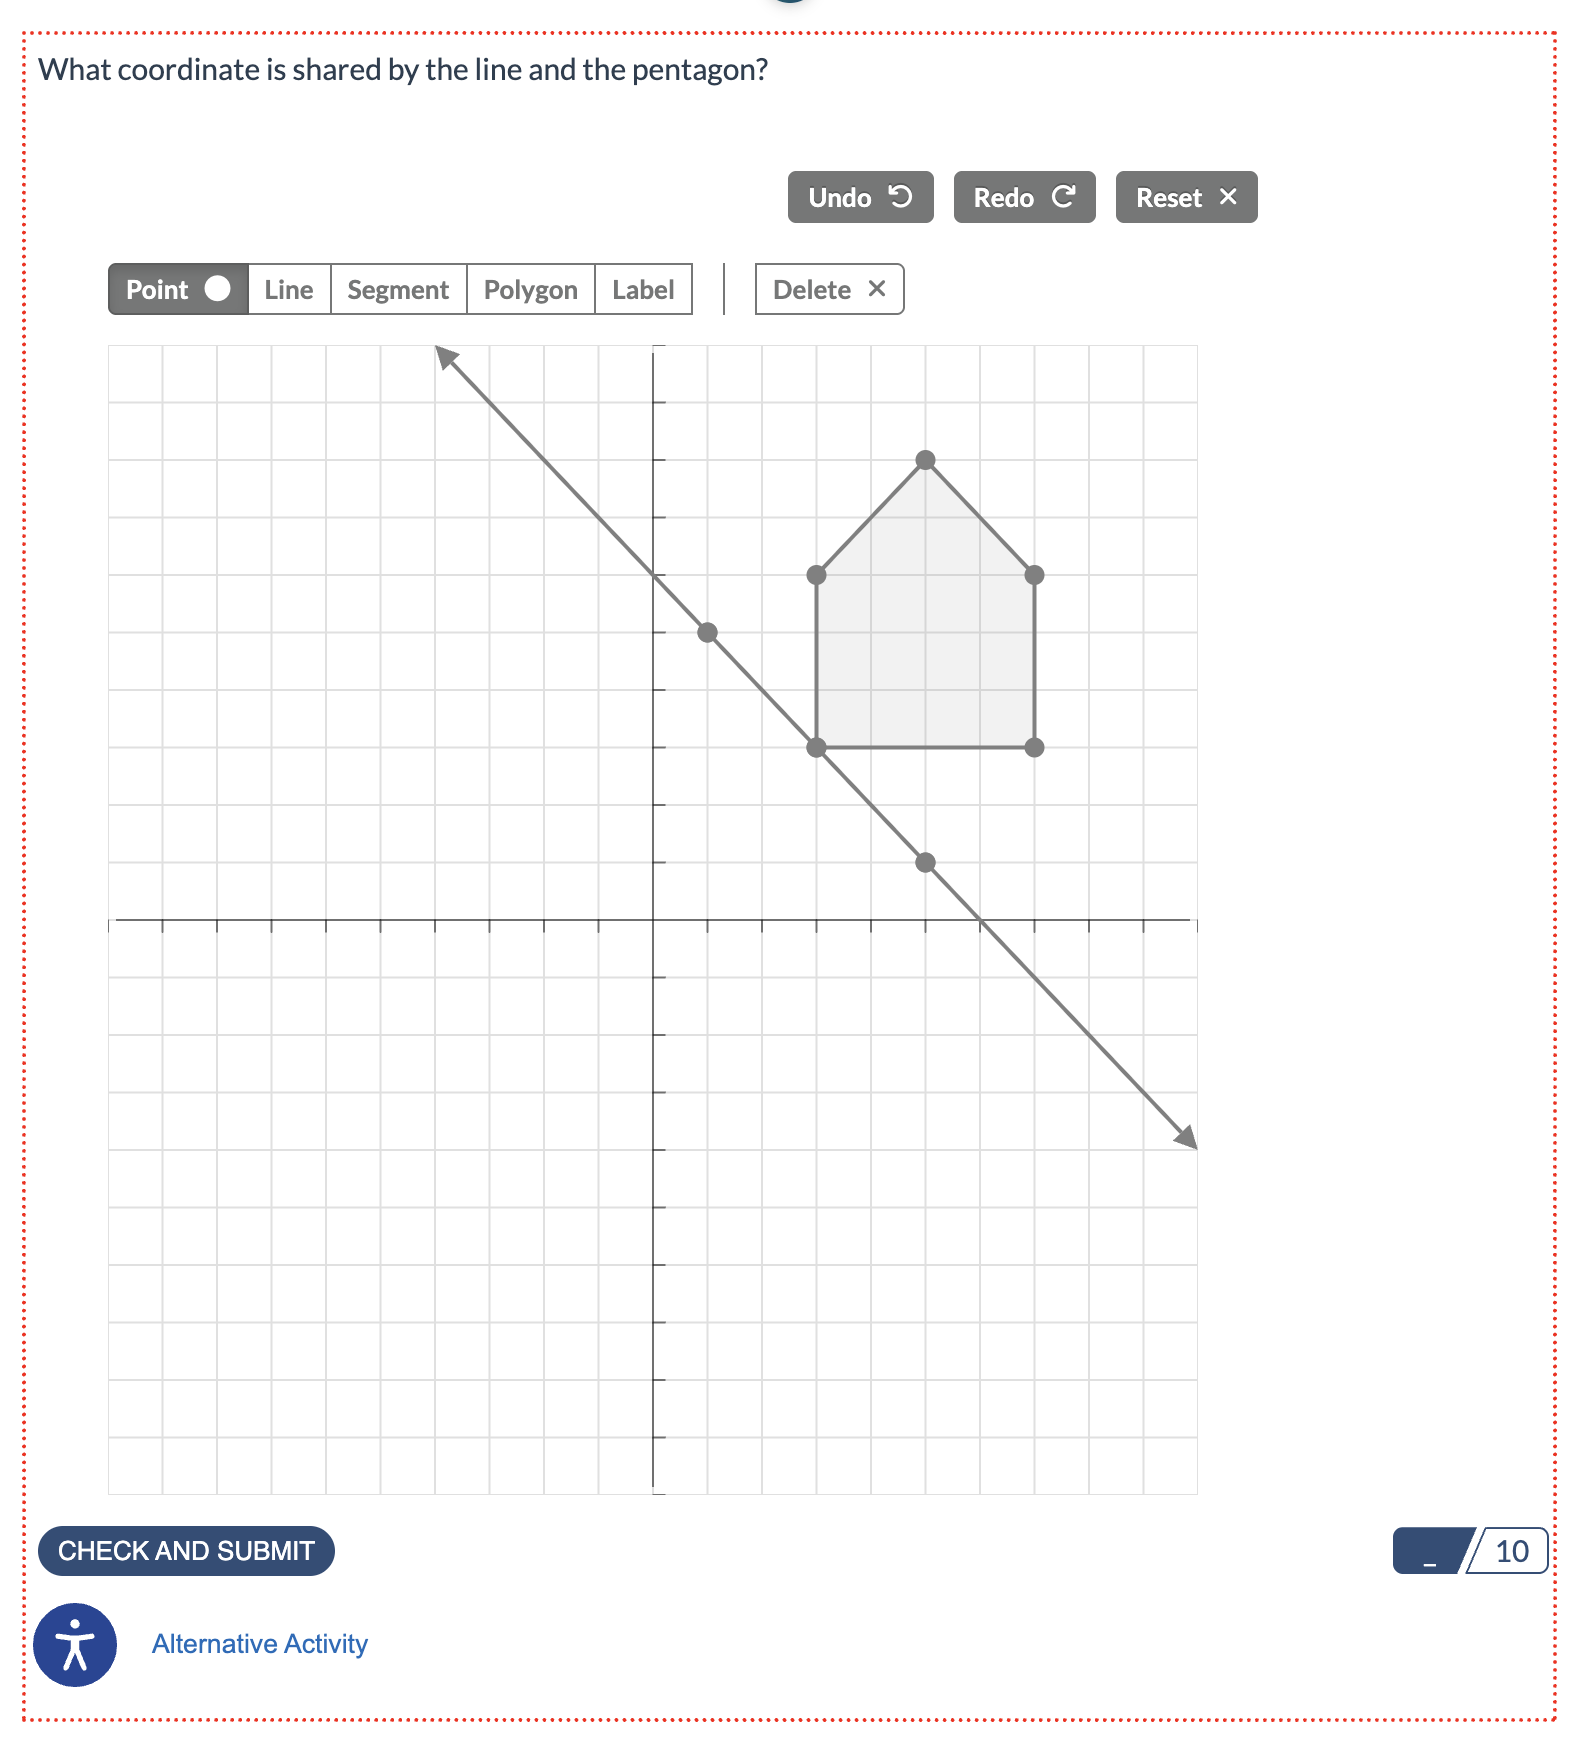 Note: An Alternative Activity is automatically generated to provide learners another option for interacting with this activity.
 - Select the Publish My Edits button to save the block to the course page and see the content as it will appear to learners.
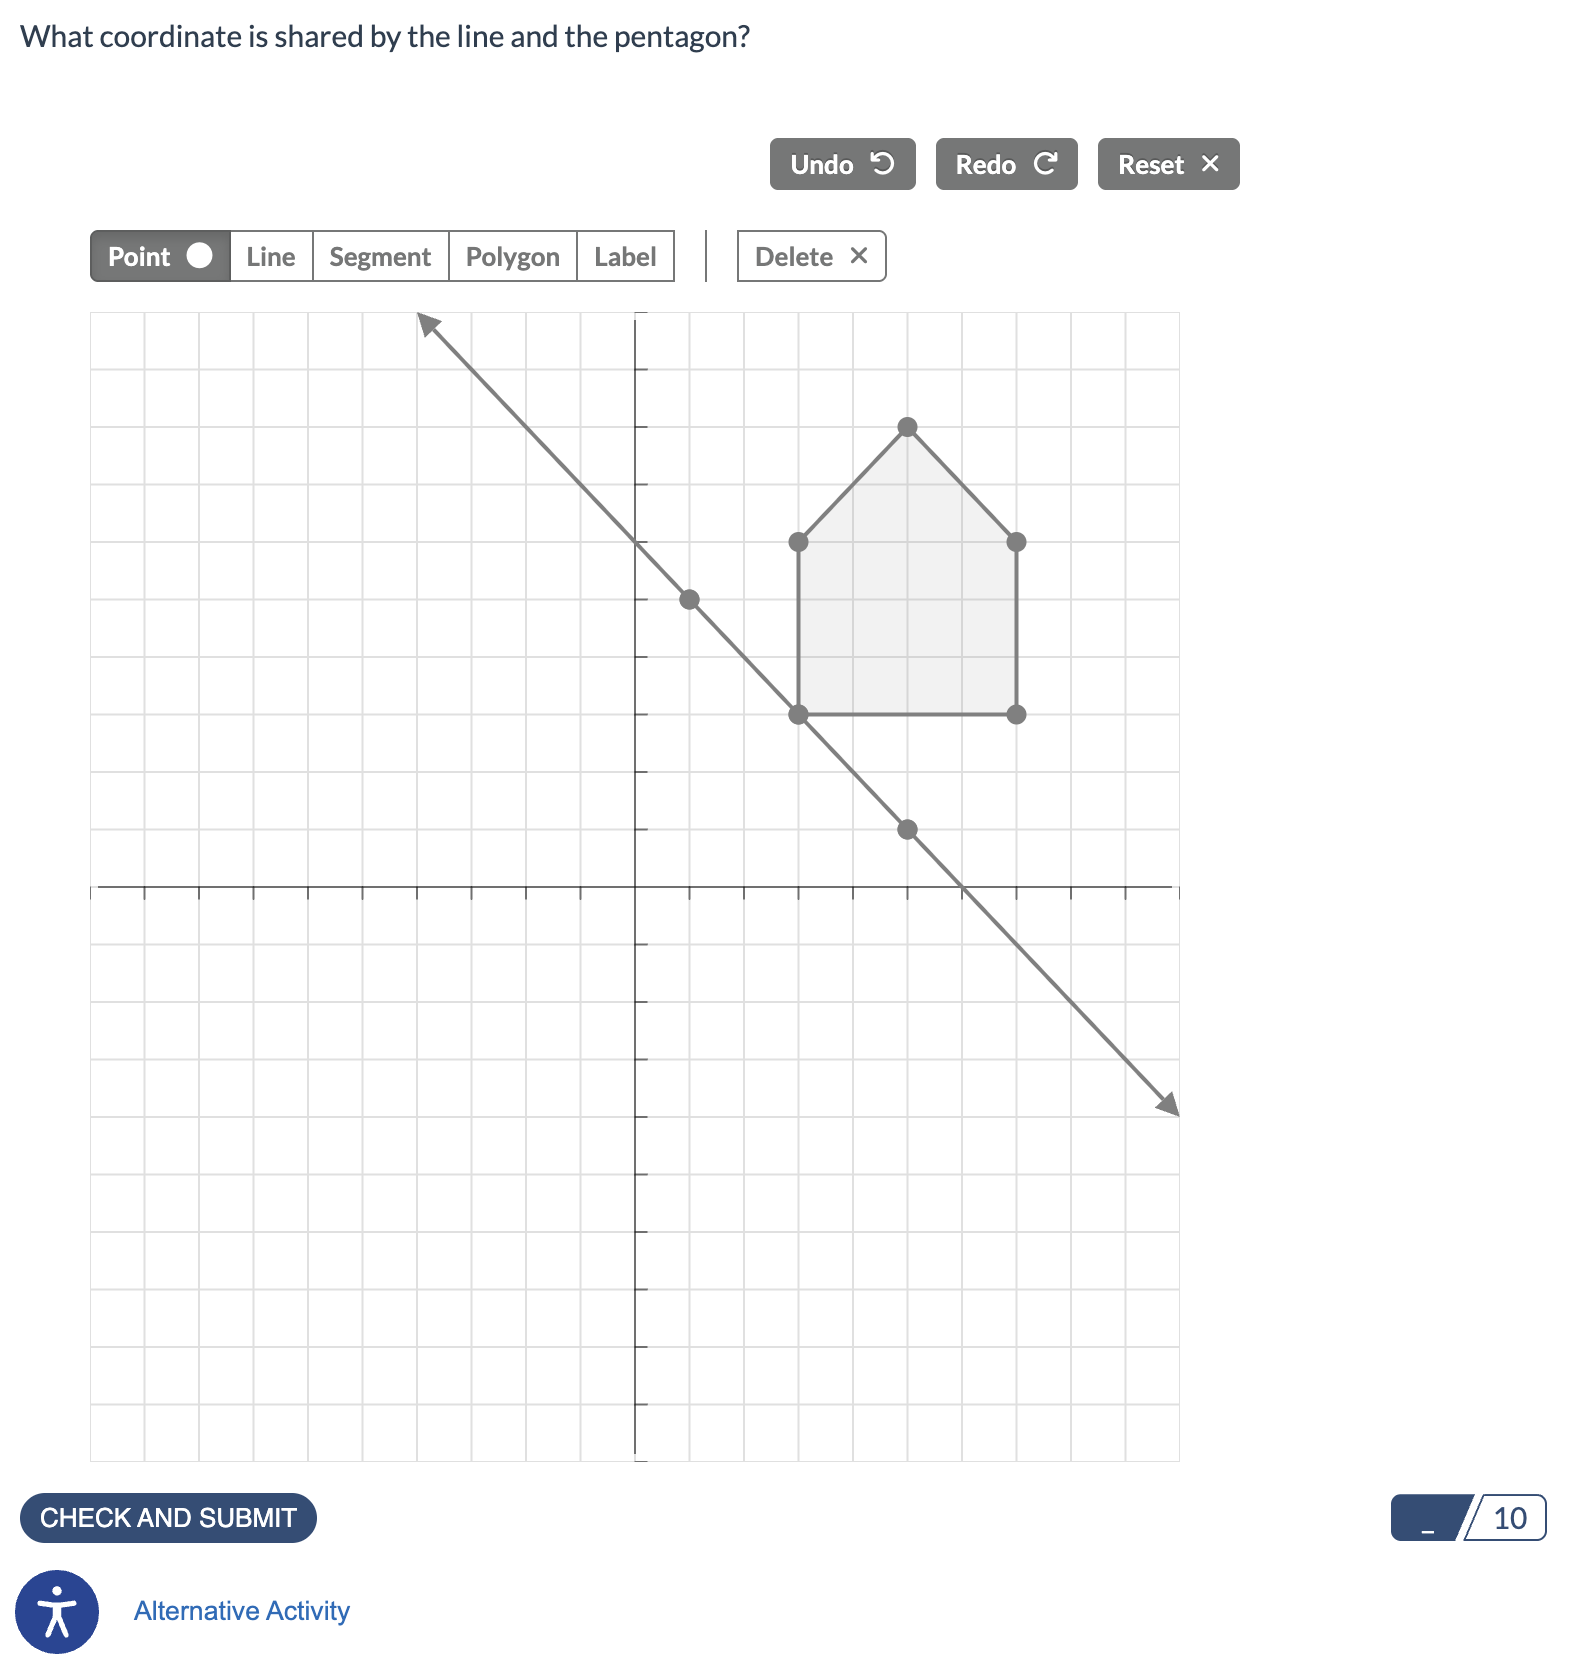
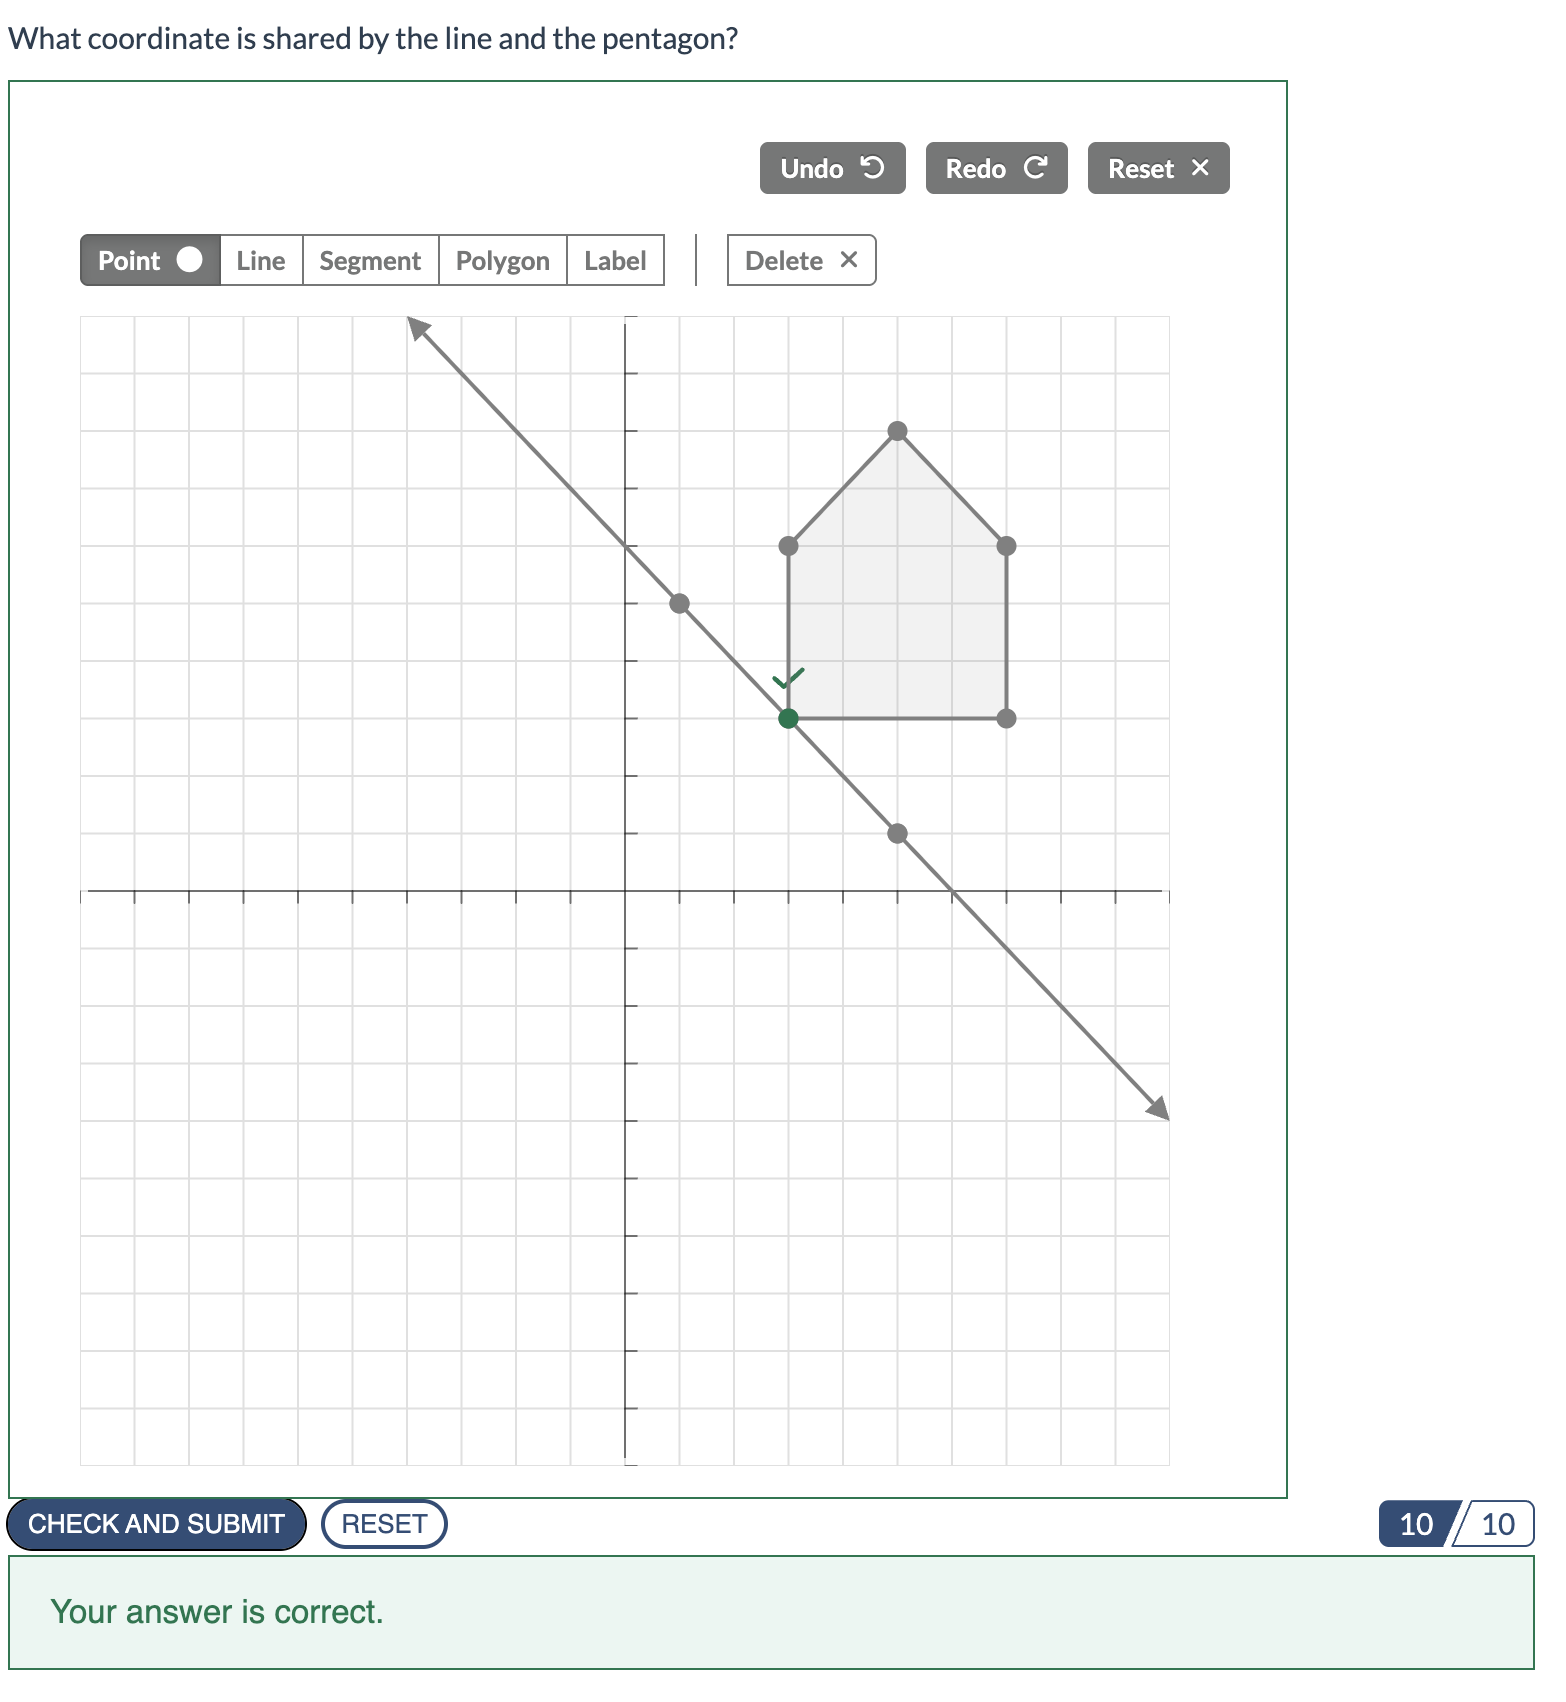
- Learners can use the CHECK AND SUBMIT button to verify their answers. Incorrect answers will be highlighted and displayed on the page. Learners can reset the activity and try again to earn the maximum number of points, which are shown in the lower right-hand corner of the page.
Advanced Grid Settings
Use the Advanced Grid Settings area to further customize the graph, including adding a title and adjusting the x- and y-axes.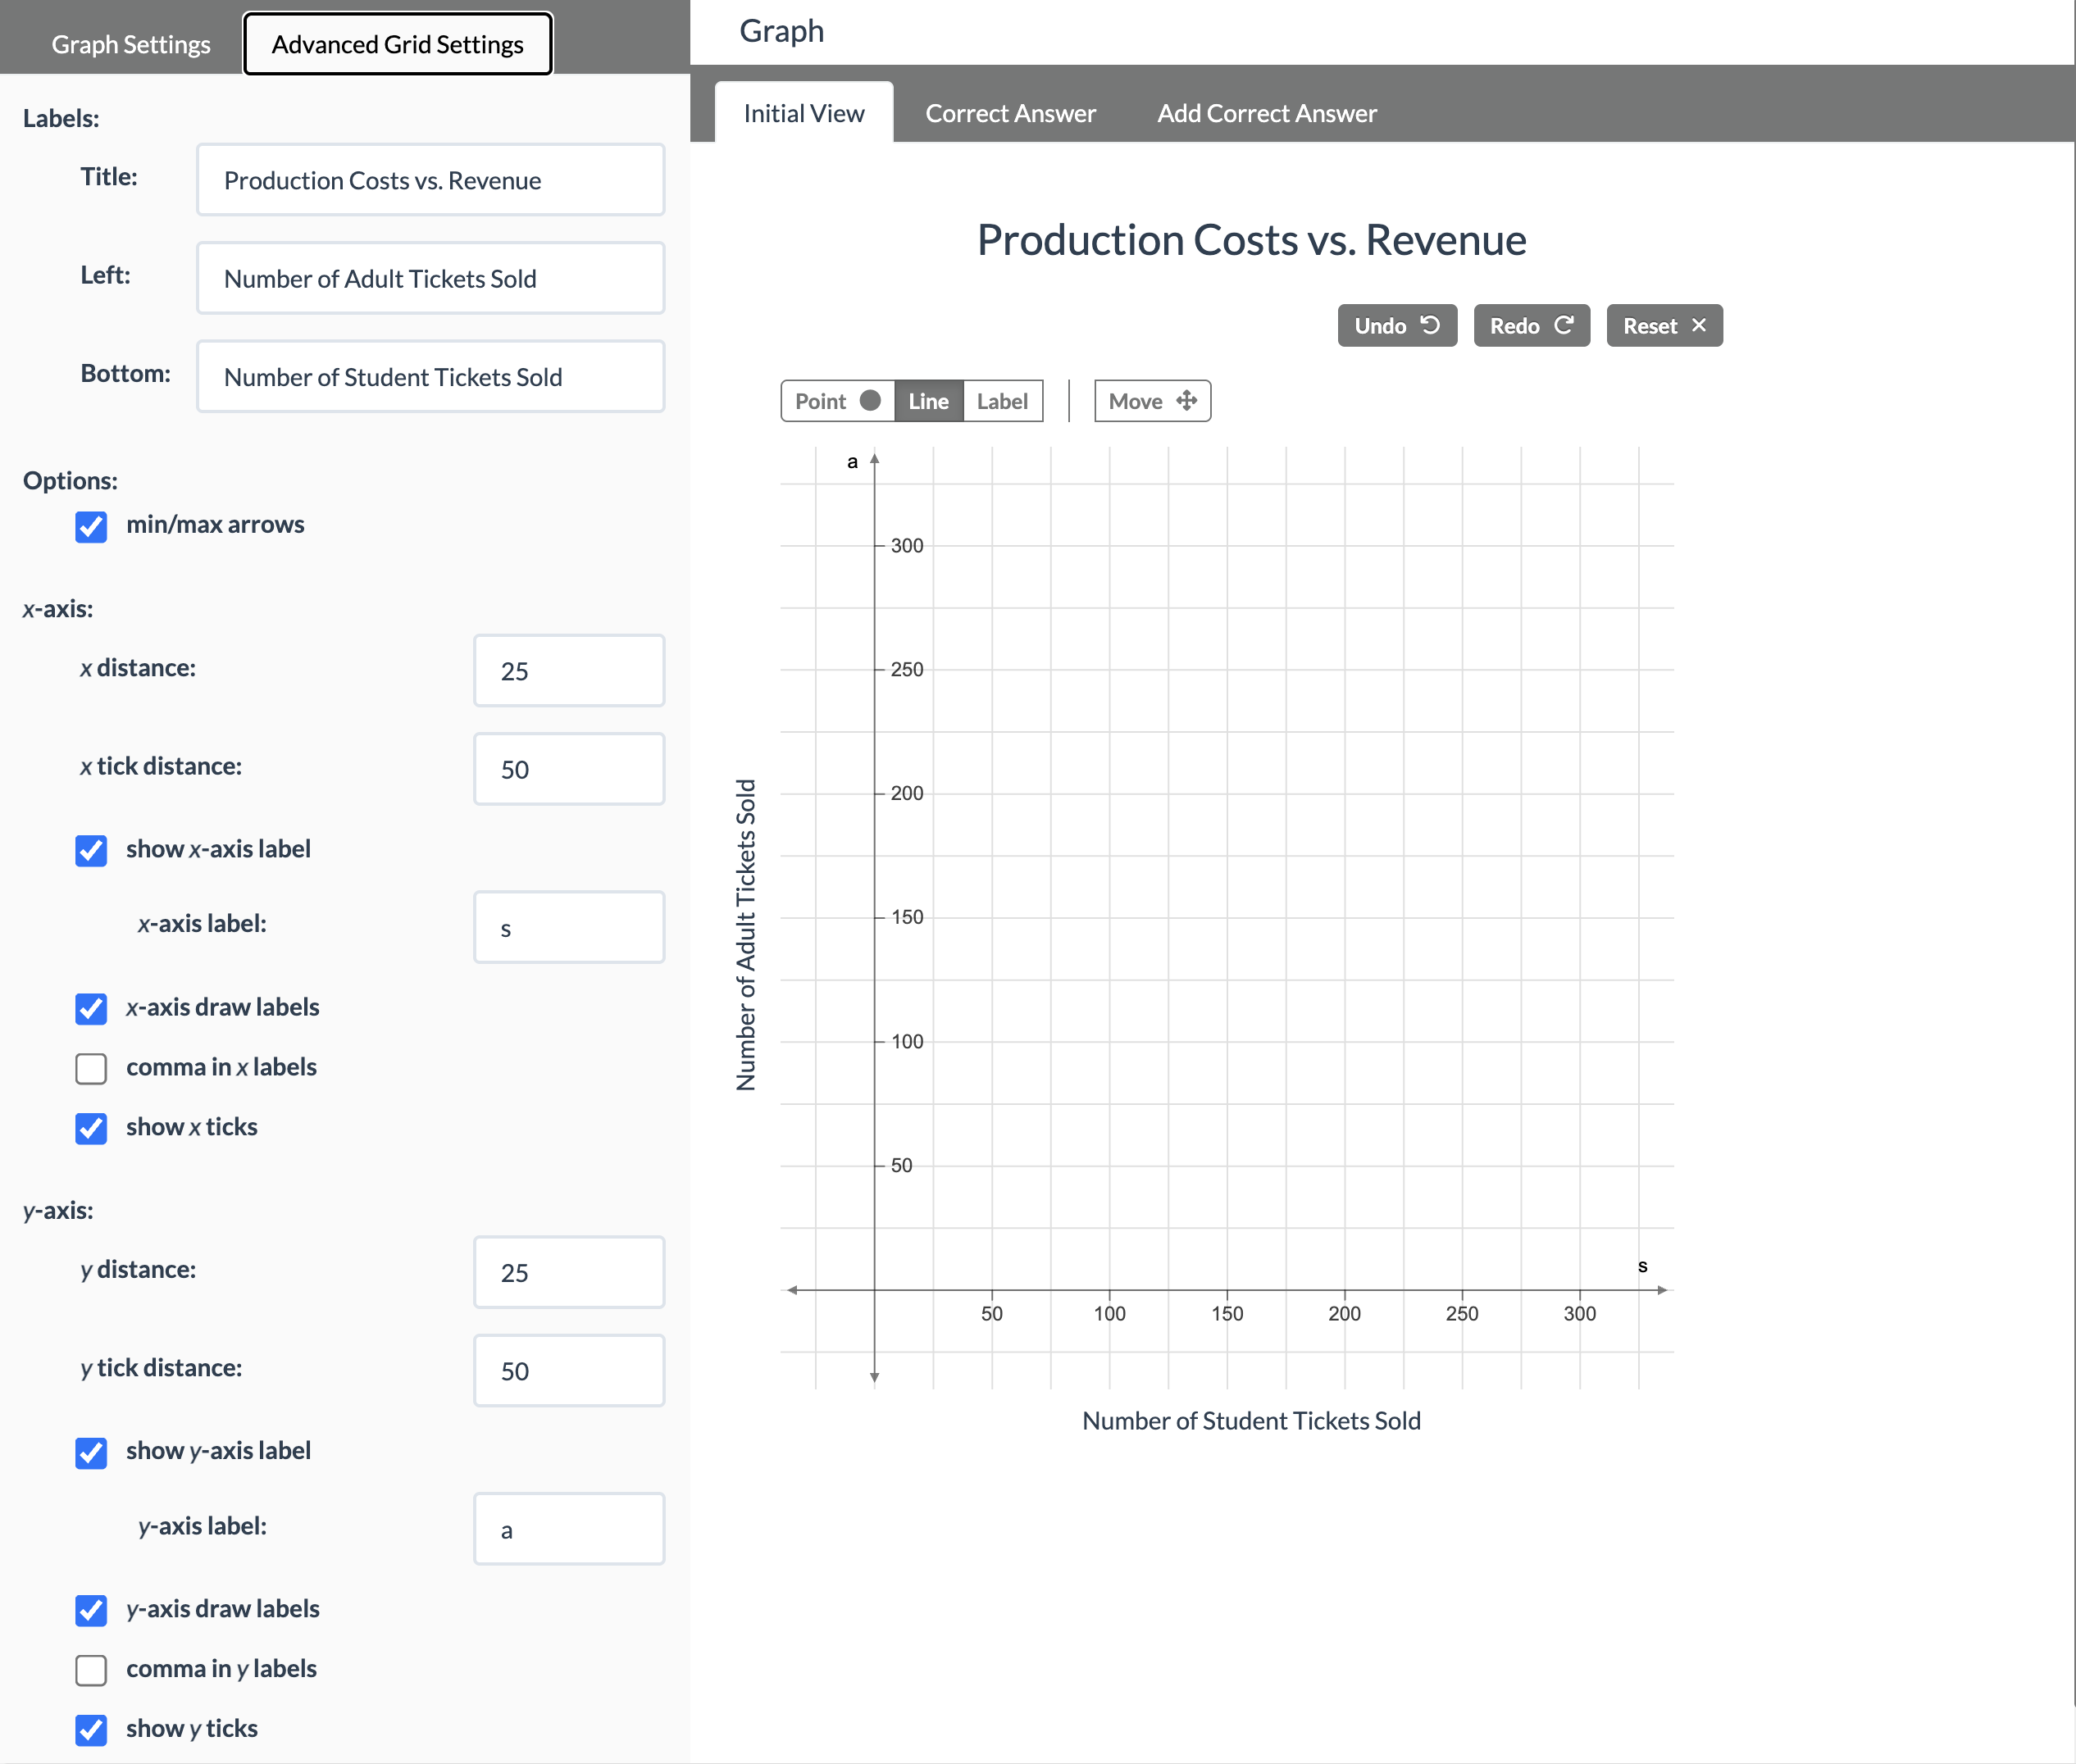
Was this article helpful?
That’s Great!
Thank you for your feedback
Sorry! We couldn't be helpful
Thank you for your feedback
Feedback sent
We appreciate your effort and will try to fix the article