The Image with Hotspots block allows content creators to create interactive images by placing clickable hotspots over any image. Each hotspot can be customized with an icon and opens a modal when clicked, allowing additional context, explanations, or media to be layered onto the visual content. Grading can be configured to be either no grading or completion.
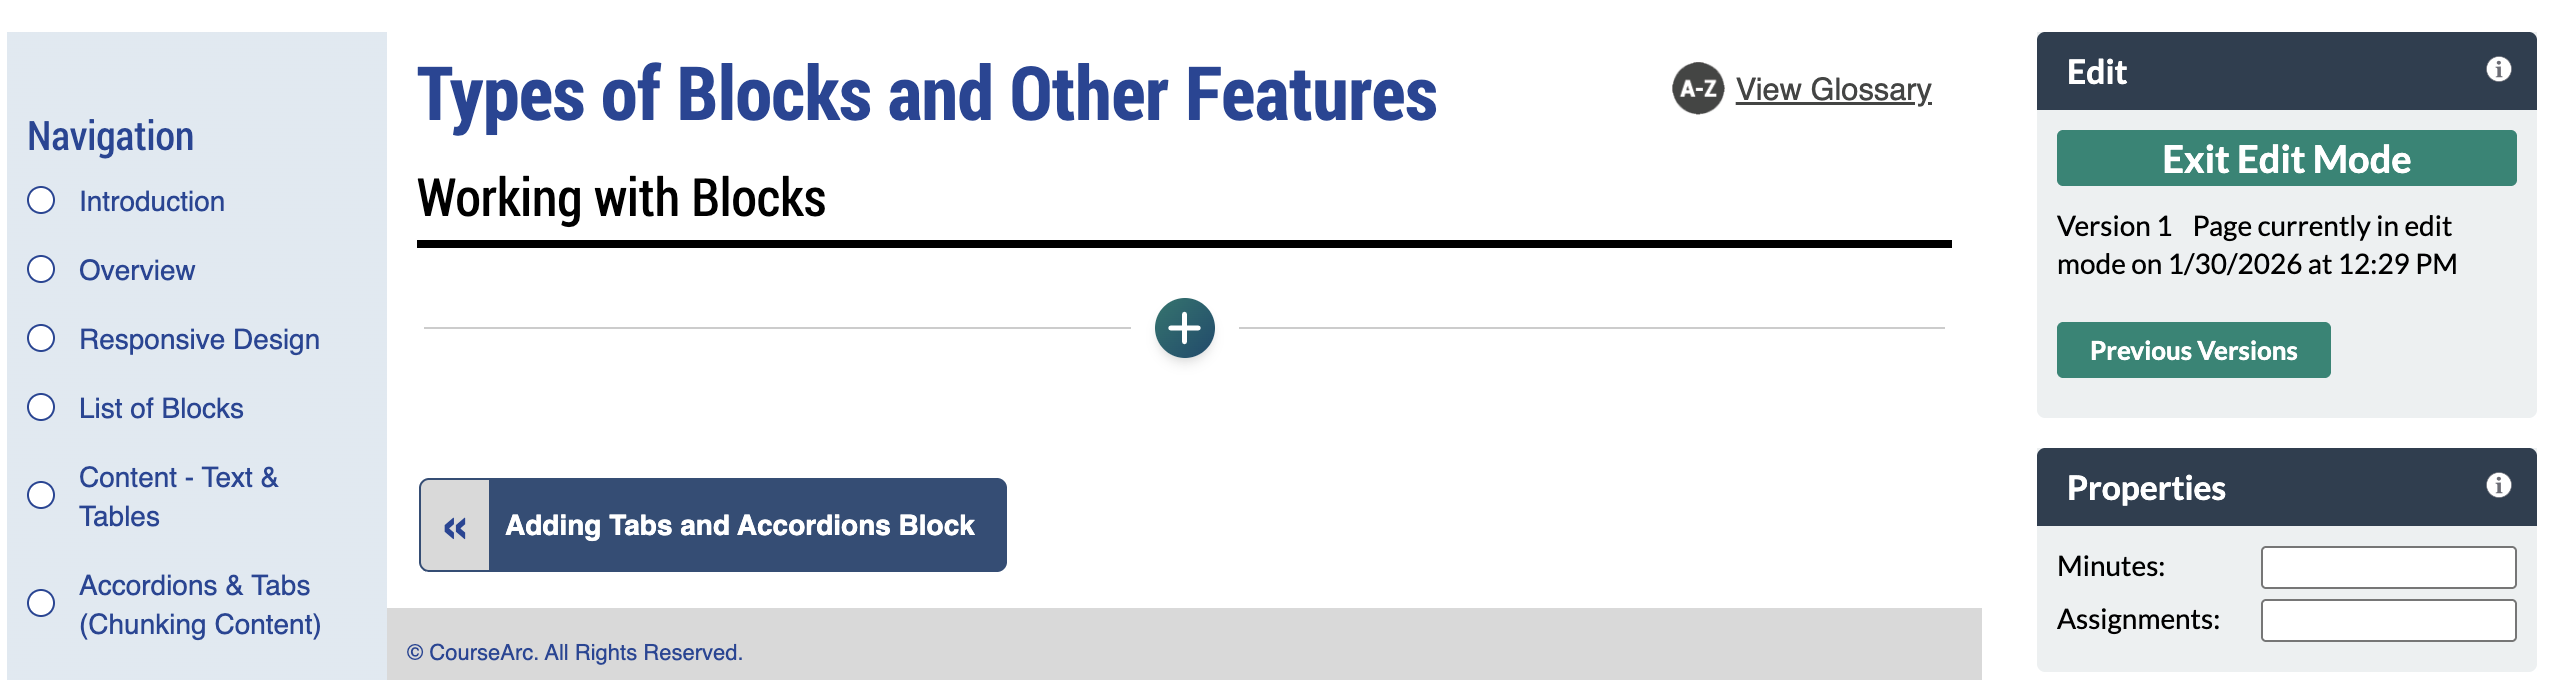
- Navigate to the page and select Edit this Page. Find the position you want to add a block and select the plus (+) icon.
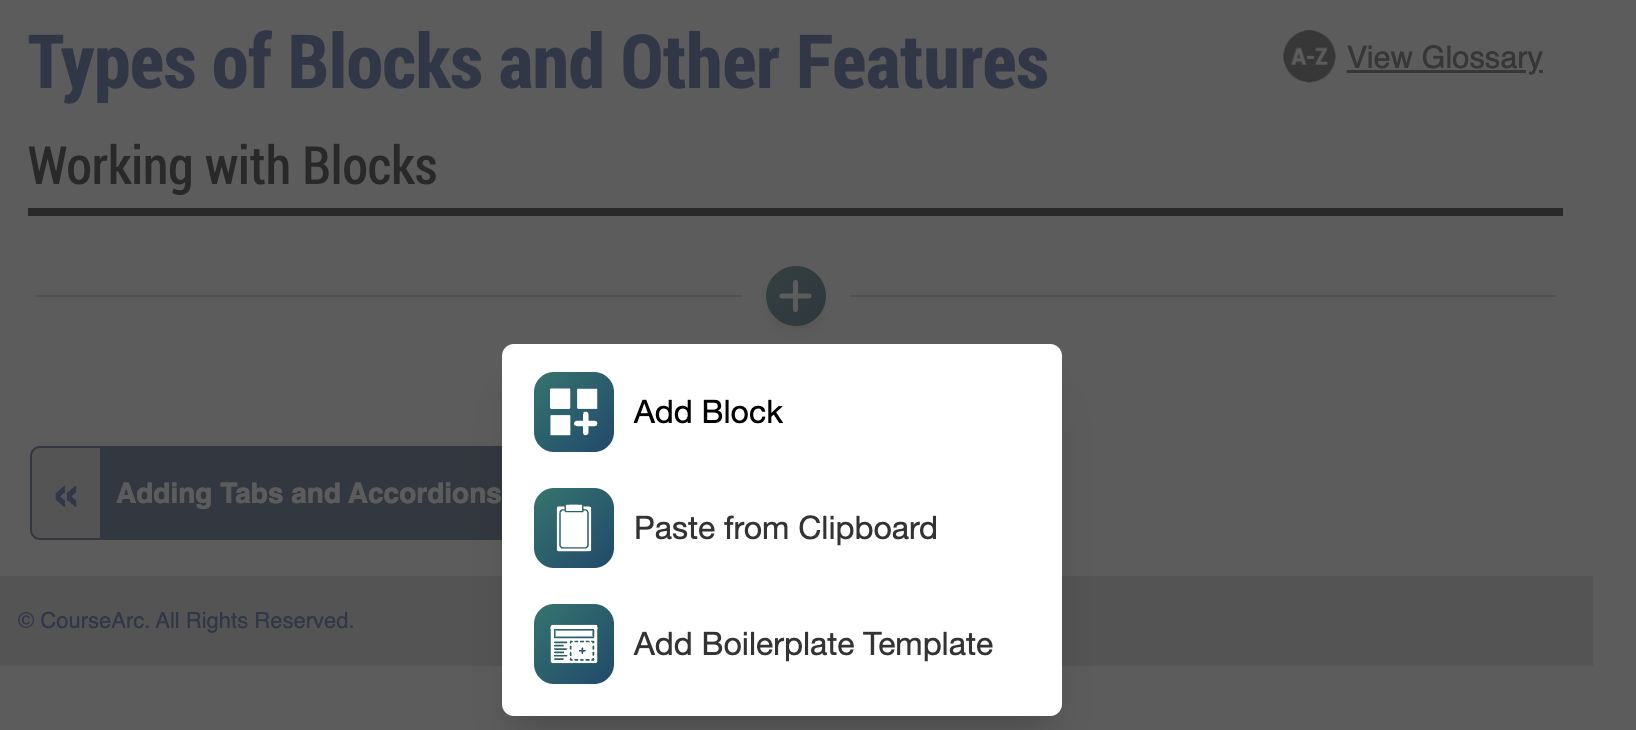
- From the dropdown, select Add Block.
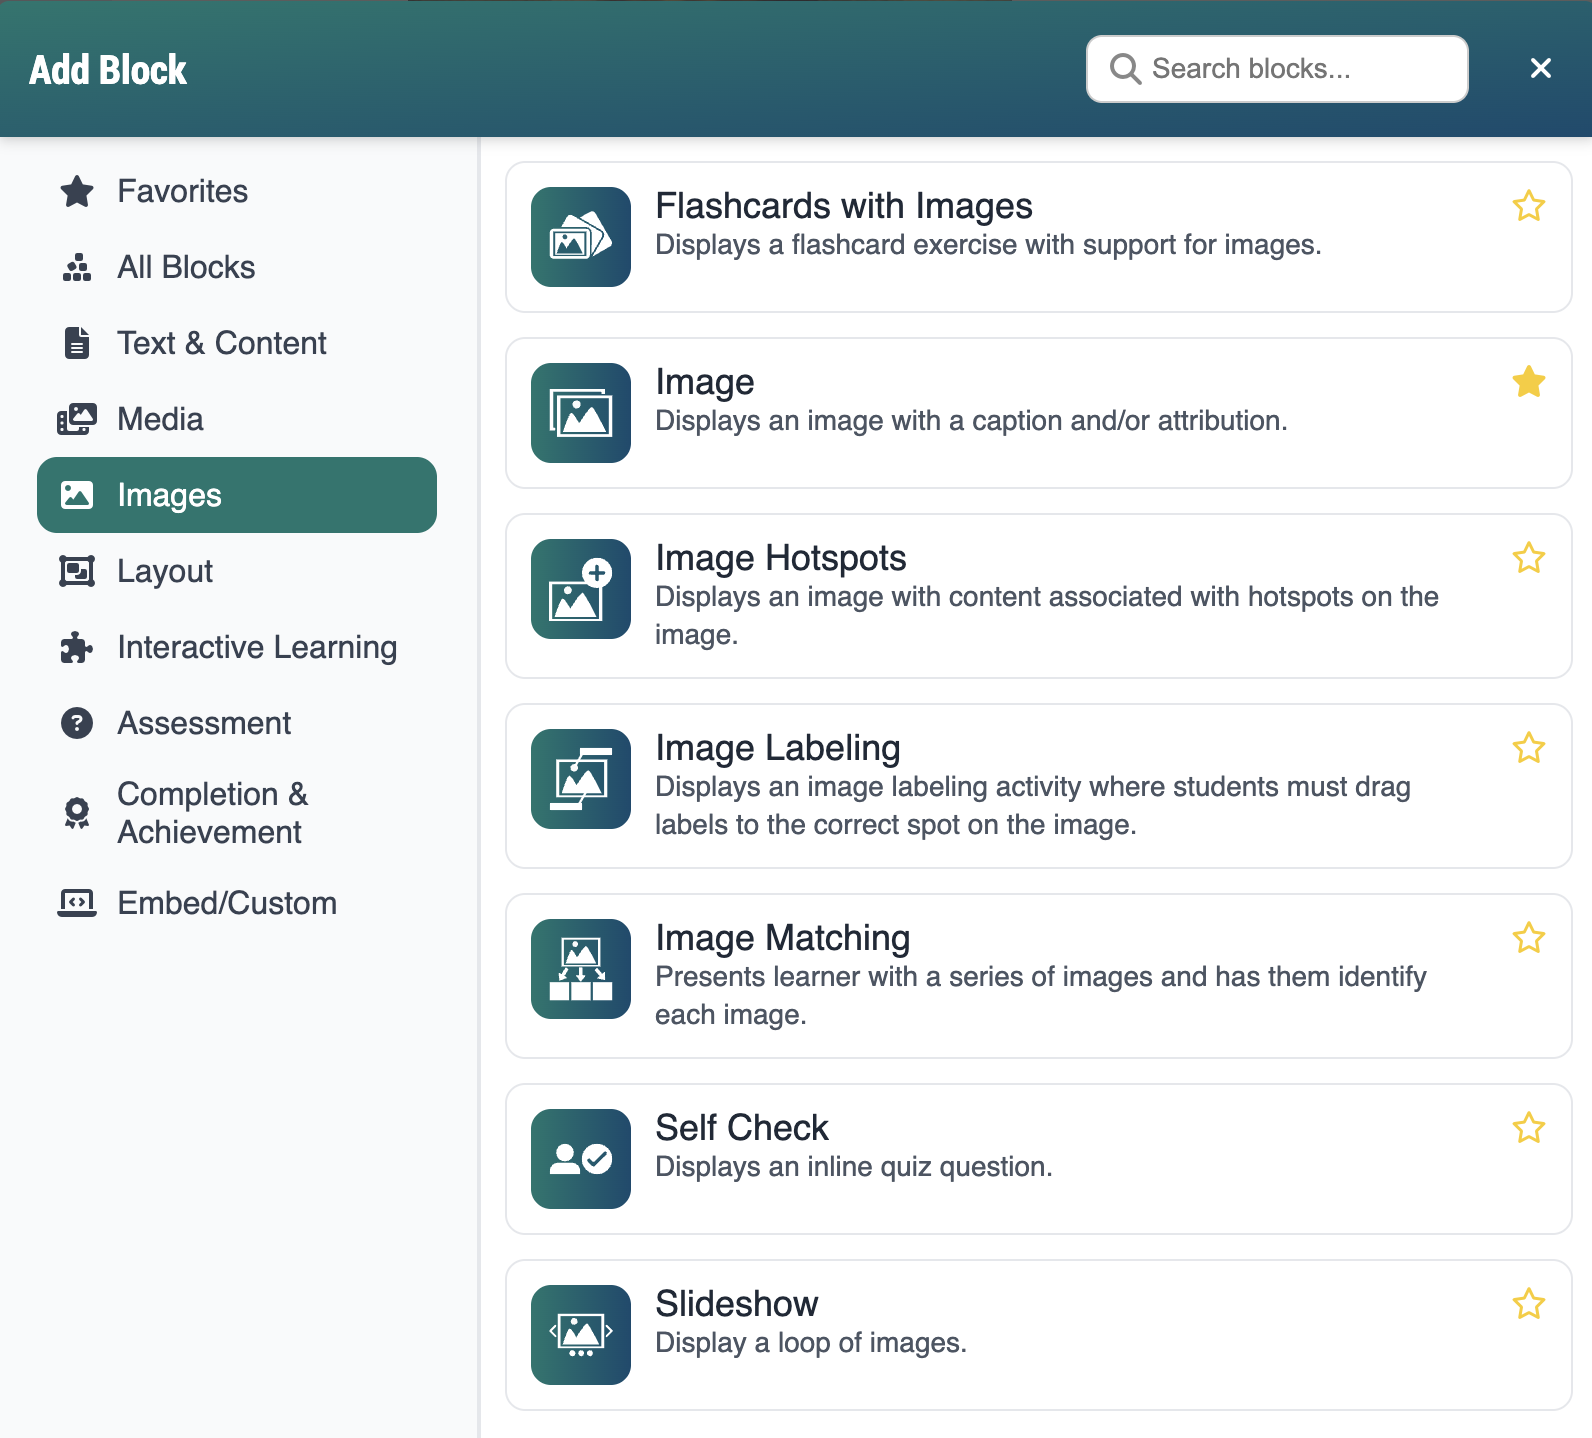
- In the Add Block modal, you can either:
- Use the Search field to find a block by keyword
- Select a block from your custom list of Favorites
- Scroll through the list of All Blocks to select one
- Use the various categories in the side panel to filter by block type
- Select the star icon to add or remove blocks in your Favorites list
- Select the Image Hotspots block. The Add Image Hotspotsform will open. The form has two areas: the Editing Pane and the Preview Pane.
- The Editing Pane is where you configure the image settings.
- As you make changes, they automatically display in the Preview Pane so you can see how the image will appear as you build it. You can use the toggle button between the panes to collapse the Editing Pane and expand the Preview Pane to full page width.
The Image Hotspots Block Form includes two tabs: Activity Settings and Add an Item.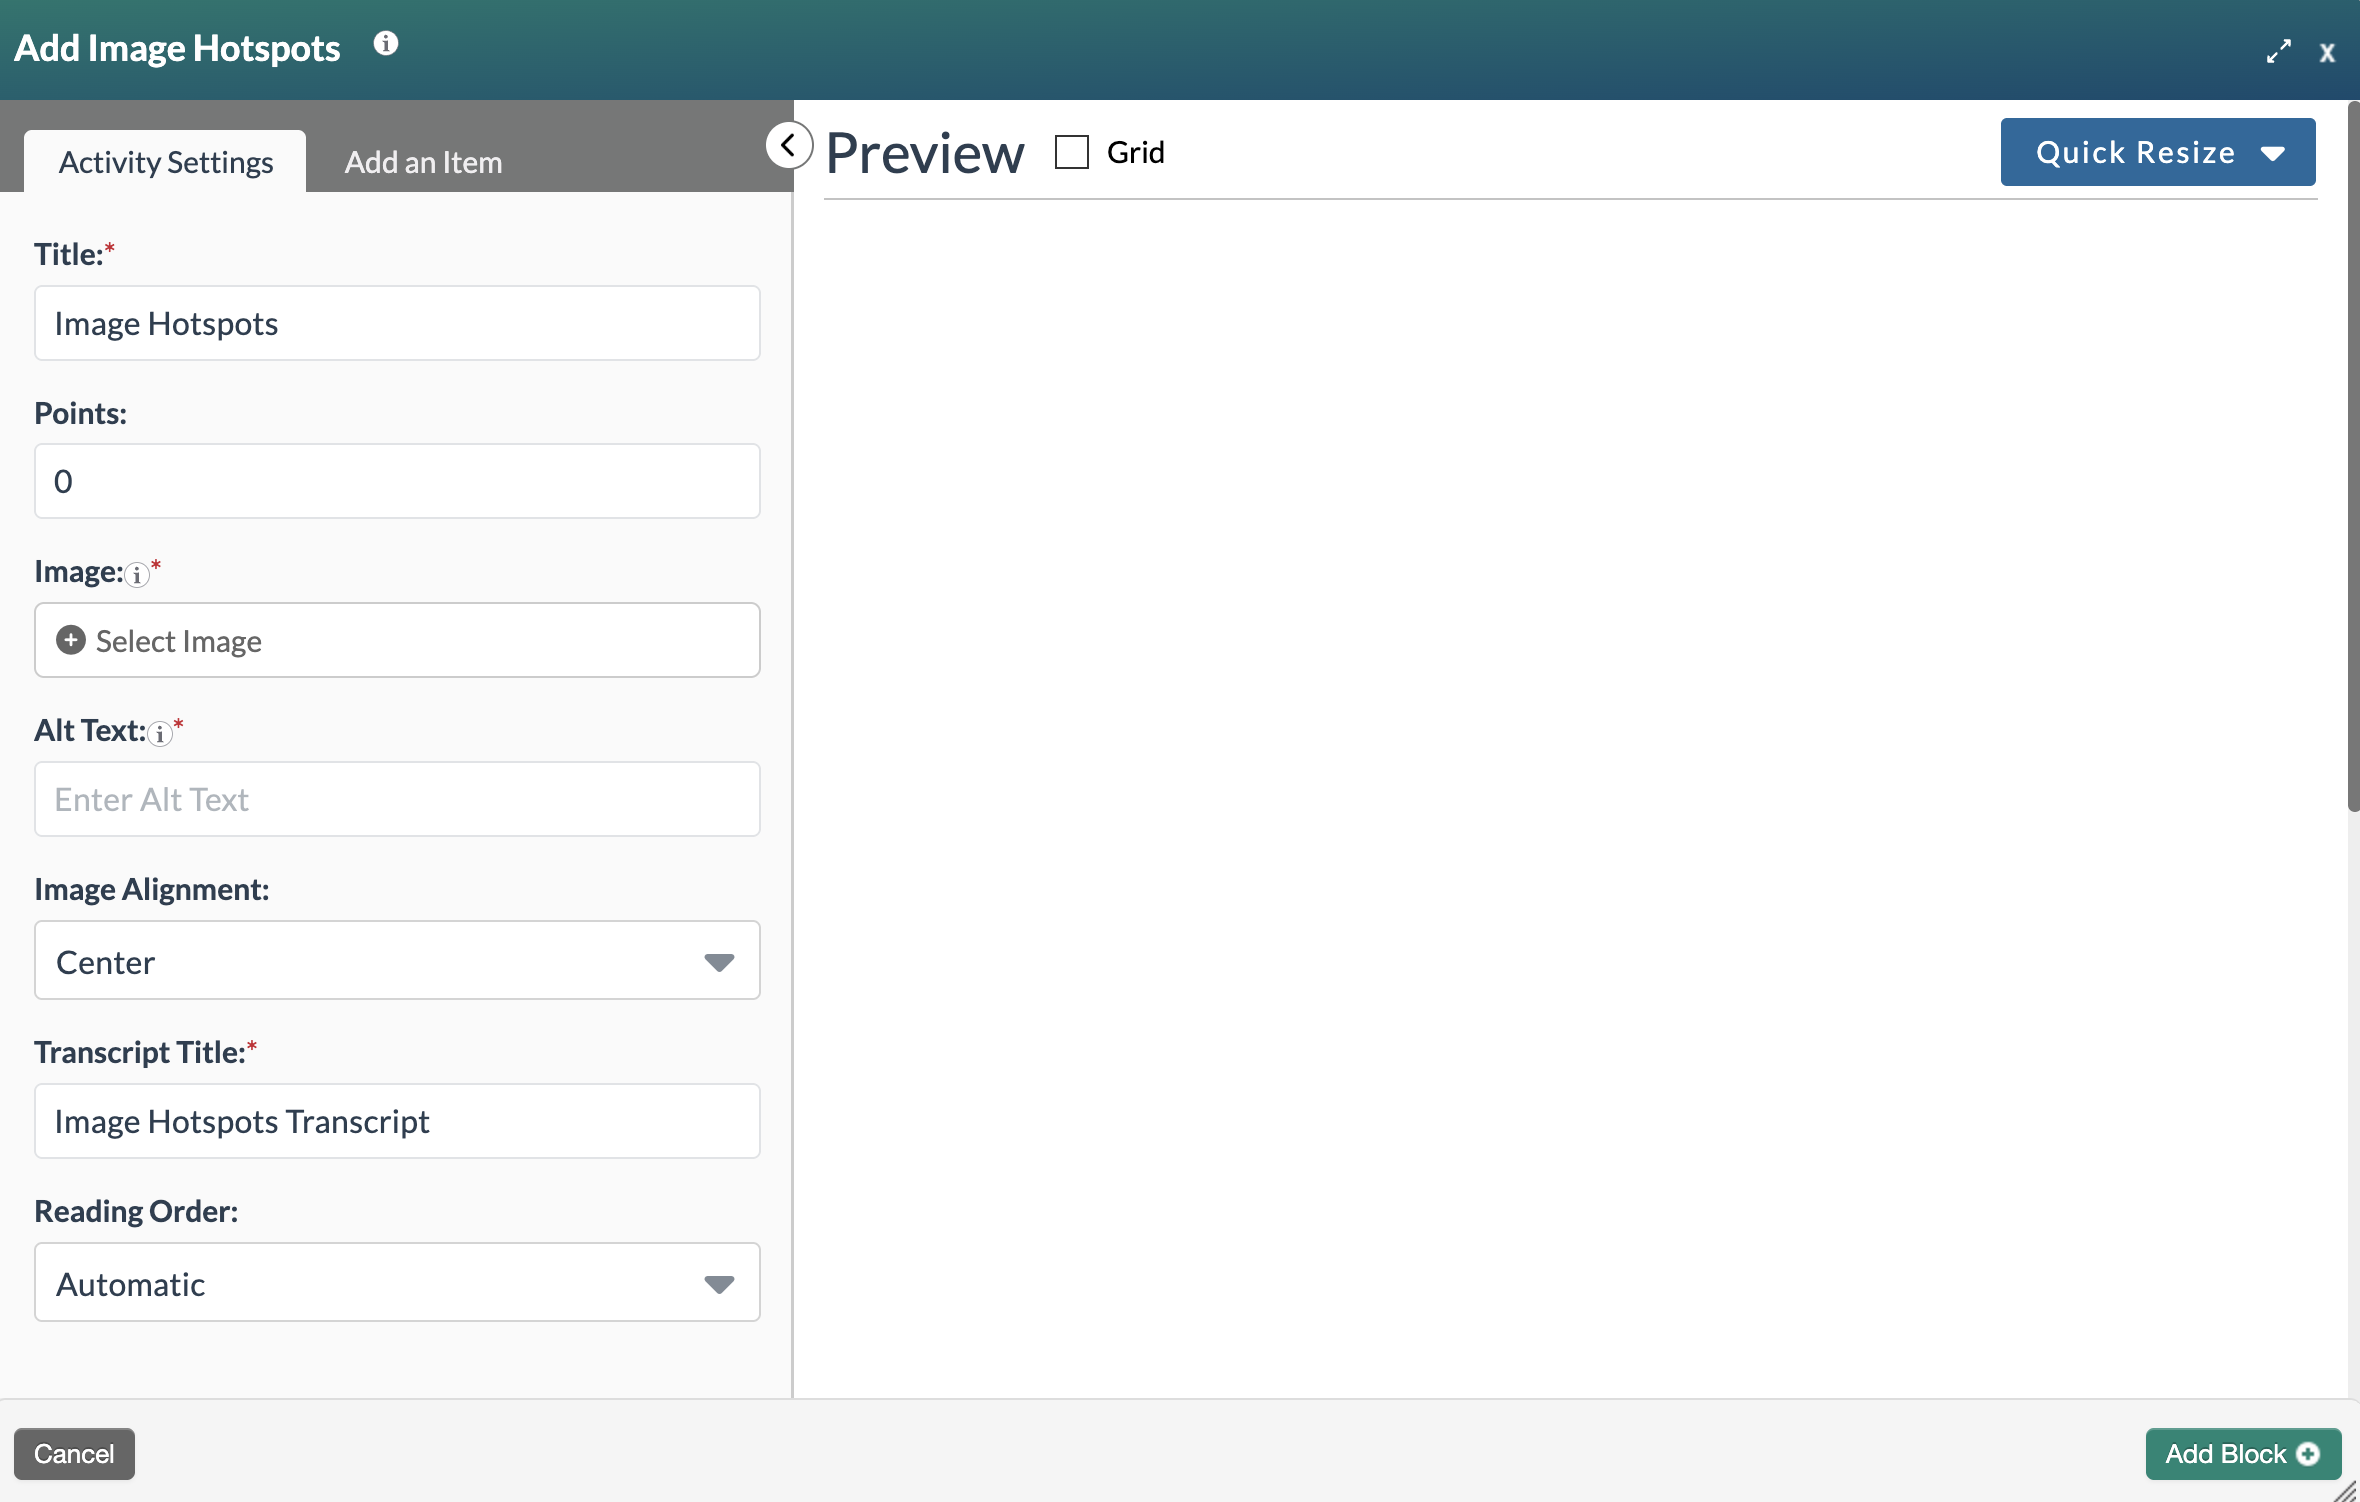
Complete the following fields under the Activity Settings tab:
- Title: The default title is Image Hotspots. Enter a clear, descriptive title. Block titles may display in student-facing areas of the course, such as activity names in the Table of Contents.
- Points: The points field will only be displayed if the module is being graded. As a default, the point value is set to 0. Change the point value if needed.
- Image: Click the Select an Image field to launch the File Manager and choose an existing image or upload a new image.
- Alt Text: If the image you selected has Alt Text associated with it in the File Manager, that Alt Text will be brought into this field. If not, you will need to add Alt Text in the field. Describe the content and function of the image using as few words as possible. Alternative text is read by screen readers allowing the content and function of an image to be accessible to those with visual or certain cognitive disabilities. To learn more about alternative text visit http://webaim.org/techniques/alttext/.
- Image Alignment: Select the desired alignment. The options are None, Left, Center, and Right. The default is Center.
- Transcript Title: The default transcript title is Image Hotspots Transcript. Adjust the transcript title as needed.
- Reading Order: The Reading Order allows screen reader users to navigate through elements on a page or website in a logical order.
- Automatic: screen readers will read the interactive elements from the top of the page to the bottom, reading left to right.
- Manual: content creators can manually set the order that they want screen readers to follow by selecting the hamburger icon next to the answer choice and dragging it to the correct spot.
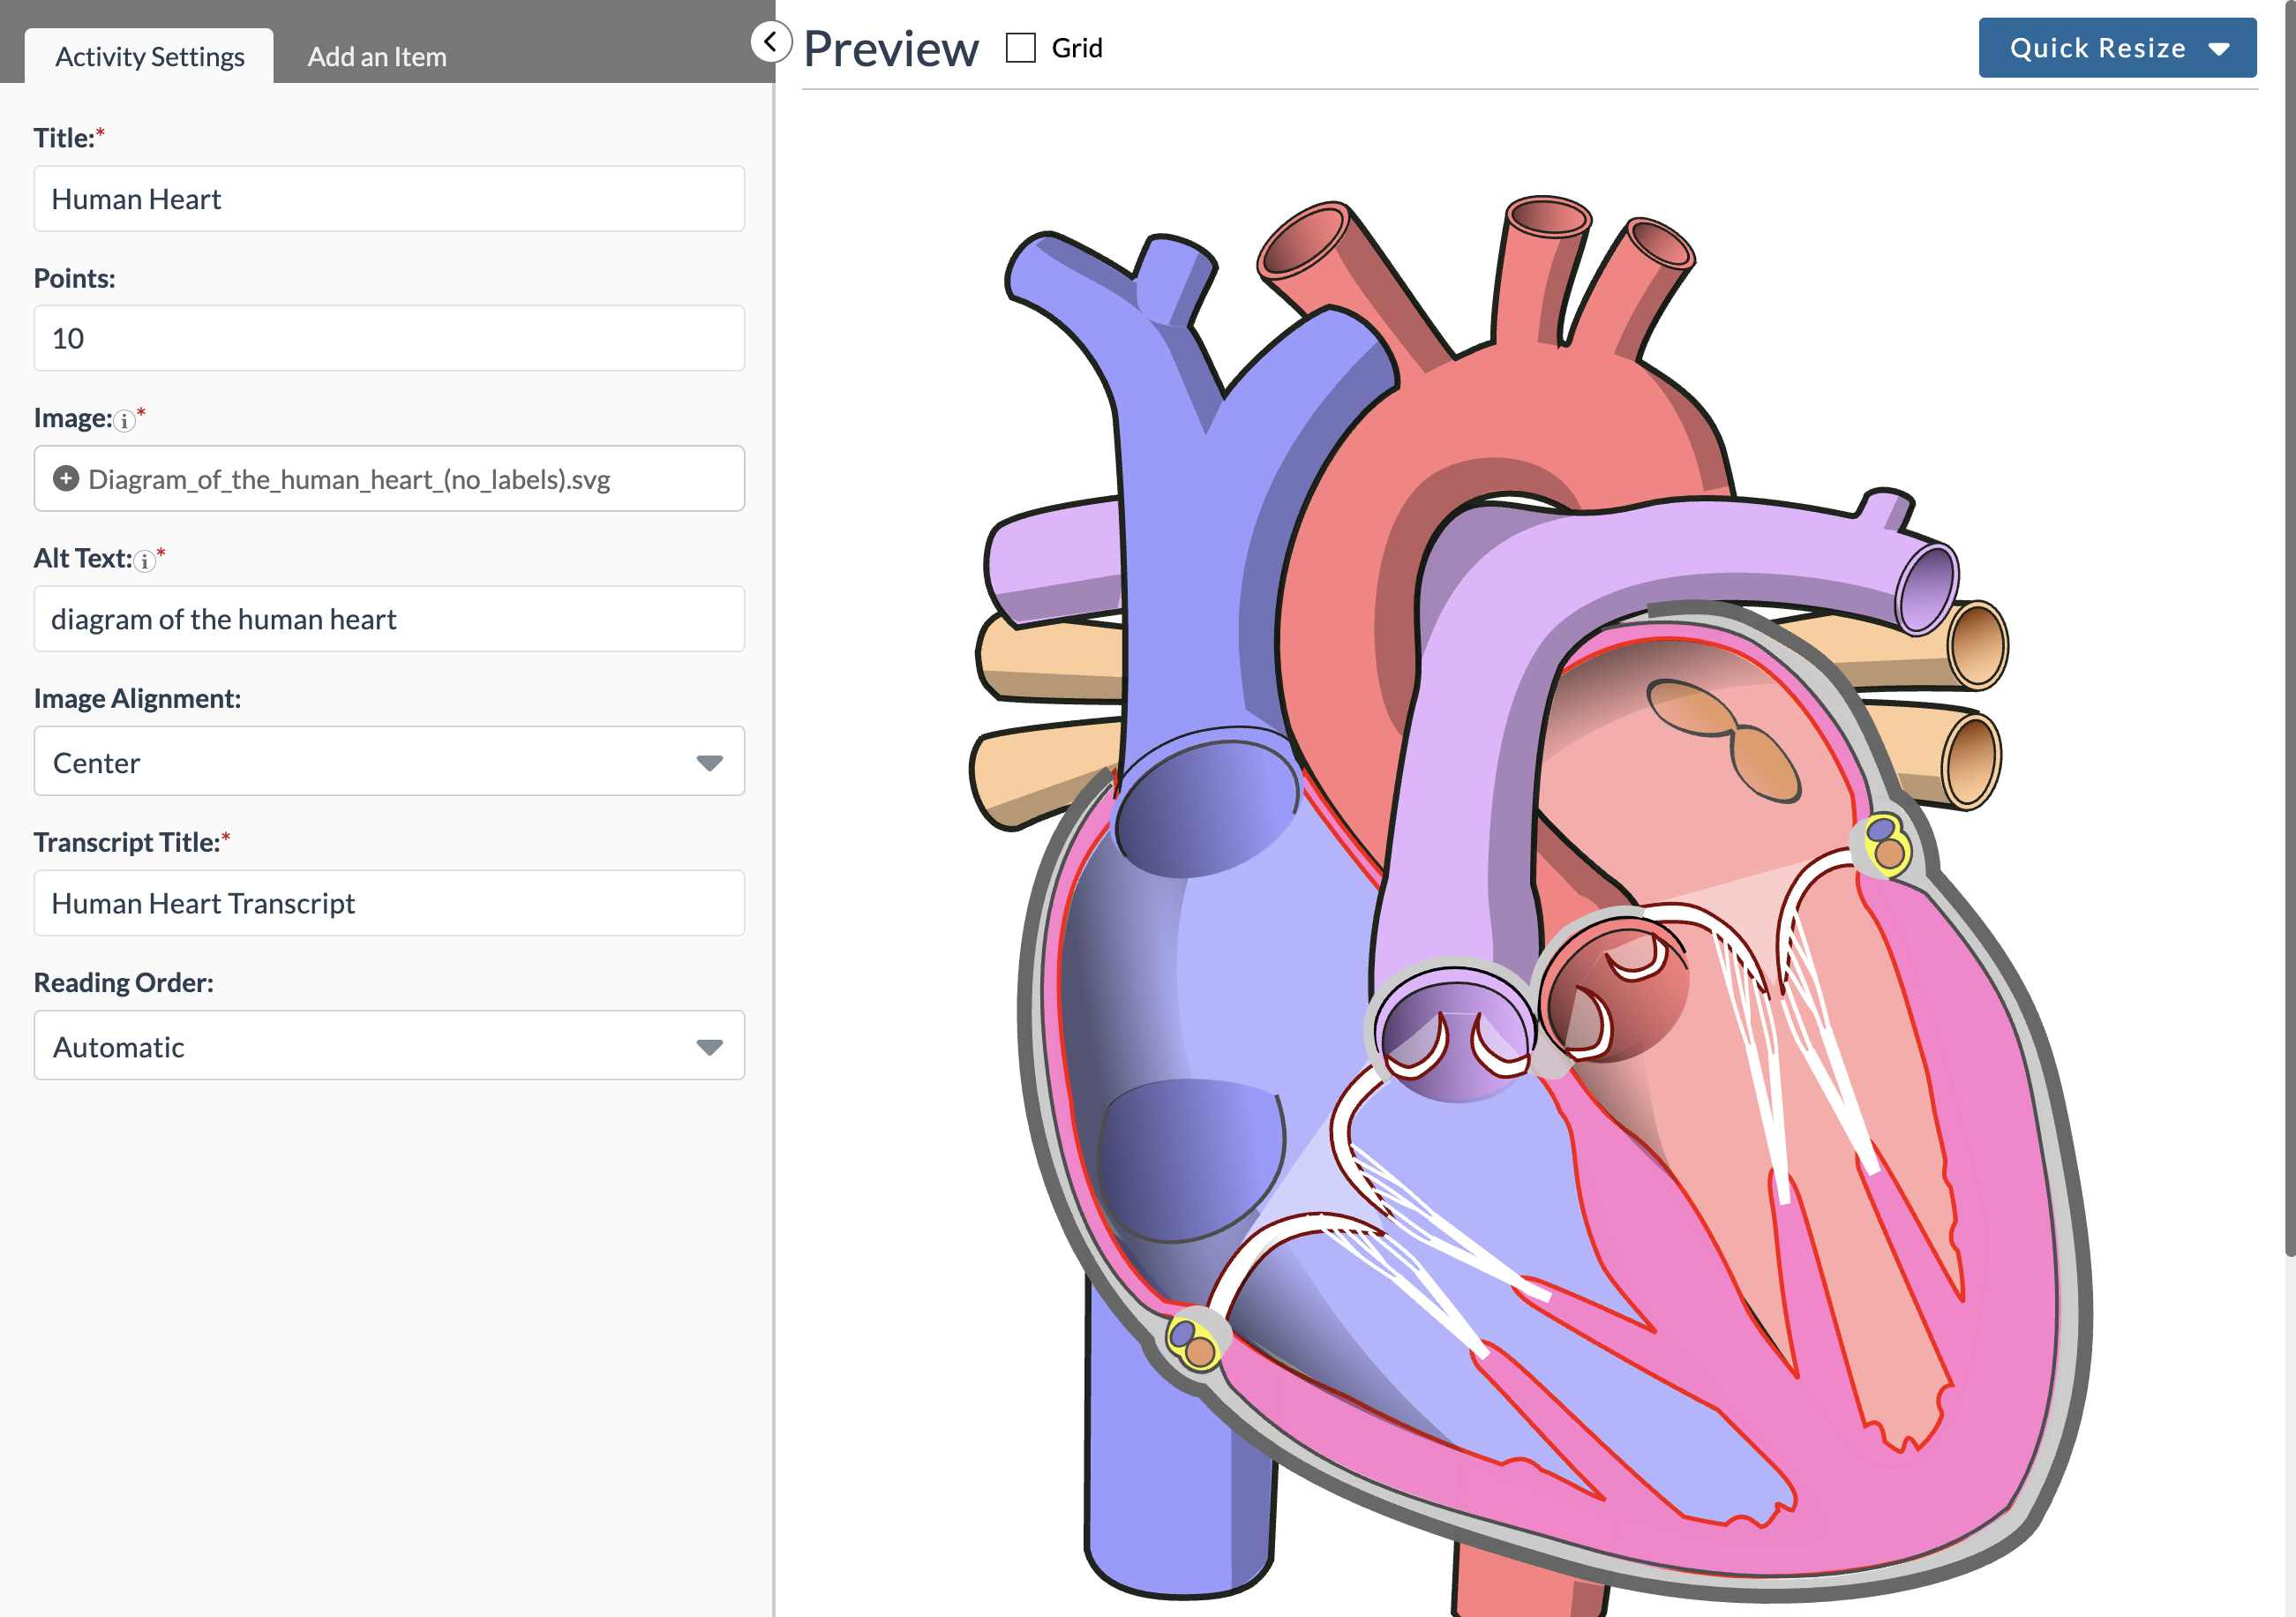
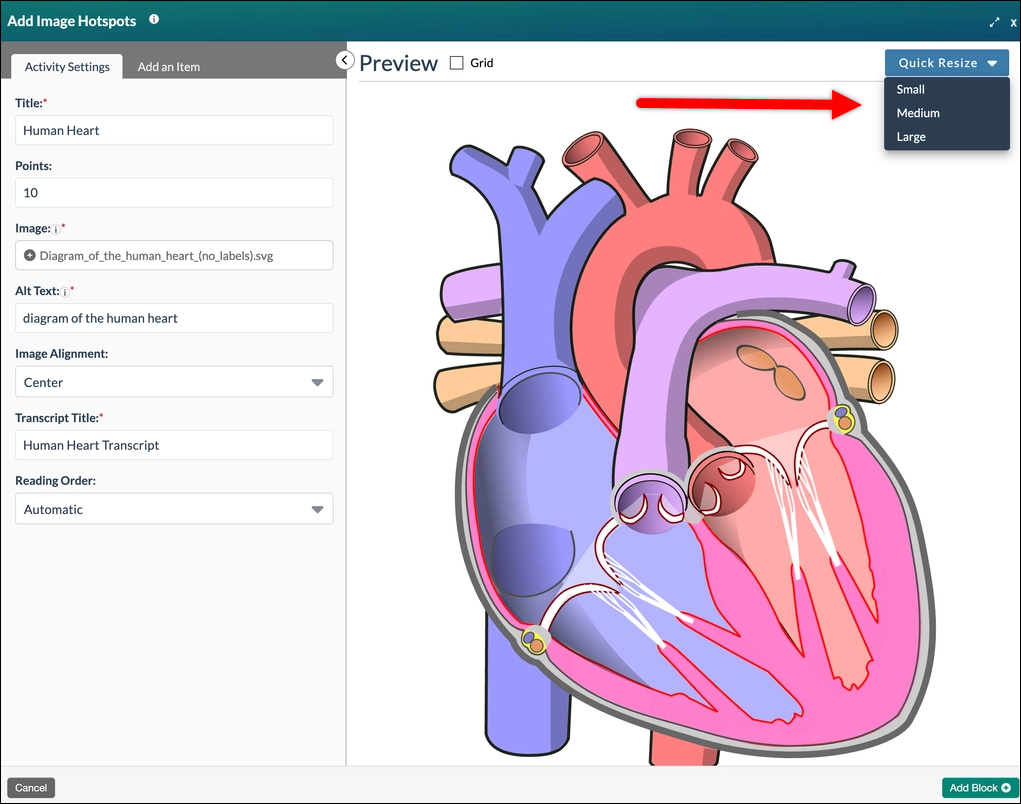
After adding an image, it will appear in the Preview pane. Use the Quick Resize button to adjust its size as needed.
Select the Add an Item tab to add a hotspot. To reposition a hotspot, click and drag it or select it and use the arrow keys. Each hotspot has the following settings:
- Label: Enter a label for the hotspot item.
- Icon: Select the icon style for the hotspot item.
- Content: Enter the content for the hotspot item. Content may include lists, links, equations and some HTML.
- Audio: If desired, audio can be added inside the hotspot item. Select from existing audio or upload a new audio file.
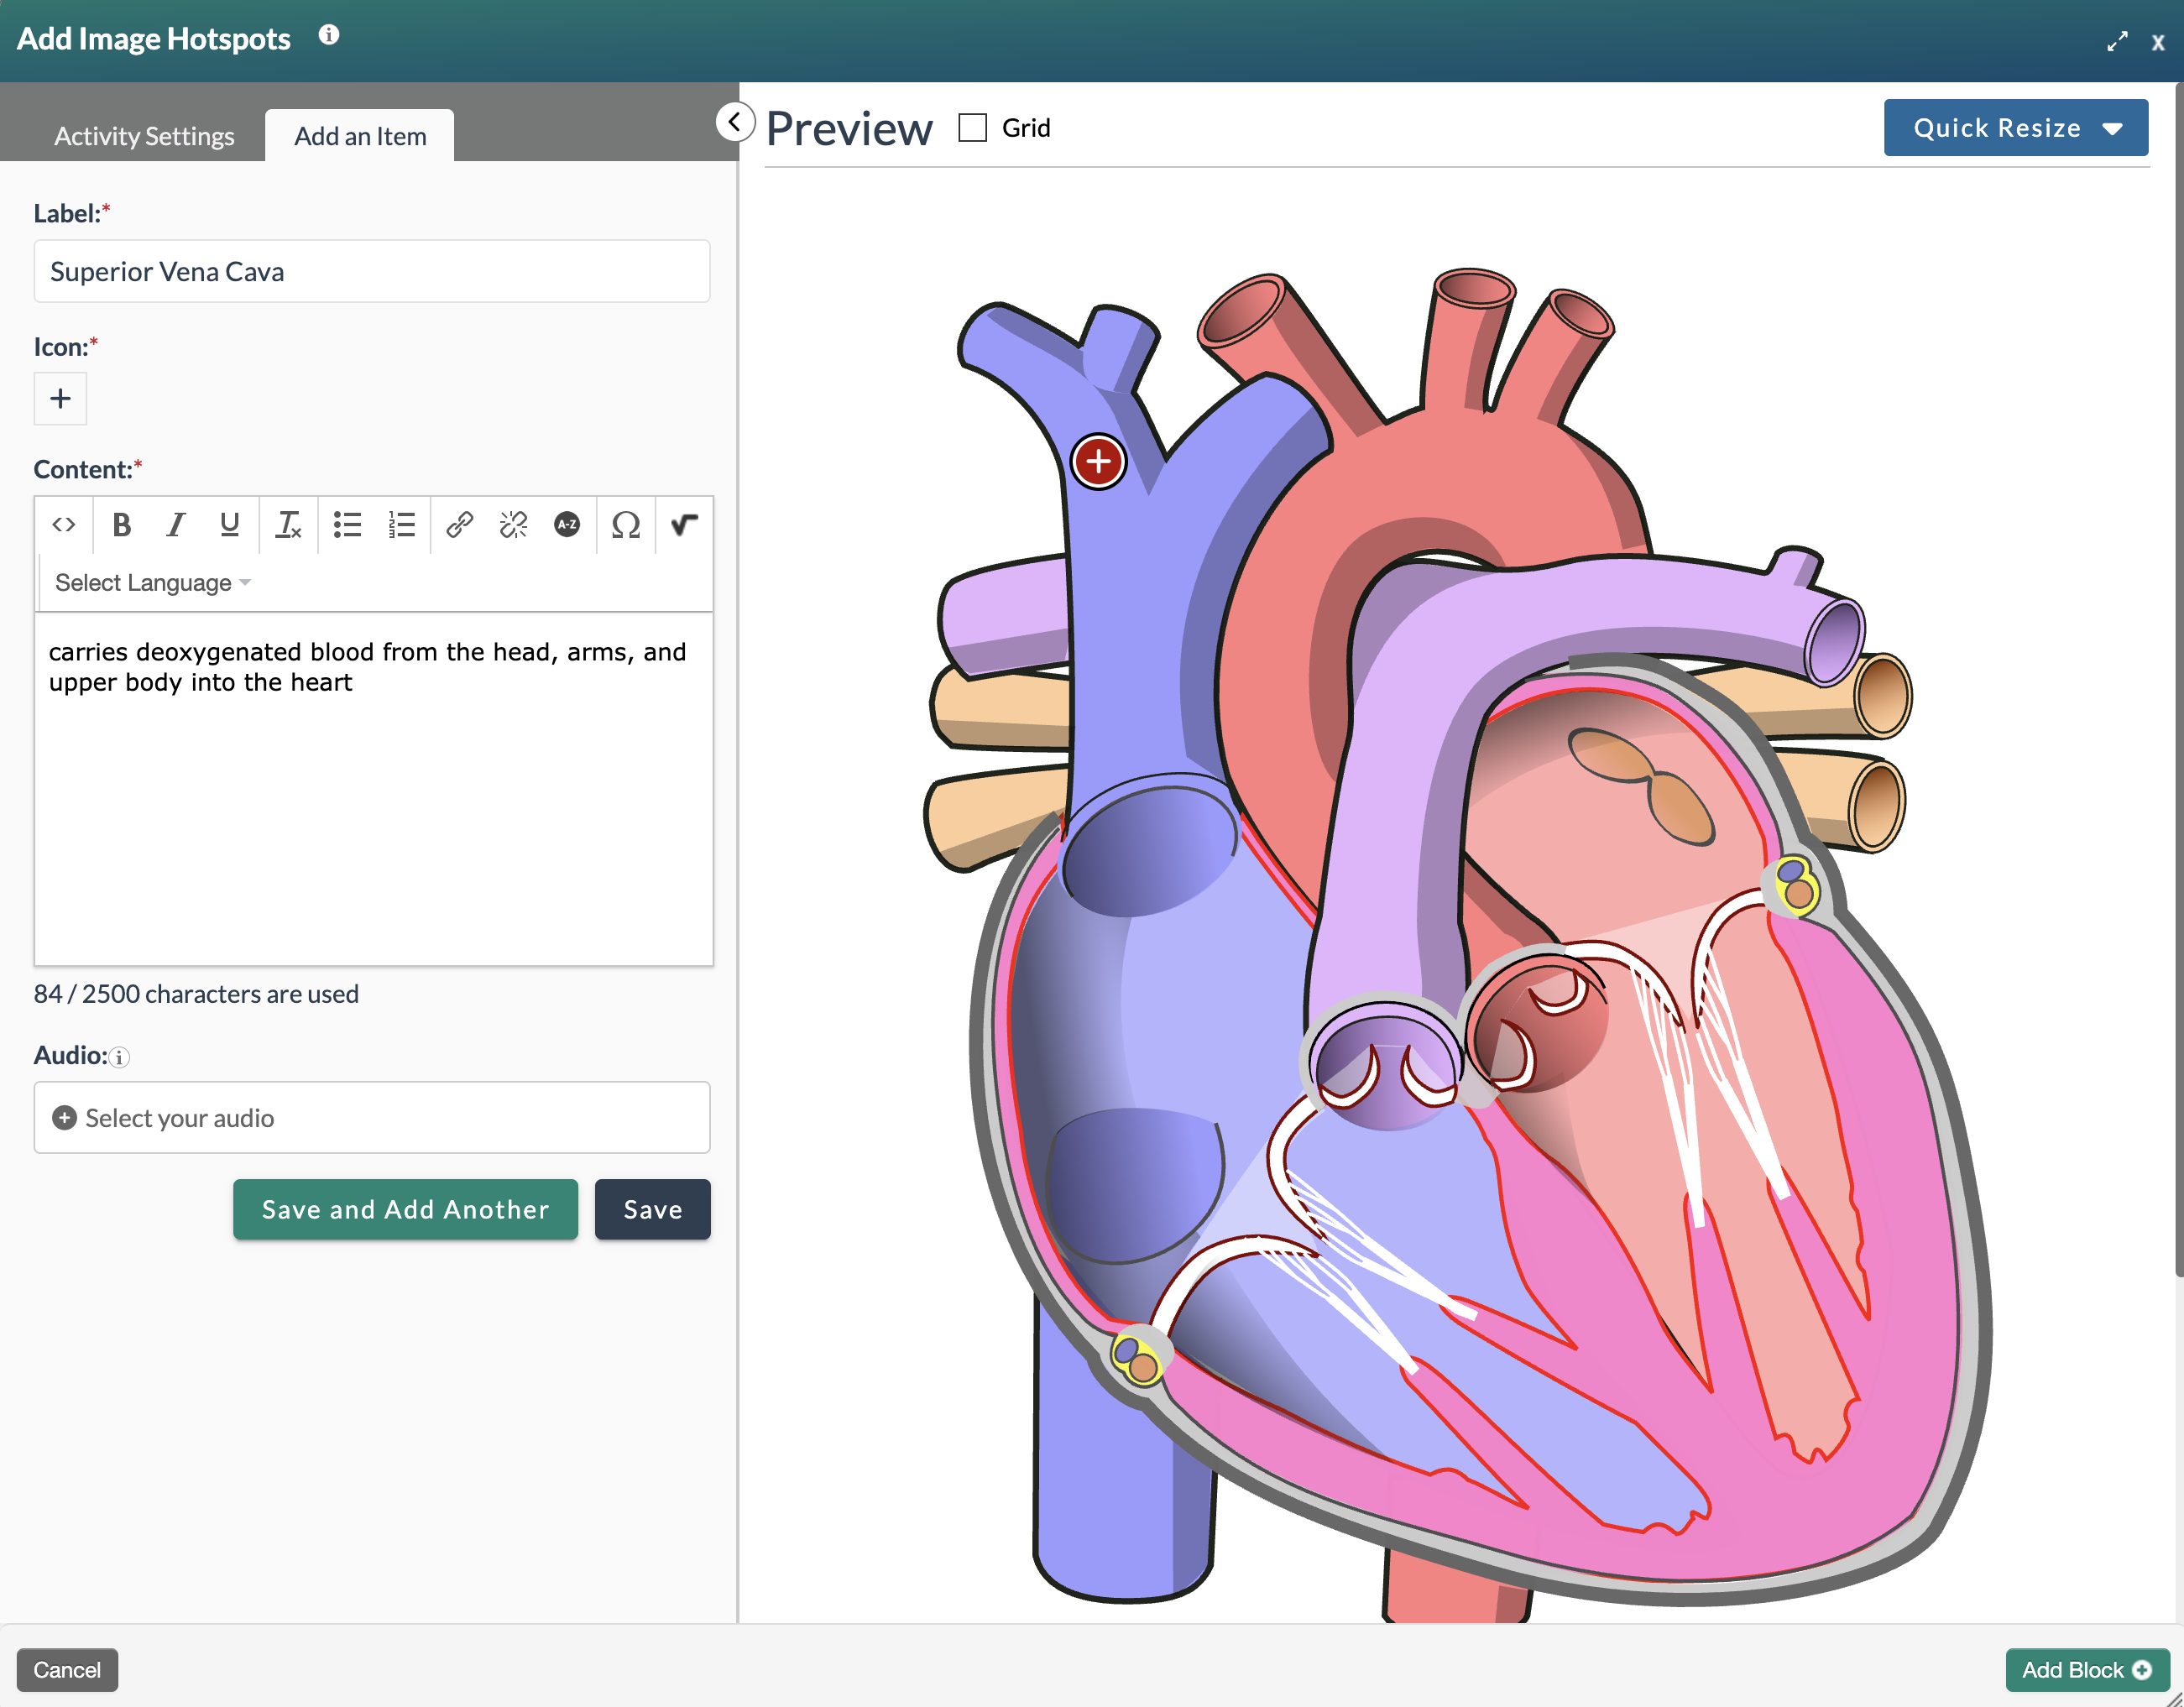
- Select Save to save the label, or select Save and Add Another to add additional labels. Repeat until all labels have been added. Select the Add Block+ button to save the block.
- The new block will appear on the page in Edit Mode with a red, dotted outline indicating it's editable.
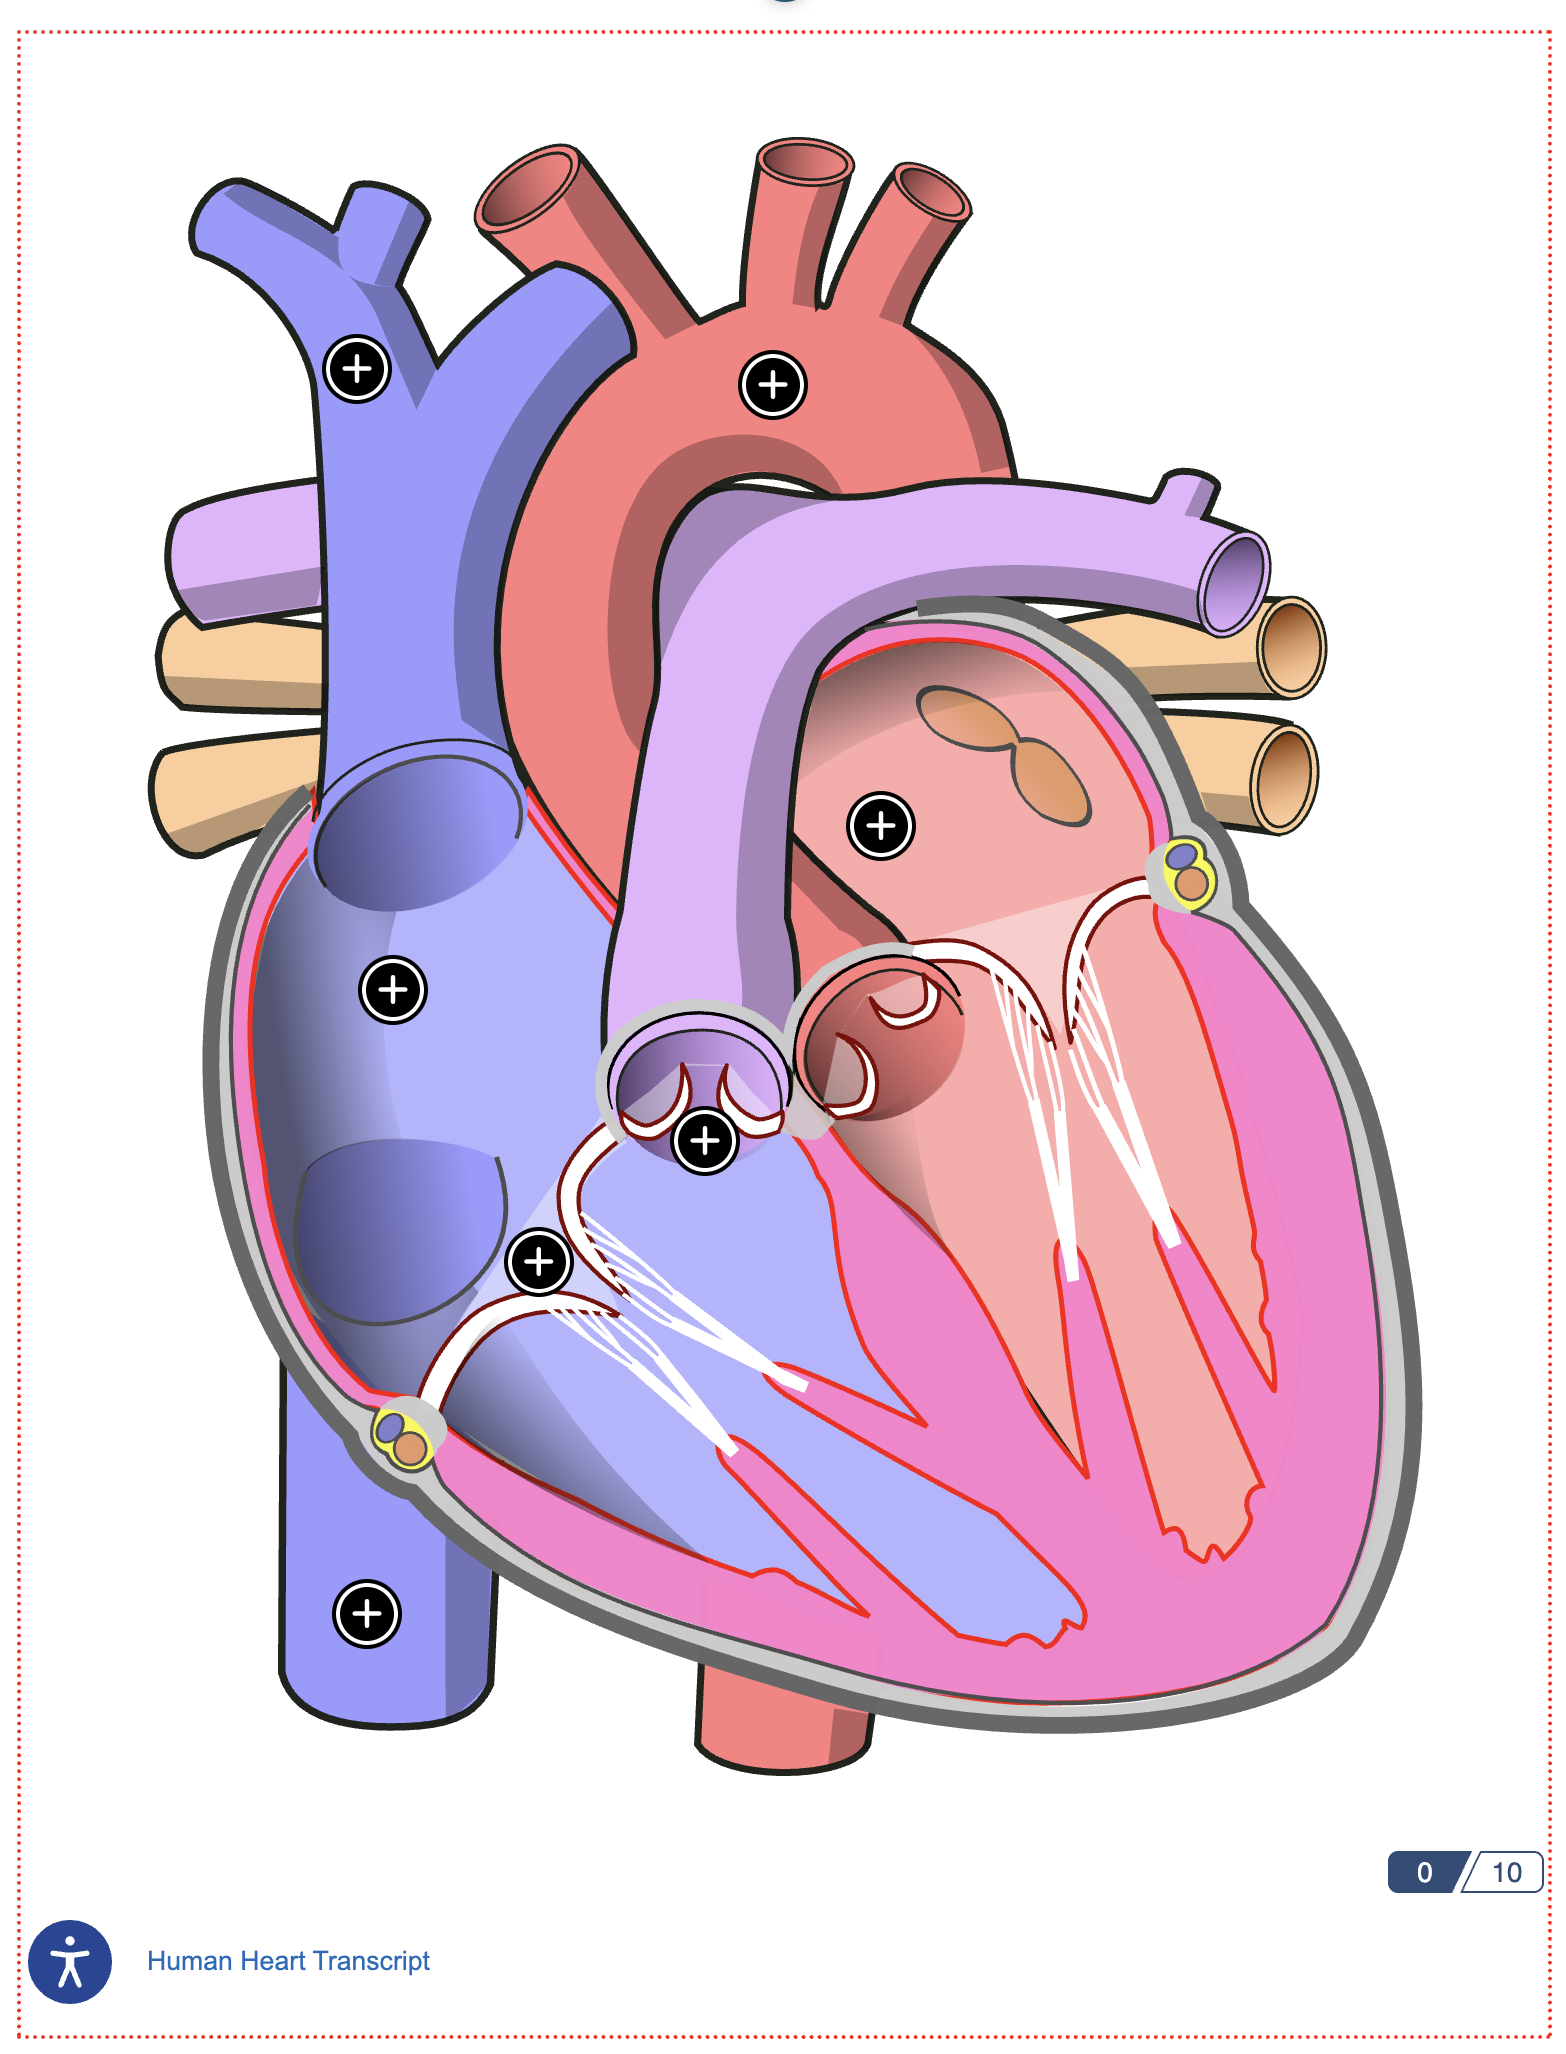
- Select the Publish My Edits button to save the block to the course page and see the content as it will appear to learners.
Note: A transcript is automatically generated to ensure the activity is accessible to learners.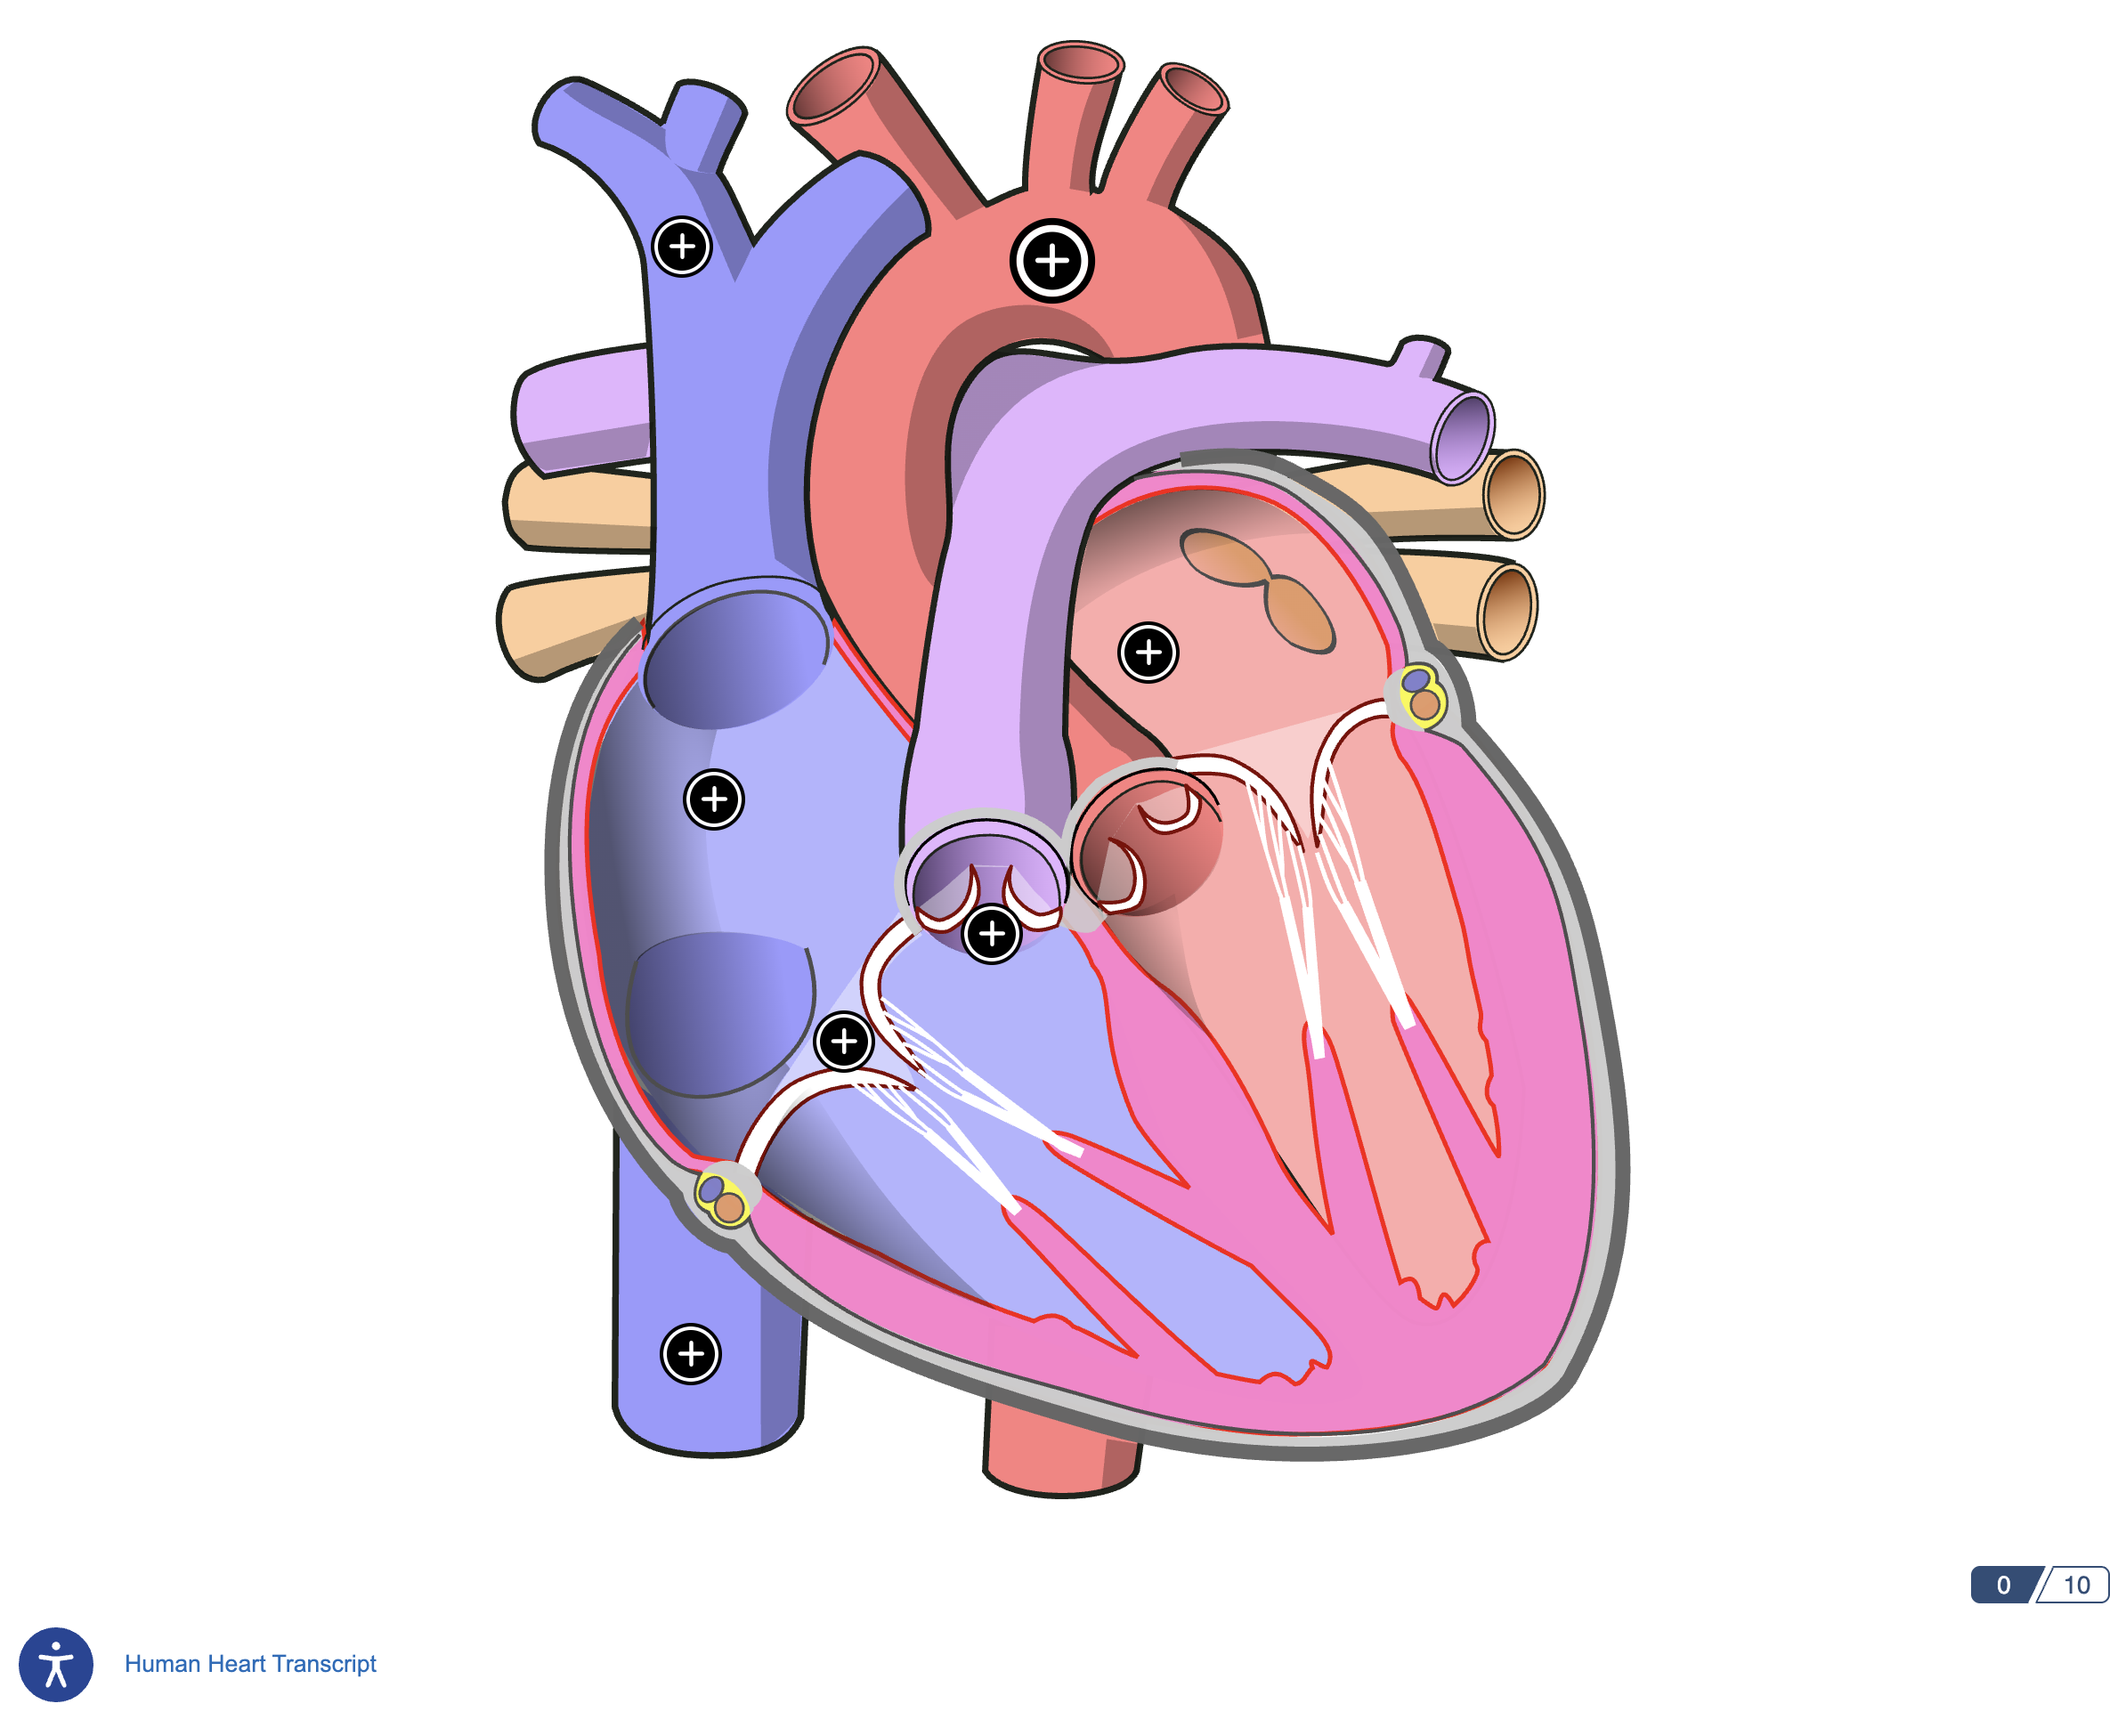
Arranging Items in the Preview Pane
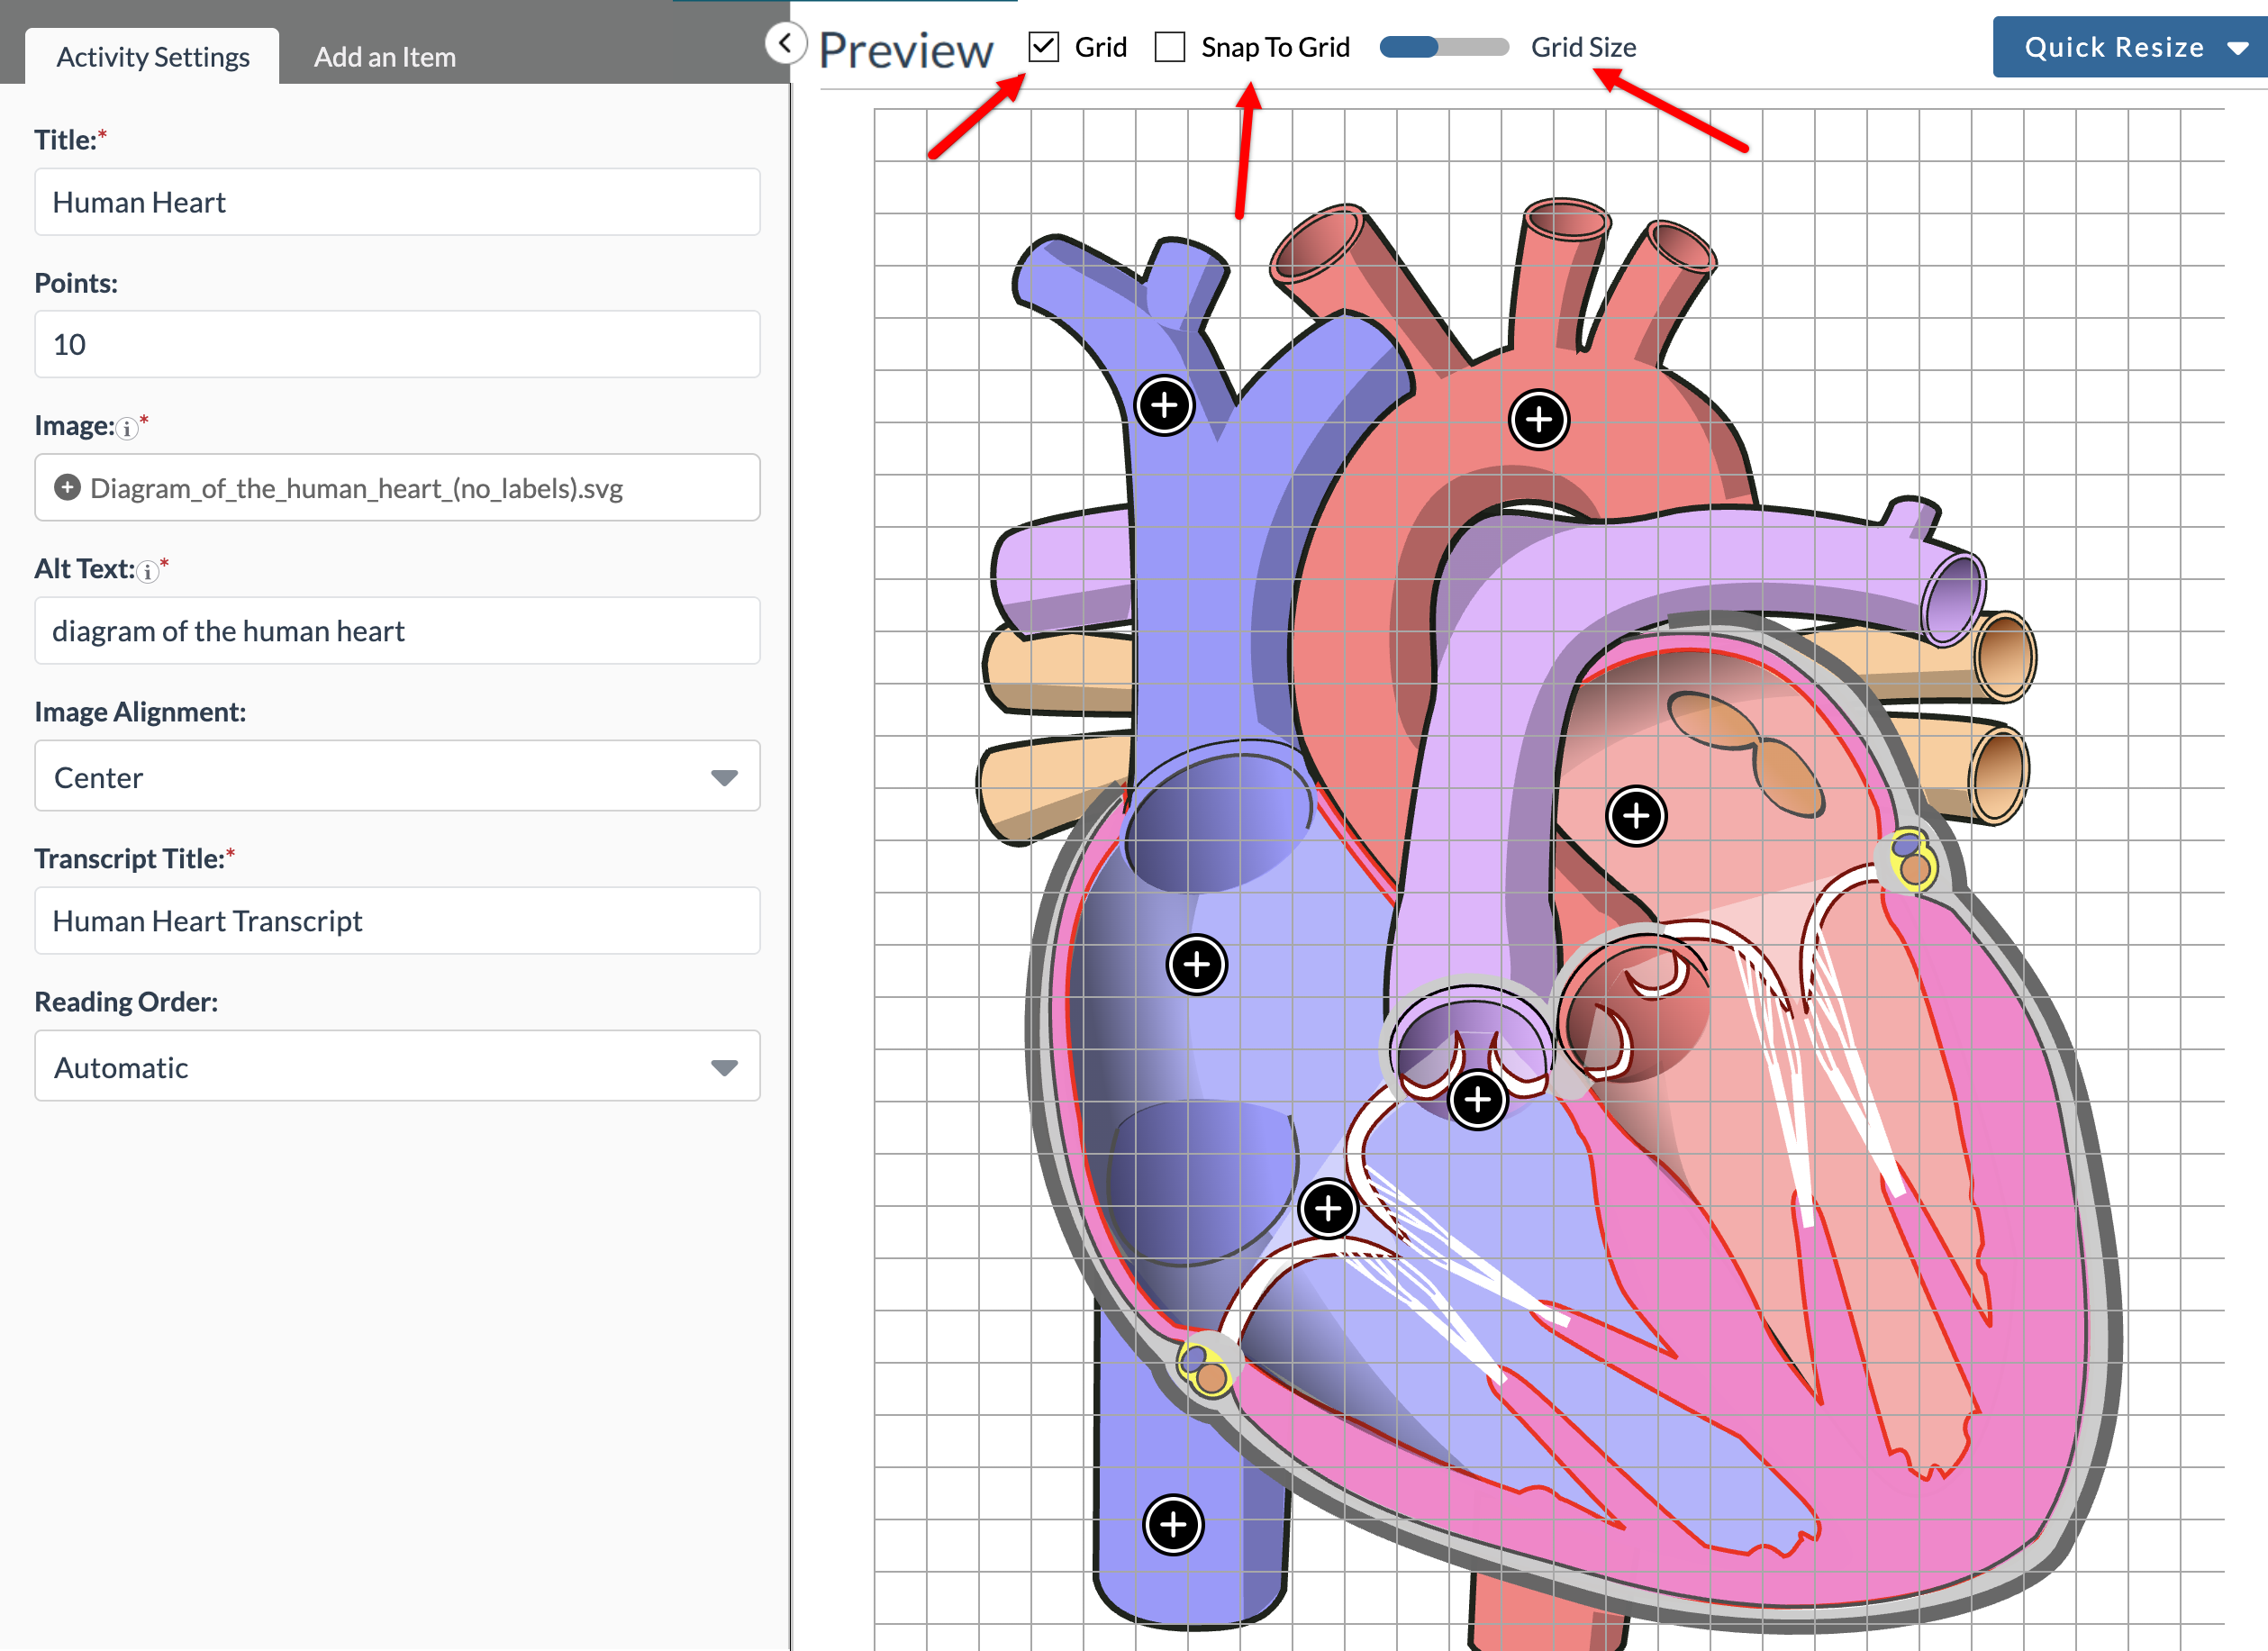
The Preview Pane includes the following options to help align hotspot items on your image:
- Grid: Display a grid overlay on the image to assist with item alignment.
- Snap to Grid: Lock items to the nearest grid point when moving them.
- Grid Size: Adjust the size of the grid.
Editing and Deleting Items
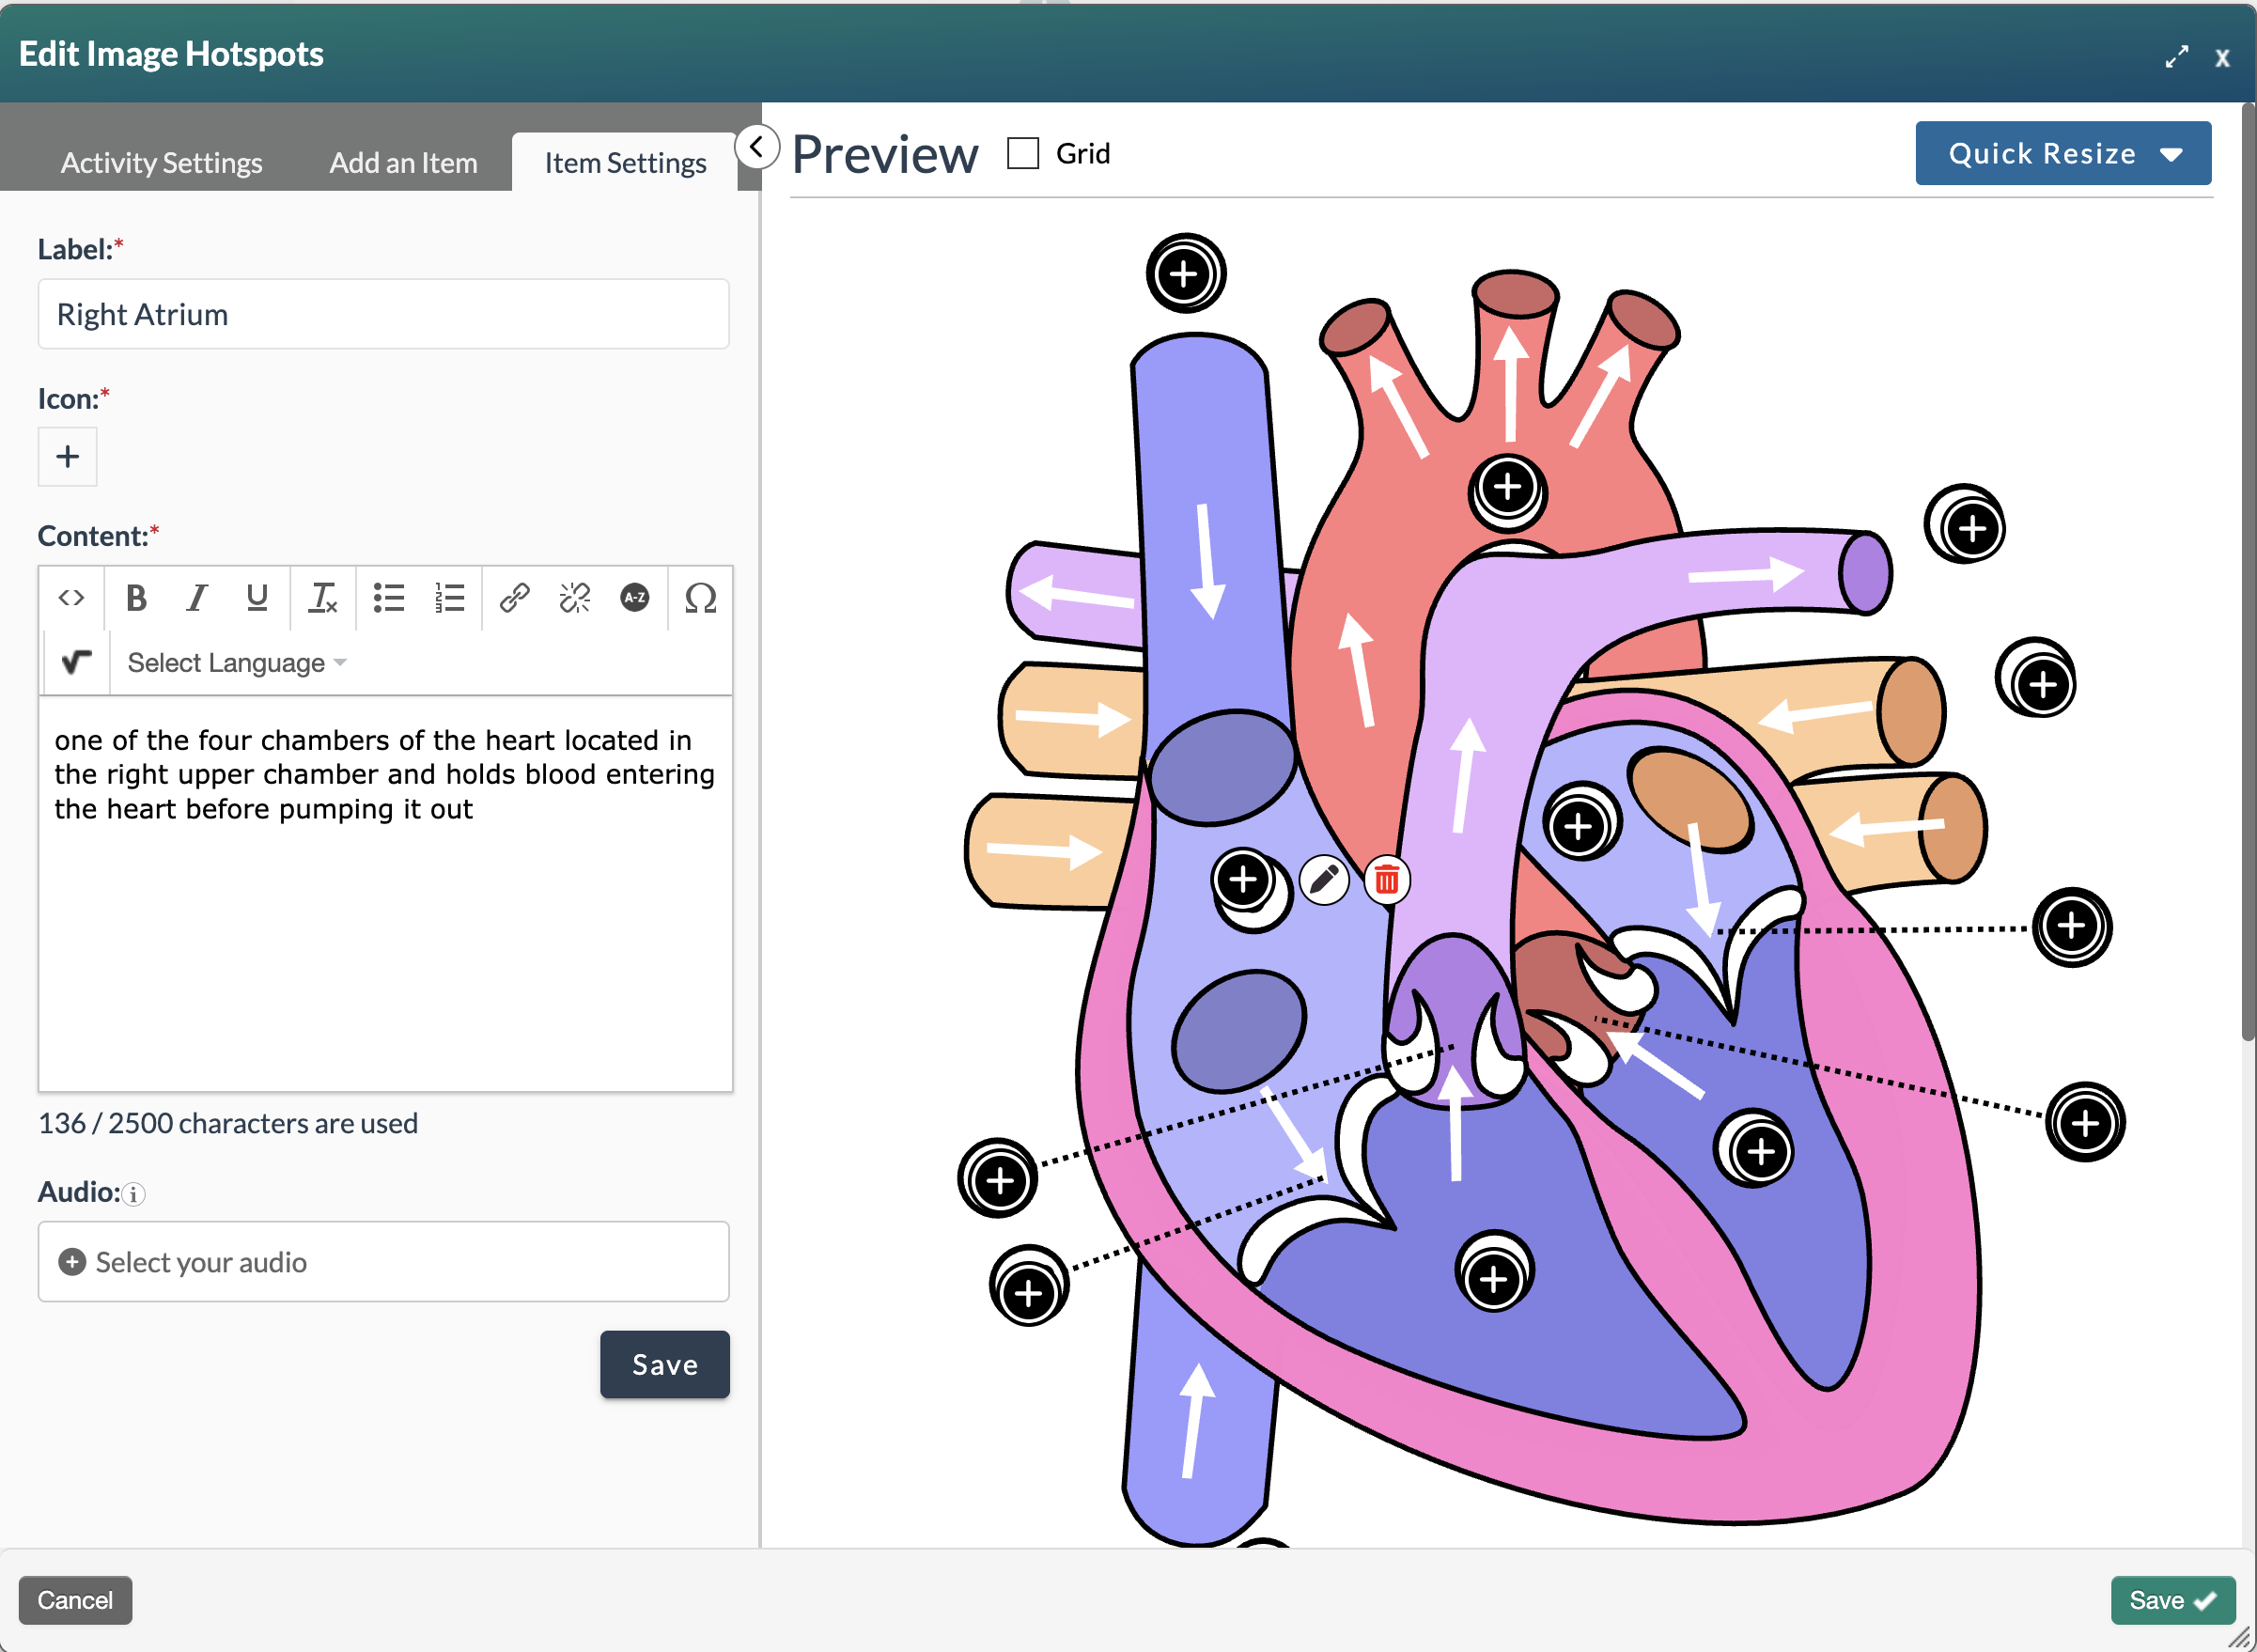
- Edit: Select the item, then select the Edit (pencil) icon. The item's settings will open in the Item Settings tab. Make changes as needed.
- Delete: Select the item, then select the Delete (trash can) icon.
Adding Audio
- To add audio, use the Select your audio button in the Audio field to choose an audio file from the File Manager.
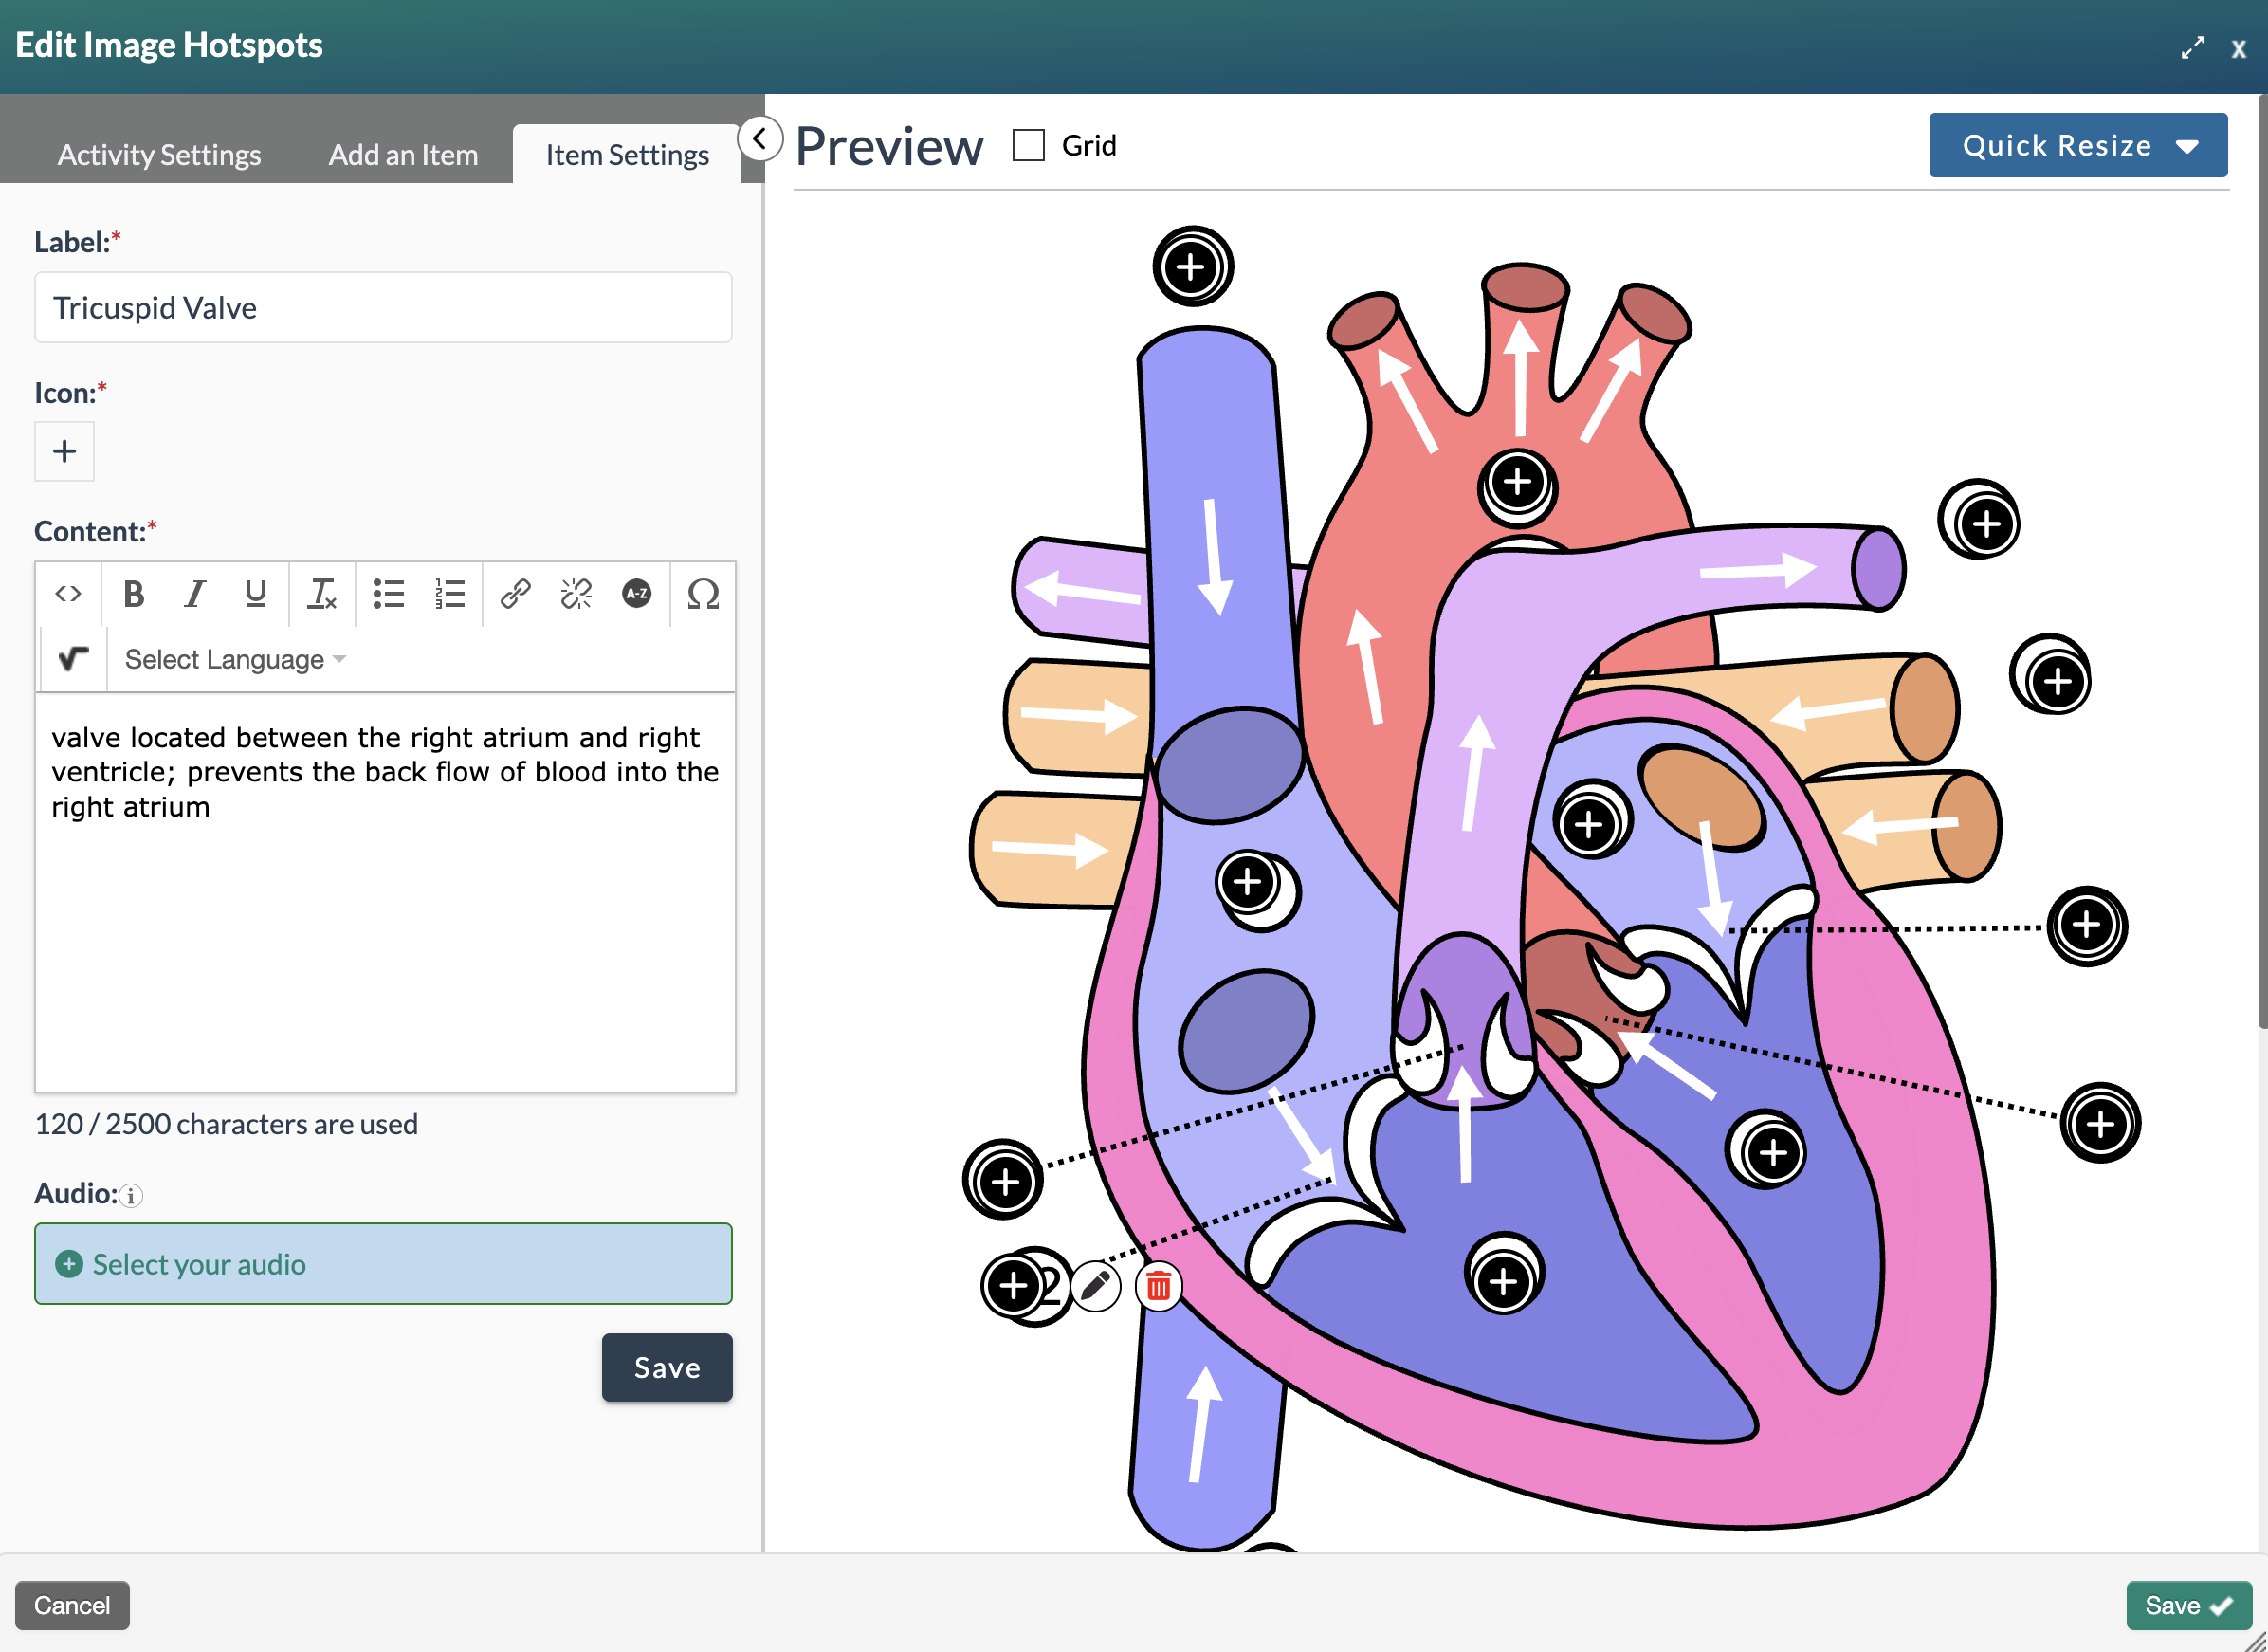
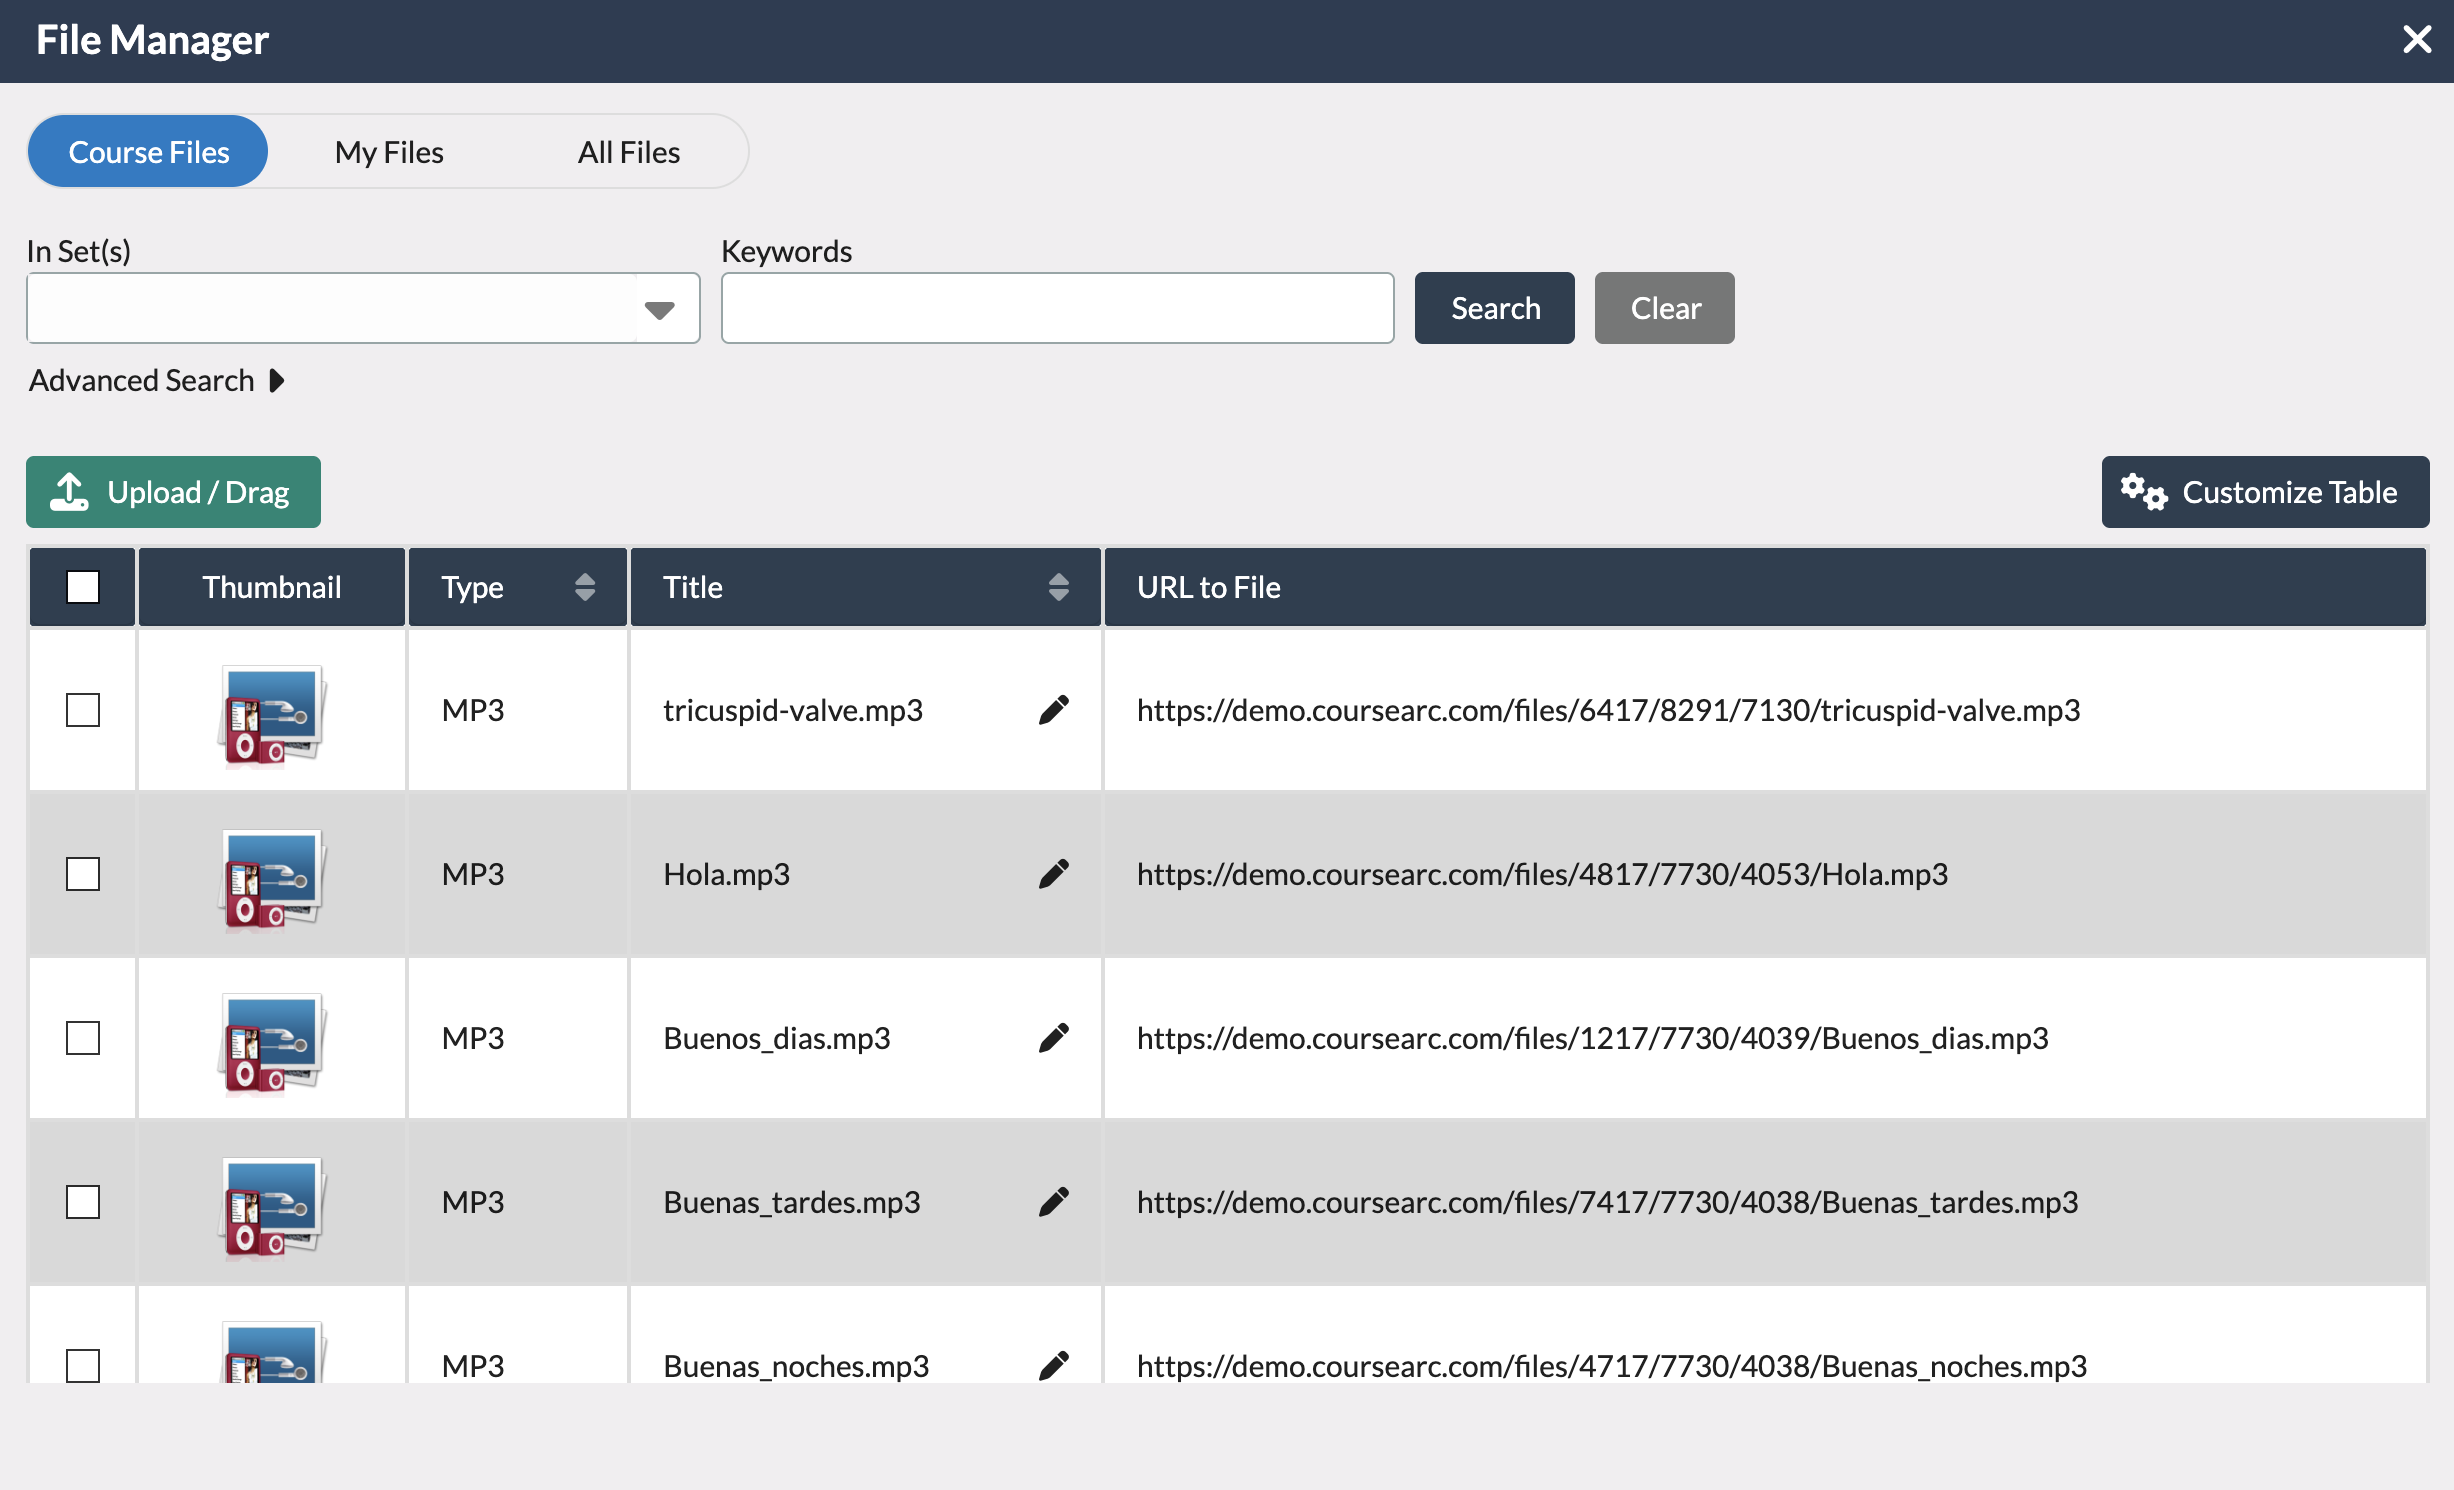
- The File Manager modal will only display audio files and is filtered to Course Files by default. Adjust the filter if needed, then search for and select the desired audio file.
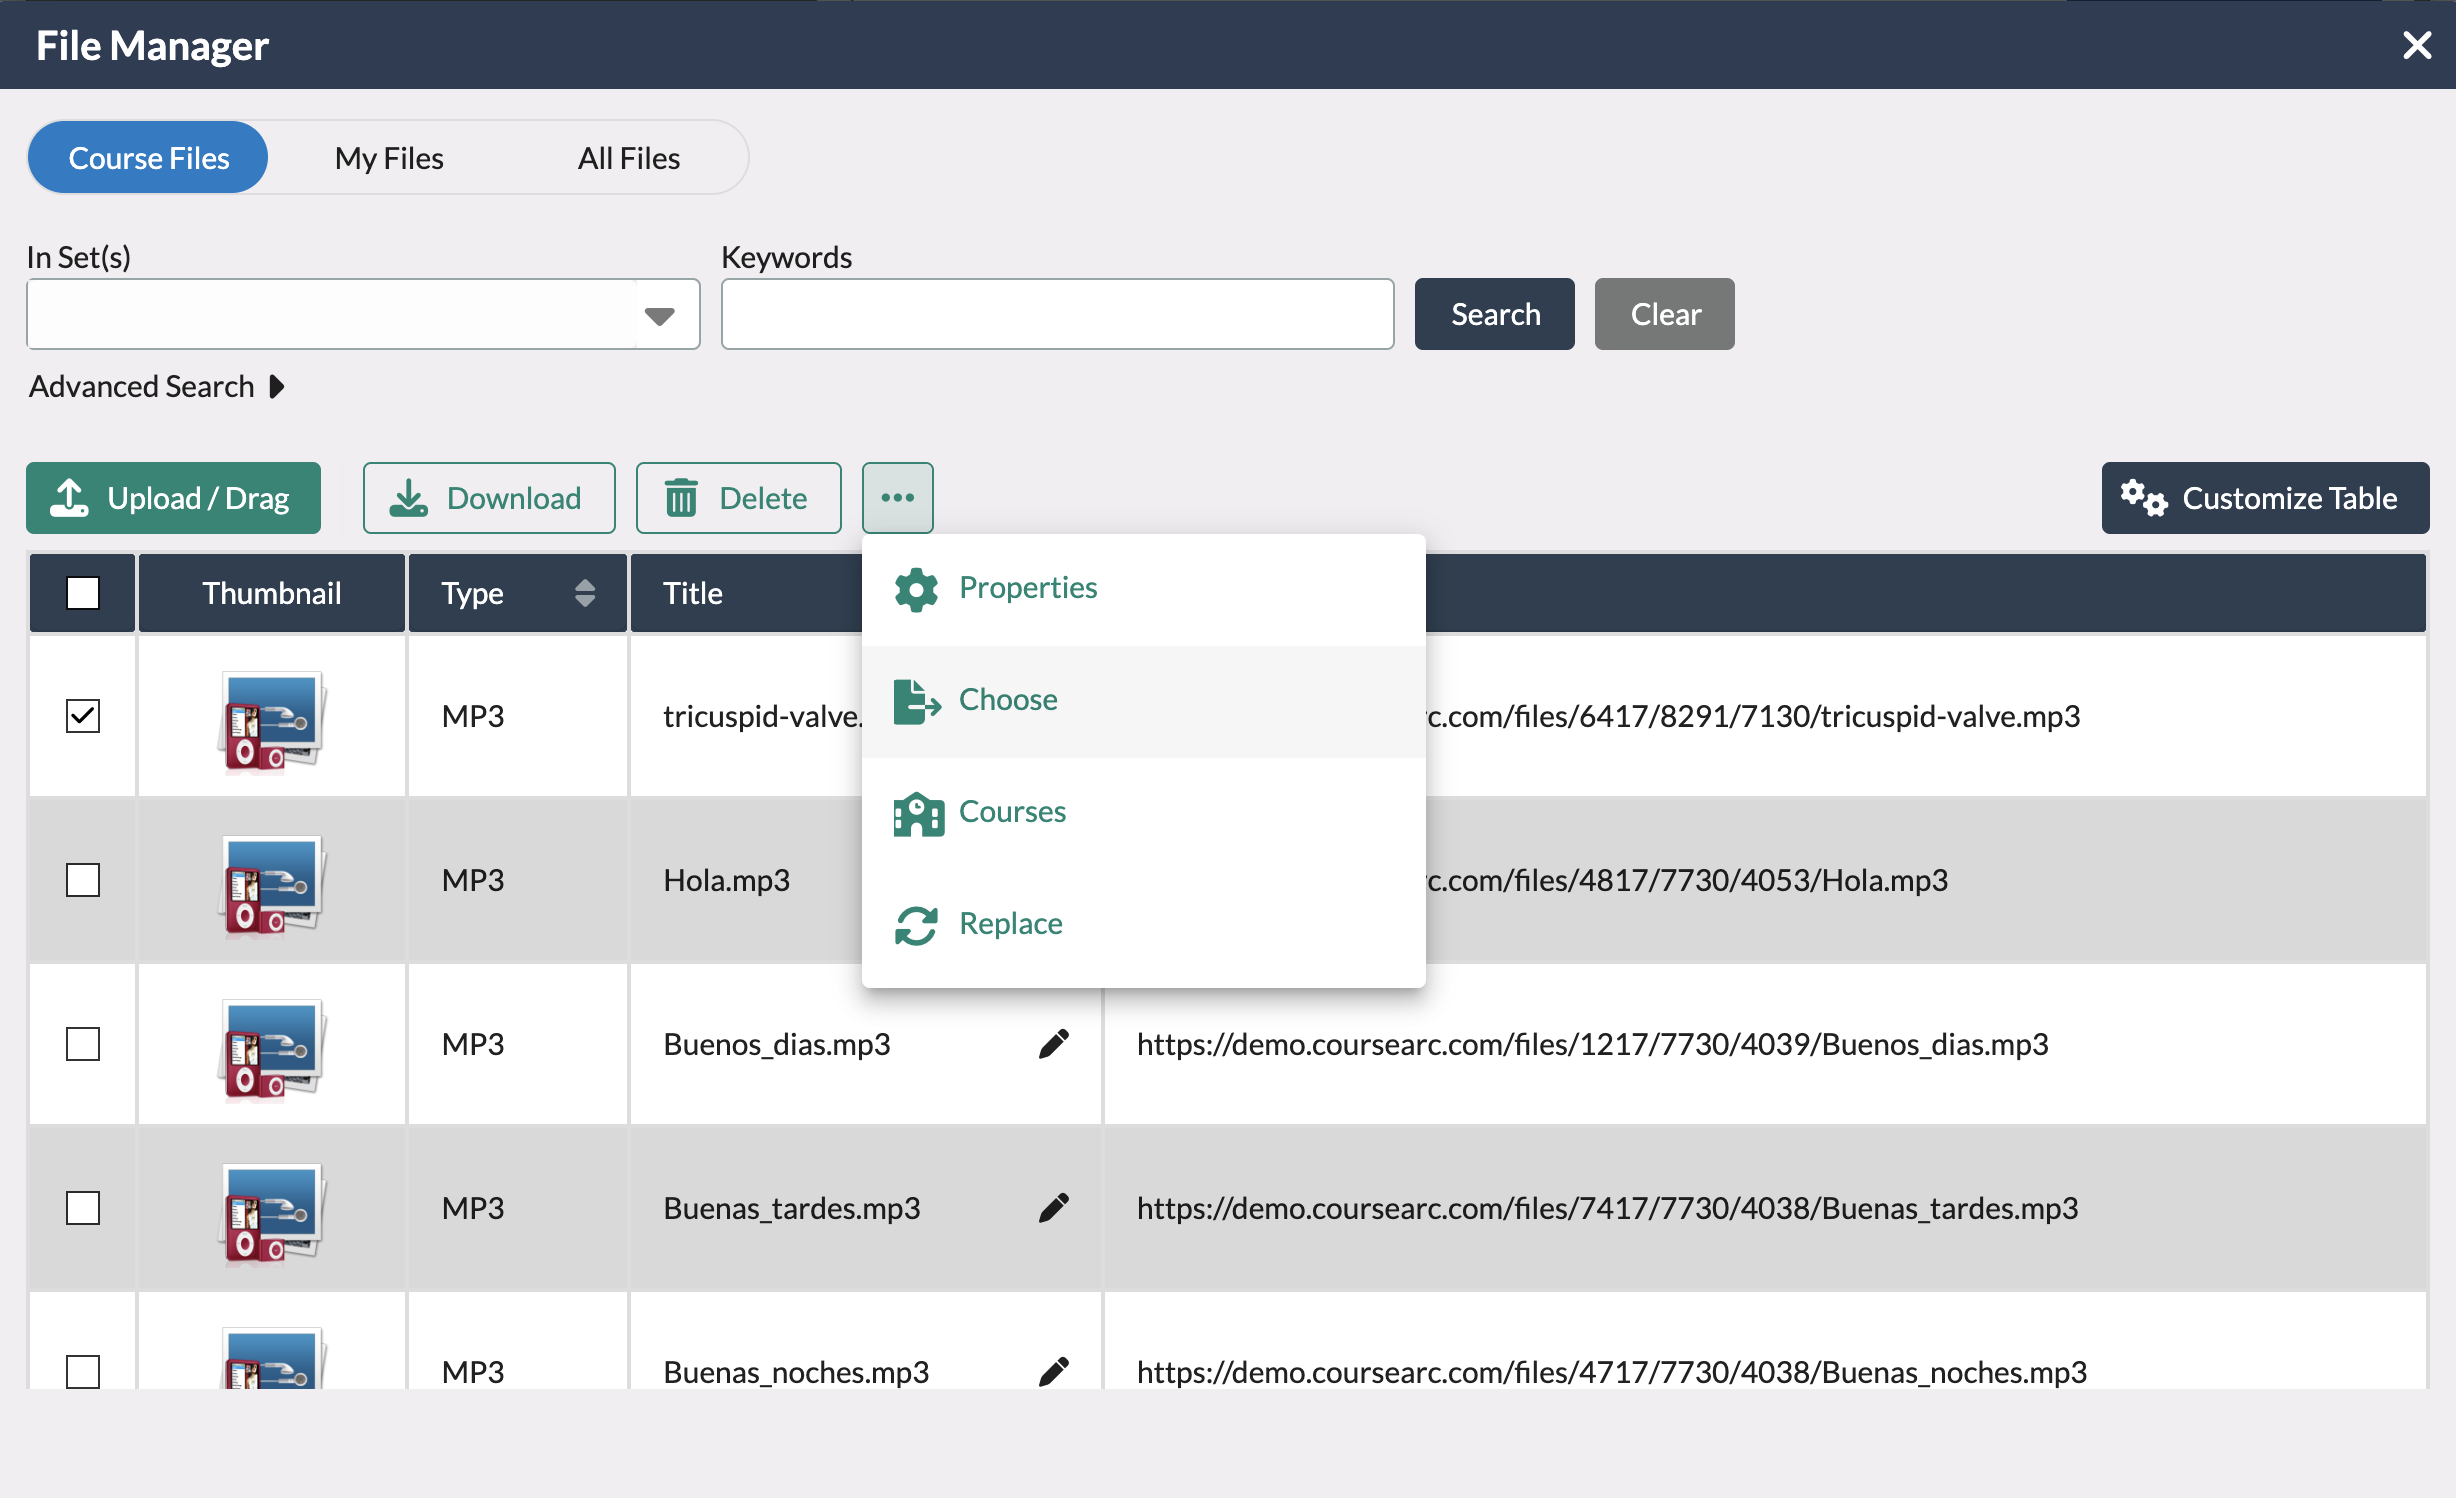
- Select the checkbox next to the file, then select Choose, to return to the Add Image Hotspots form.
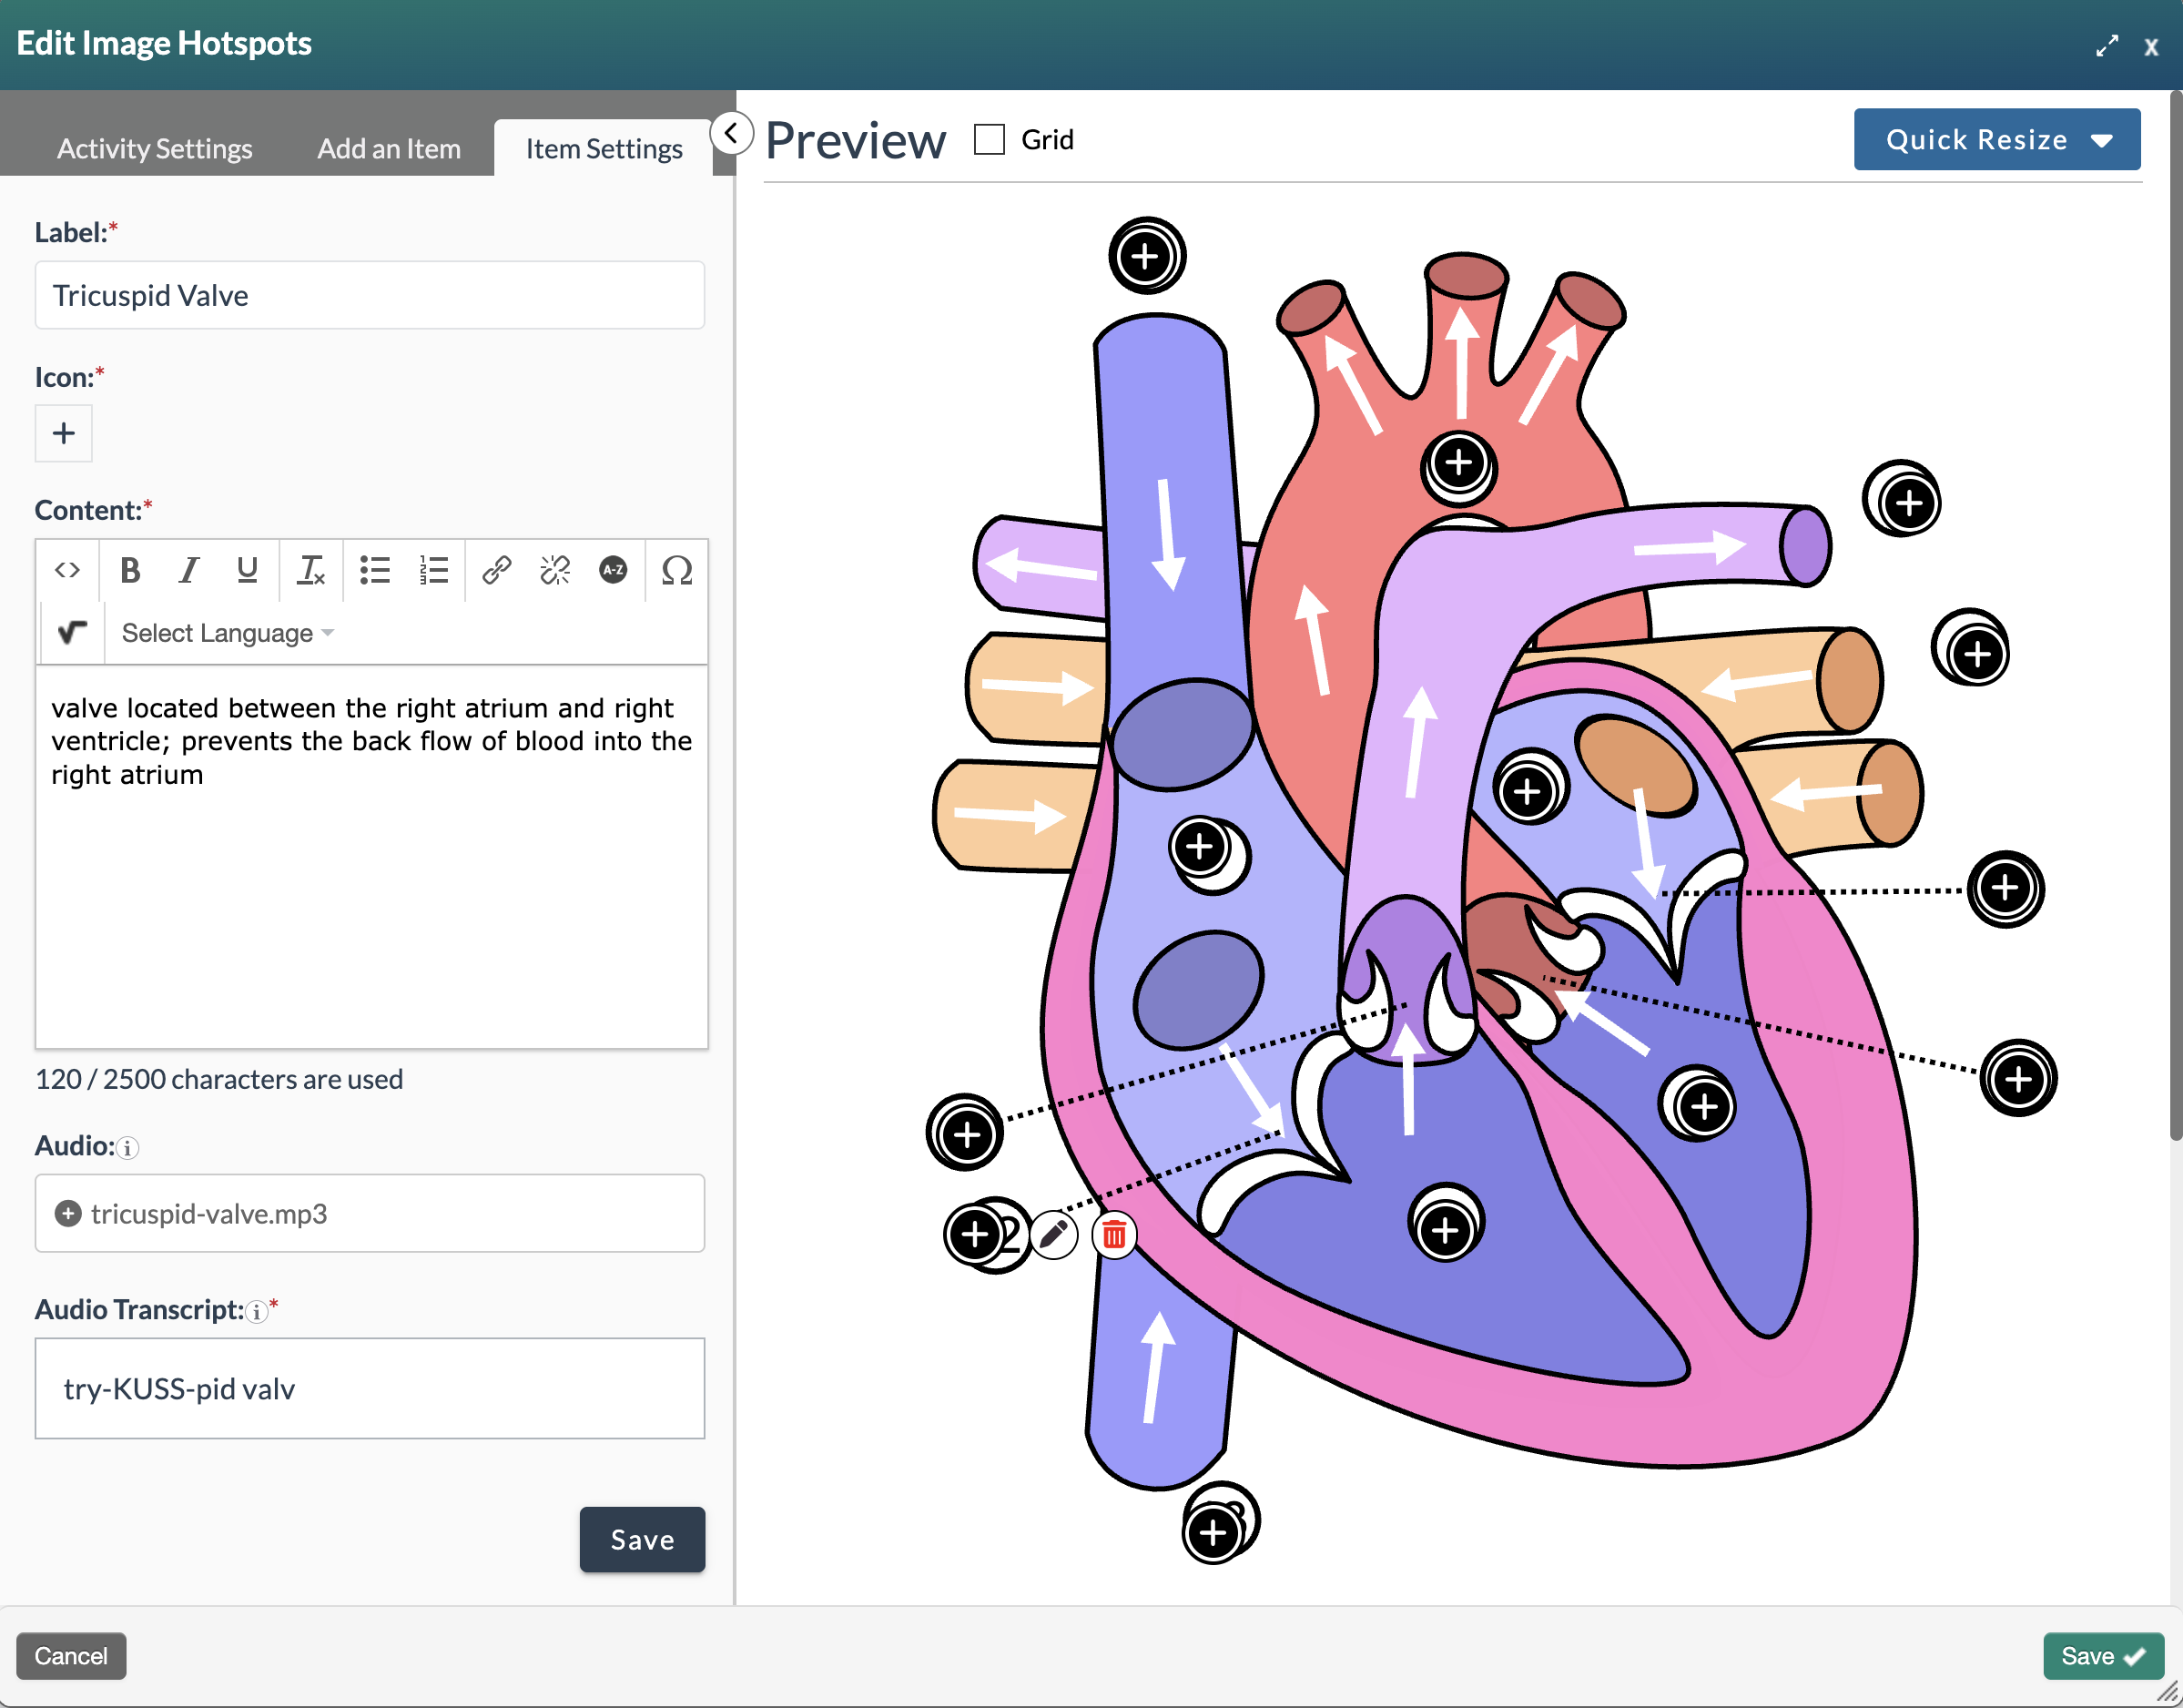
- Add a transcript for the chosen audio file in the Audio Transcript field and then elect the Save button.
Was this article helpful?
That’s Great!
Thank you for your feedback
Sorry! We couldn't be helpful
Thank you for your feedback
Feedback sent
We appreciate your effort and will try to fix the article