Section Breaks can help you add a visual break on the page to do one or more of the following:
- break text or other blocks to stop them from wrapping around an image
- add a horizontal rule between blocks
- add padding between blocks
Image Wrapping
One of CourseArc's features allows for content text to wrap around an image, as shown below. However, that may not always be the desired visual layout. (To learn how to wrap text around an image, refer to How do I align an image in an Image block?)
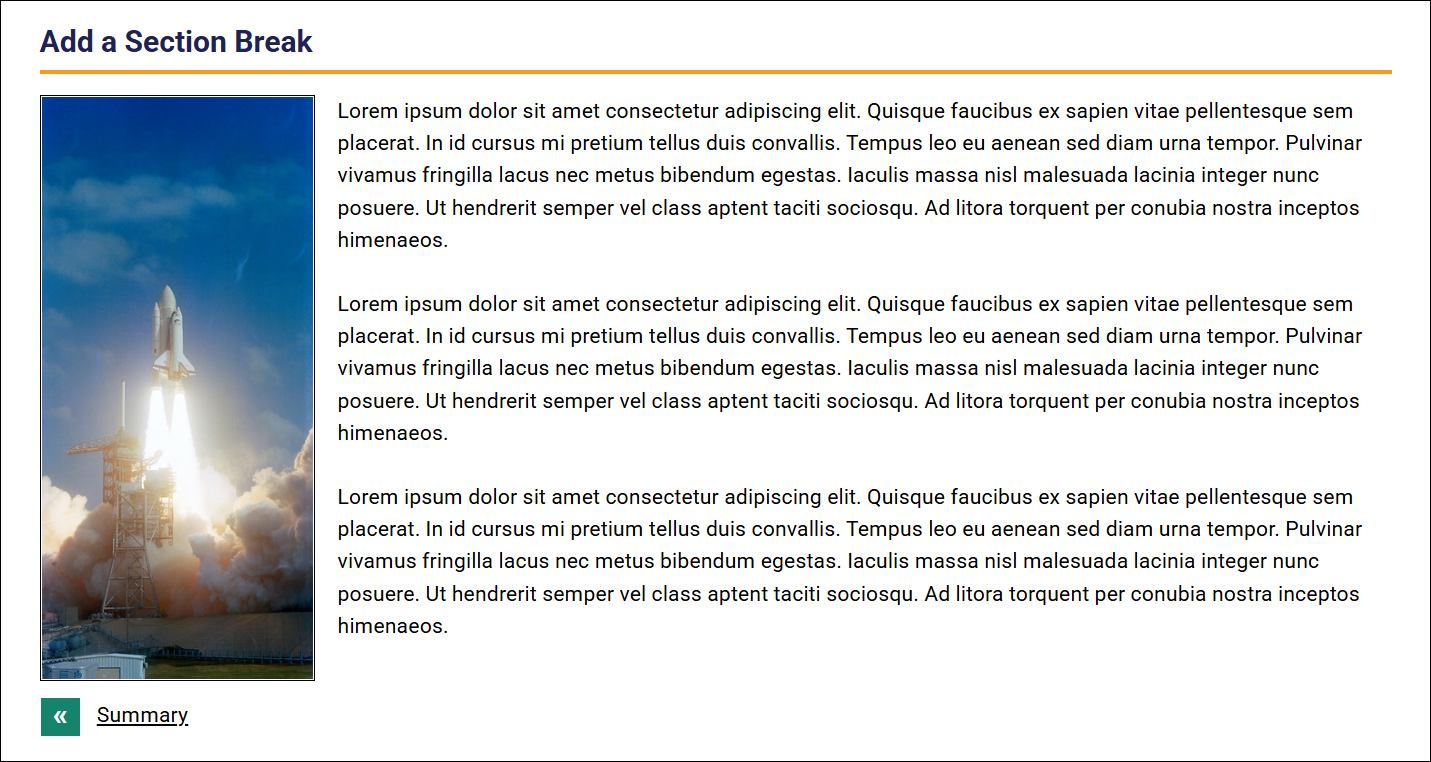
The Section Break block prevents content placed below it from wrapping around content positioned above it. For example, the Section Break block can be used to stop text in a Content block from wrapping around a right-aligned image in an Image block.
- Navigate to the page and select Edit this Page. Find the position you want to add a block and then select the plus (+) icon.

- From the dropdown, select Add Block.

- In the Add Block modal, you can:
- Use the Search field to find a block by keyword
- Select a block from your custom list of Favorites
- Scroll through the list of All Blocks to select one
- Use the various Categories to filter by block type
- Select a star icon to add or remove blocks in your Favorites list

Simple Section Break
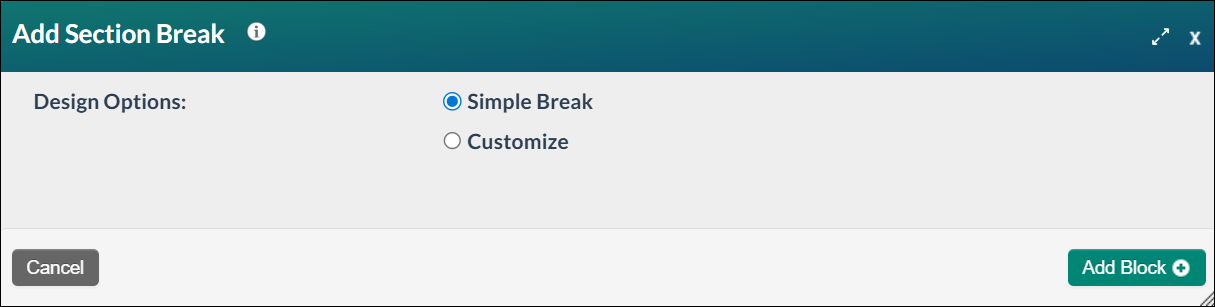
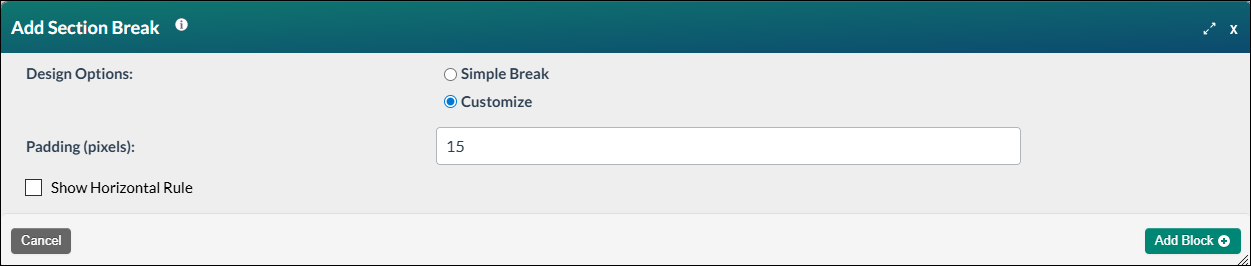
- The Section Break block has two configuration options: Simple Break or Customized. Select the Simple Break option and then select Add Block + button to save the block to the page.
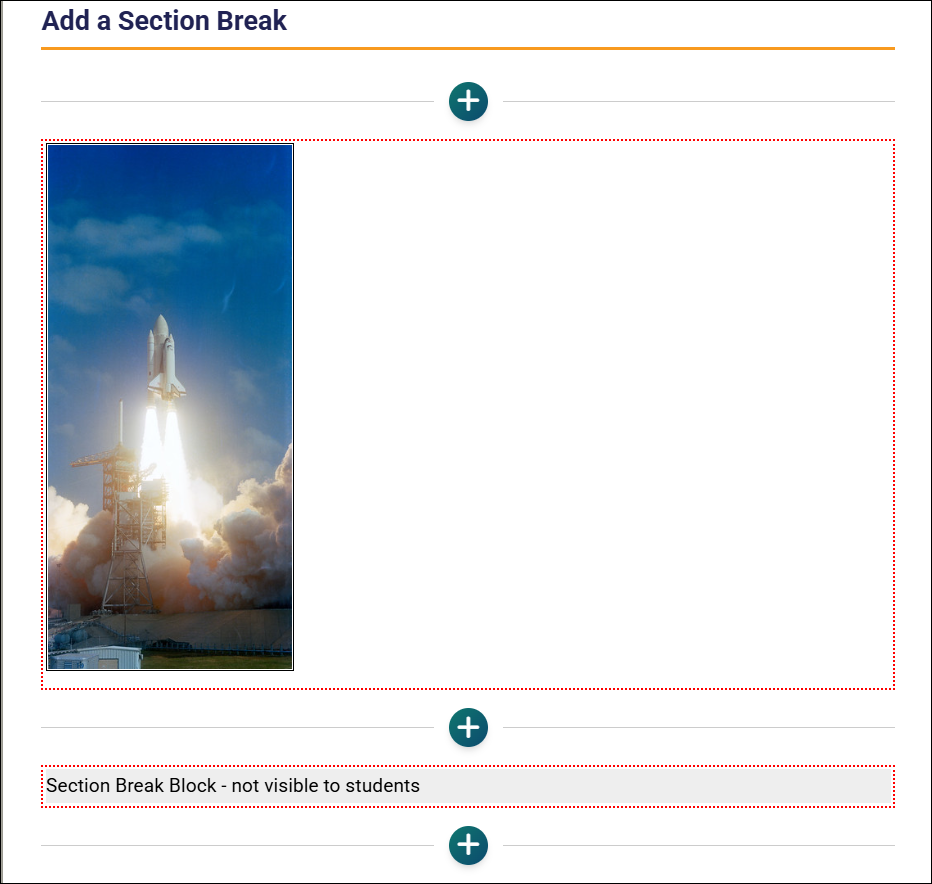
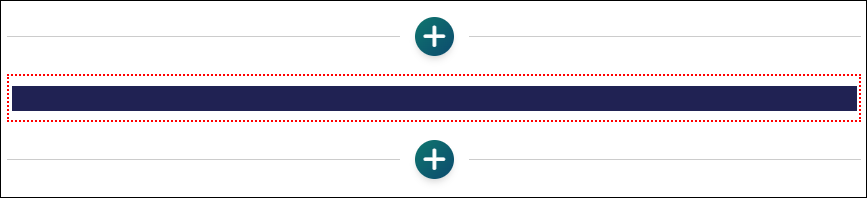
- The new block will appear on the page in Edit Mode with a red, dotted outline indicating it's editable.
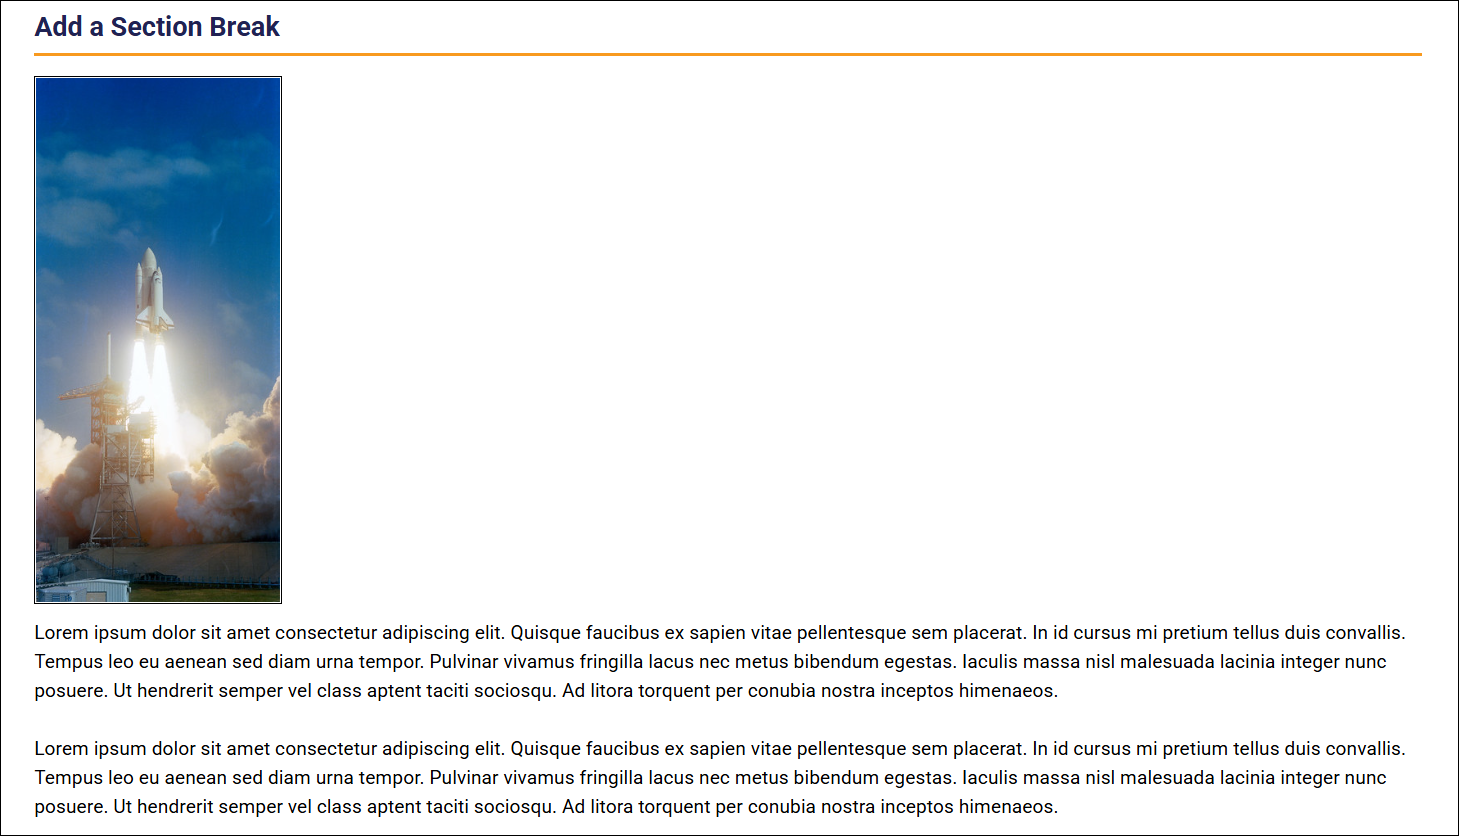
- Select the Publish My Edits button to save the block to the course page and see the content as it will appear to learners. In this example, the section break prevents text in the Content block from wrapping around the image. (Note: you can split text in multiple Content blocks and add a Section Break between them if you want part of the text to wrap around the image.)
Customized Section Break
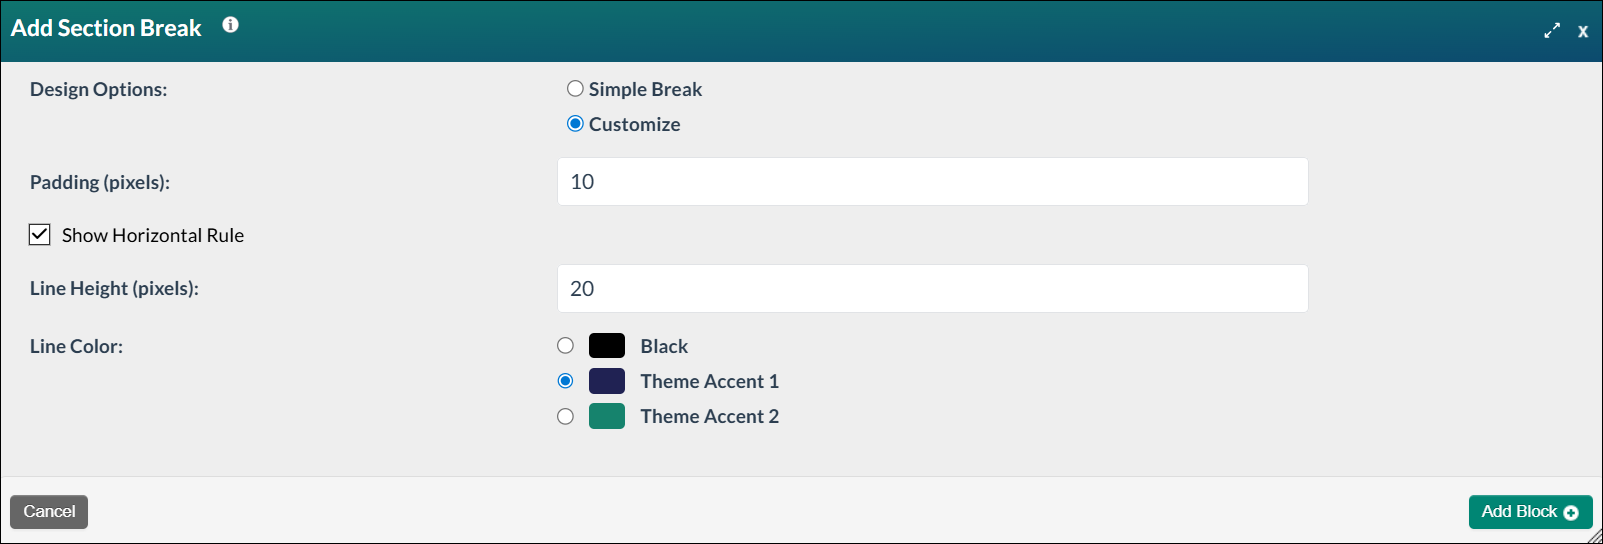
- Select the Customize option to create a section break with your own settings. Additional settings will appear on the Add Section Break form. Enter a number in the Padding (pixels) field. The padding refers to the space between the blocks.
- Check Show Horizontal Rule to add a visual line between the blocks. Select black or one of the two accent colors from your theme. Select Add Block + button to save the block to the page.
- The new block will appear on the page in Edit Mode with a red, dotted outline indicating it's editable.
- Select the Publish My Edits button to save the block to the course page and see the content as it will appear to learners.
- Section breaks can also be used to visually separate long passages of text to make reading easier for learners. In the example below, a customized section break of 3 pixels (px) with a 15 px padding separates different sections of text.
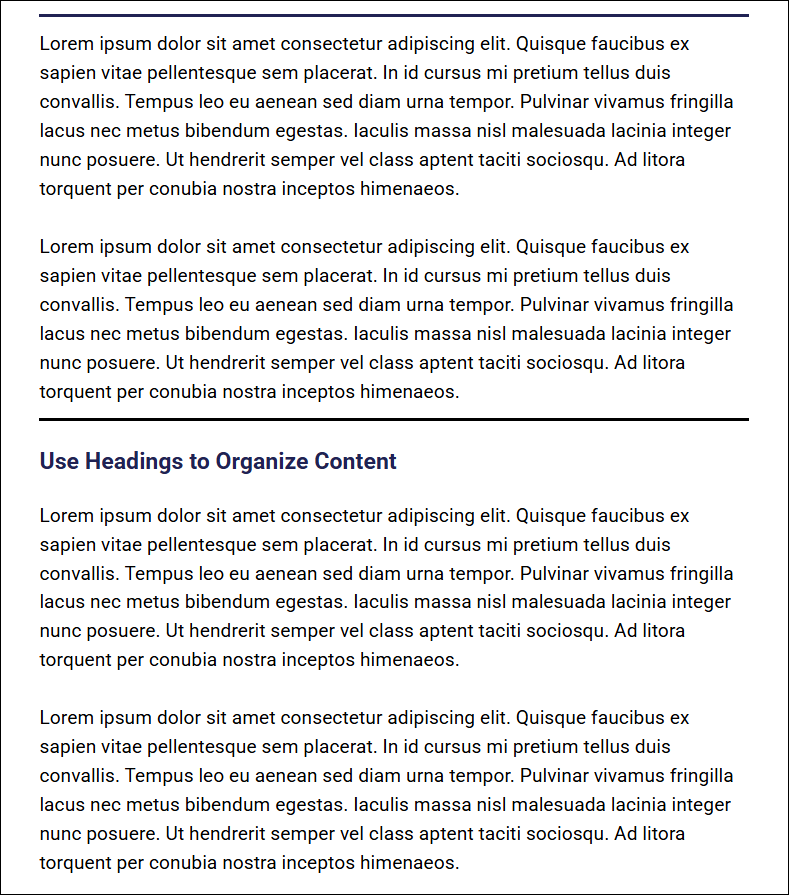
Note: In the previous image, Headings were added to Content blocks to provide structure to the page. To learn more about using headings, visit the Why is it important to use headings properly? article in our Knowledge Base.
Was this article helpful?
That’s Great!
Thank you for your feedback
Sorry! We couldn't be helpful
Thank you for your feedback
Feedback sent
We appreciate your effort and will try to fix the article