The Certificate block allows content creators to set up certificates for learners that can be issued by a course instructor or issued automatically based on a quiz score. Content creators can import a background image to customize the certificate.
Important Note: Each page can contain only one Certificate block. If the certificate is set to be issued automatically, it must be placed on a separate page from the quiz.
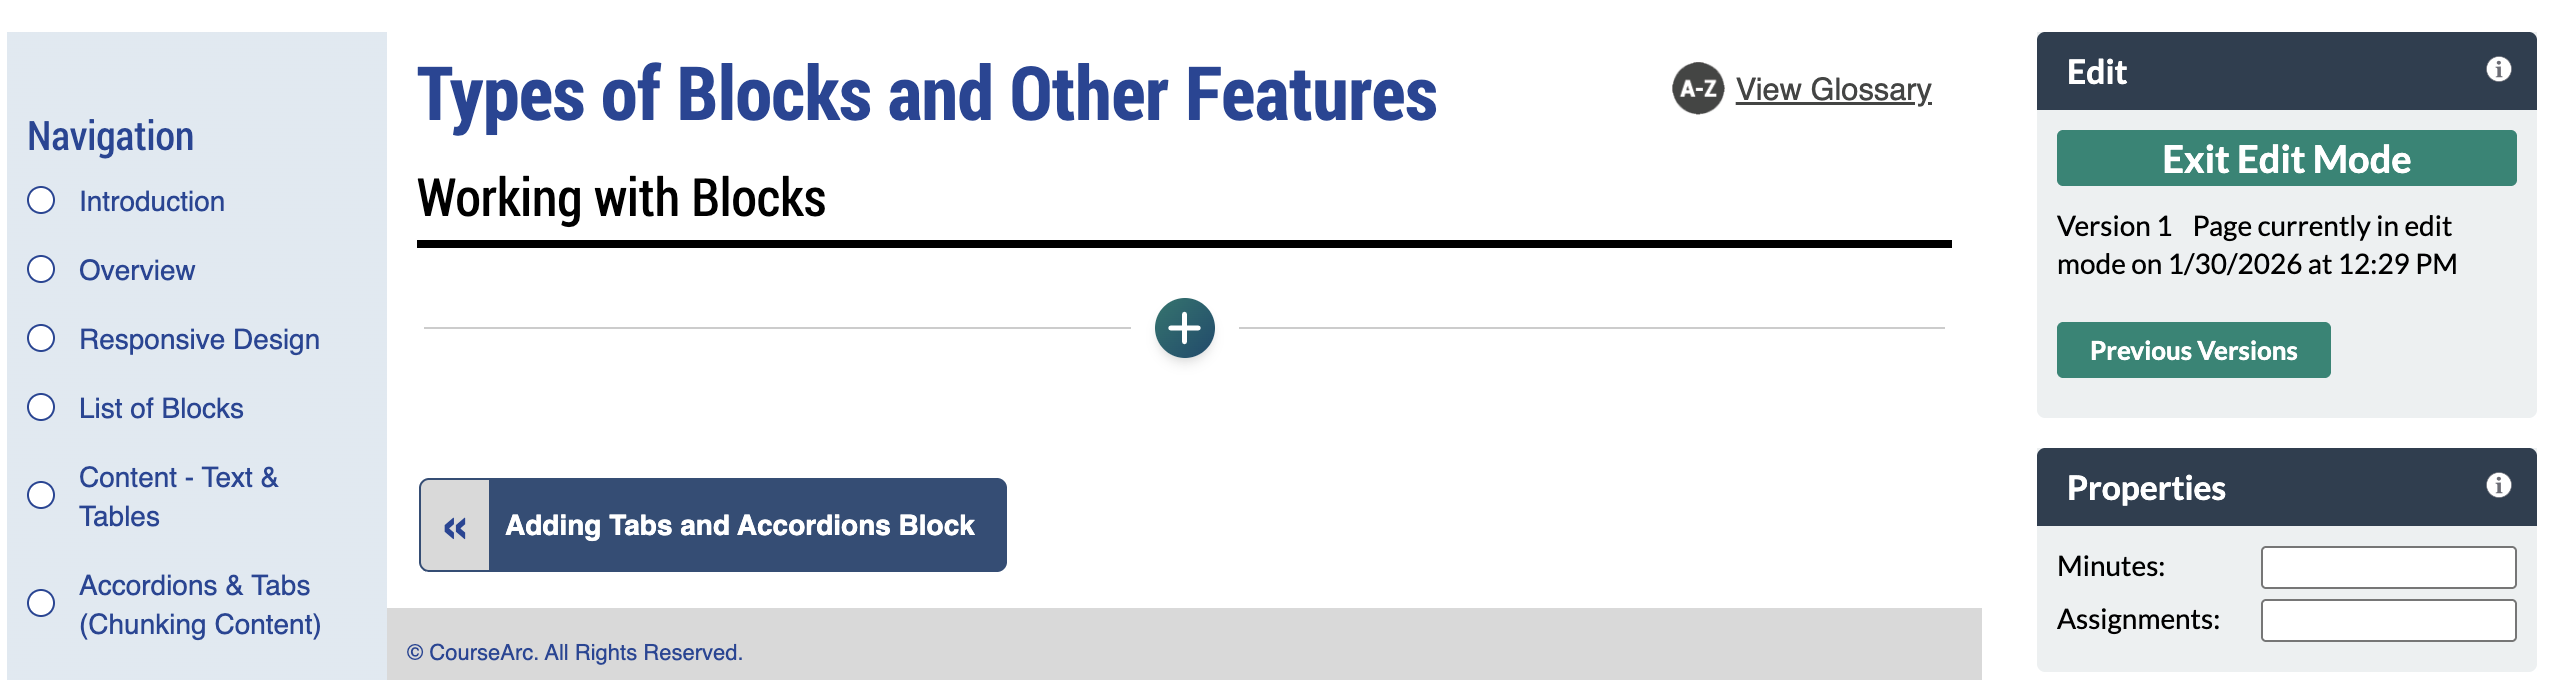
- Navigate to the page and select Edit this Page. Find the position you want to add a block and select the plus (+) icon.
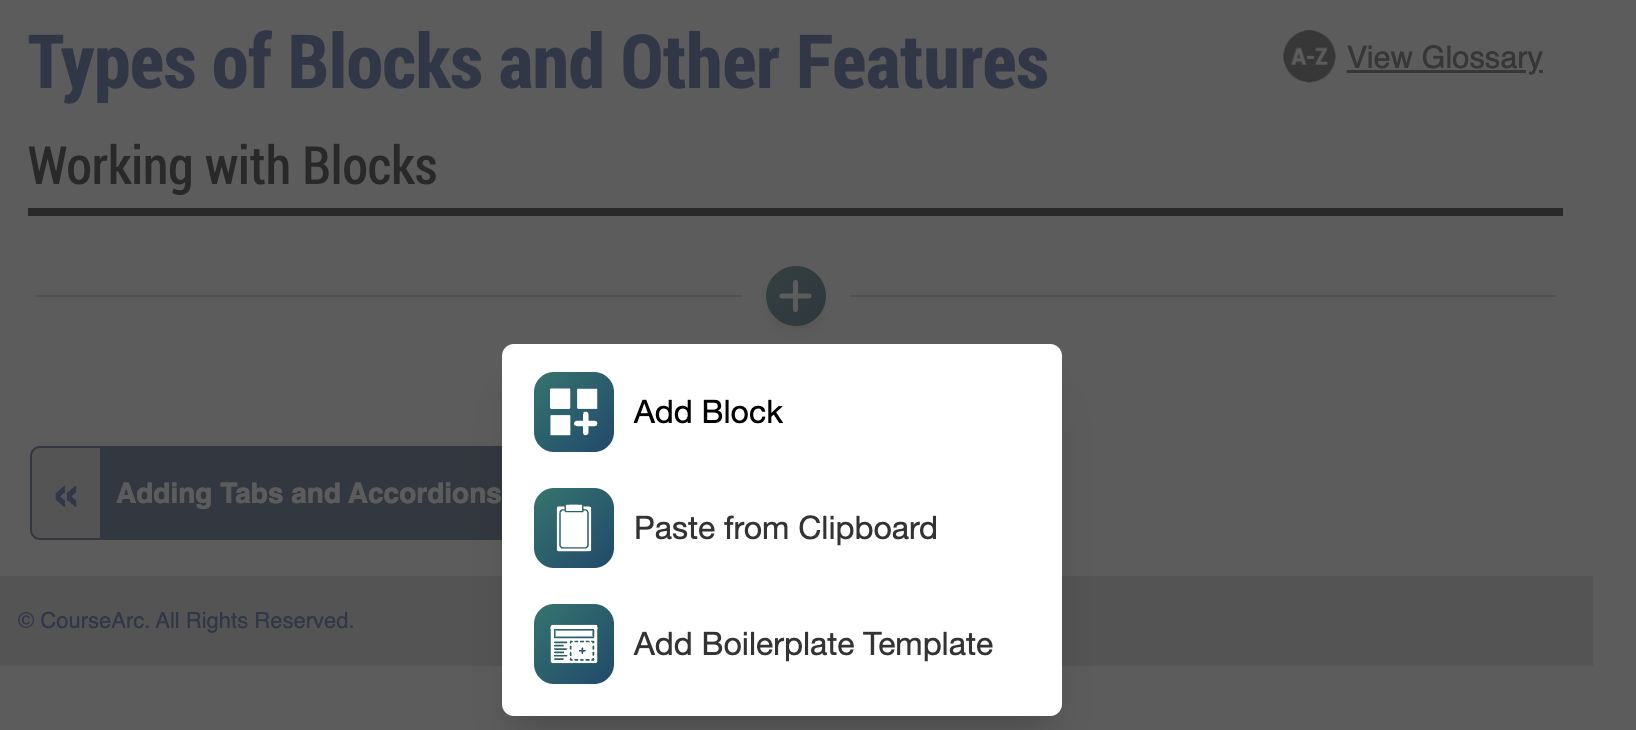
- From the dropdown, select Add Block.
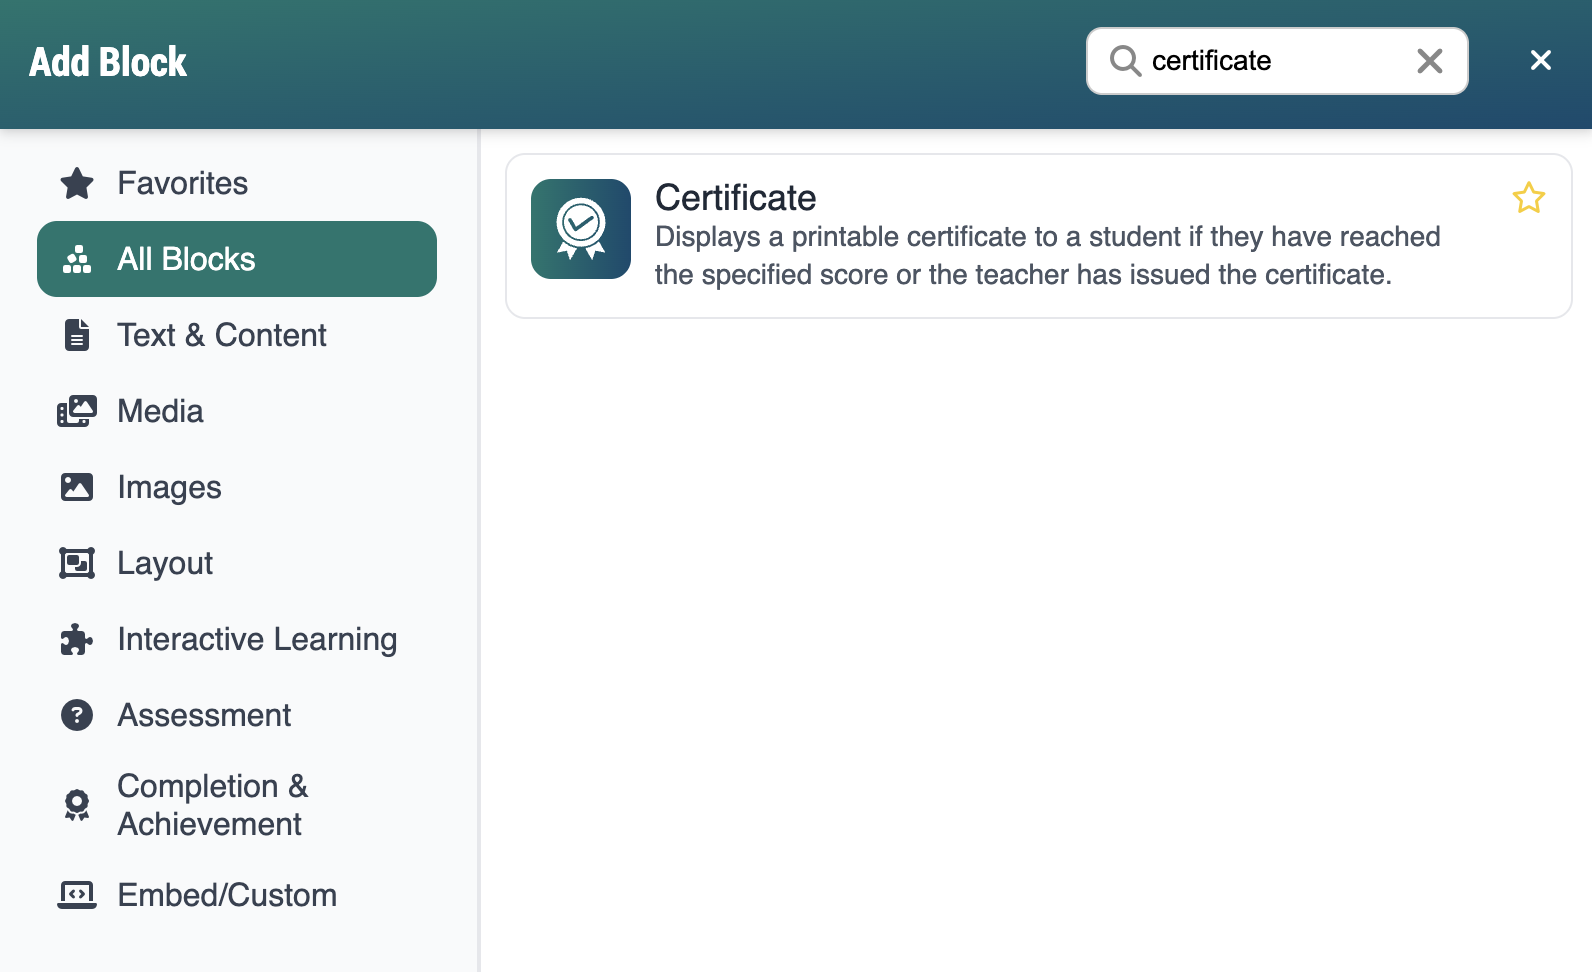
- In the Add Block modal, you can either:
- Use the Search field to find a block by keyword
- Select a block from your custom list of Favorites
- Scroll through the list of All Blocks to select one
- Use the various categories in the side panel to filter by block type
- Select the star icon to add or remove blocks in your Favorites list
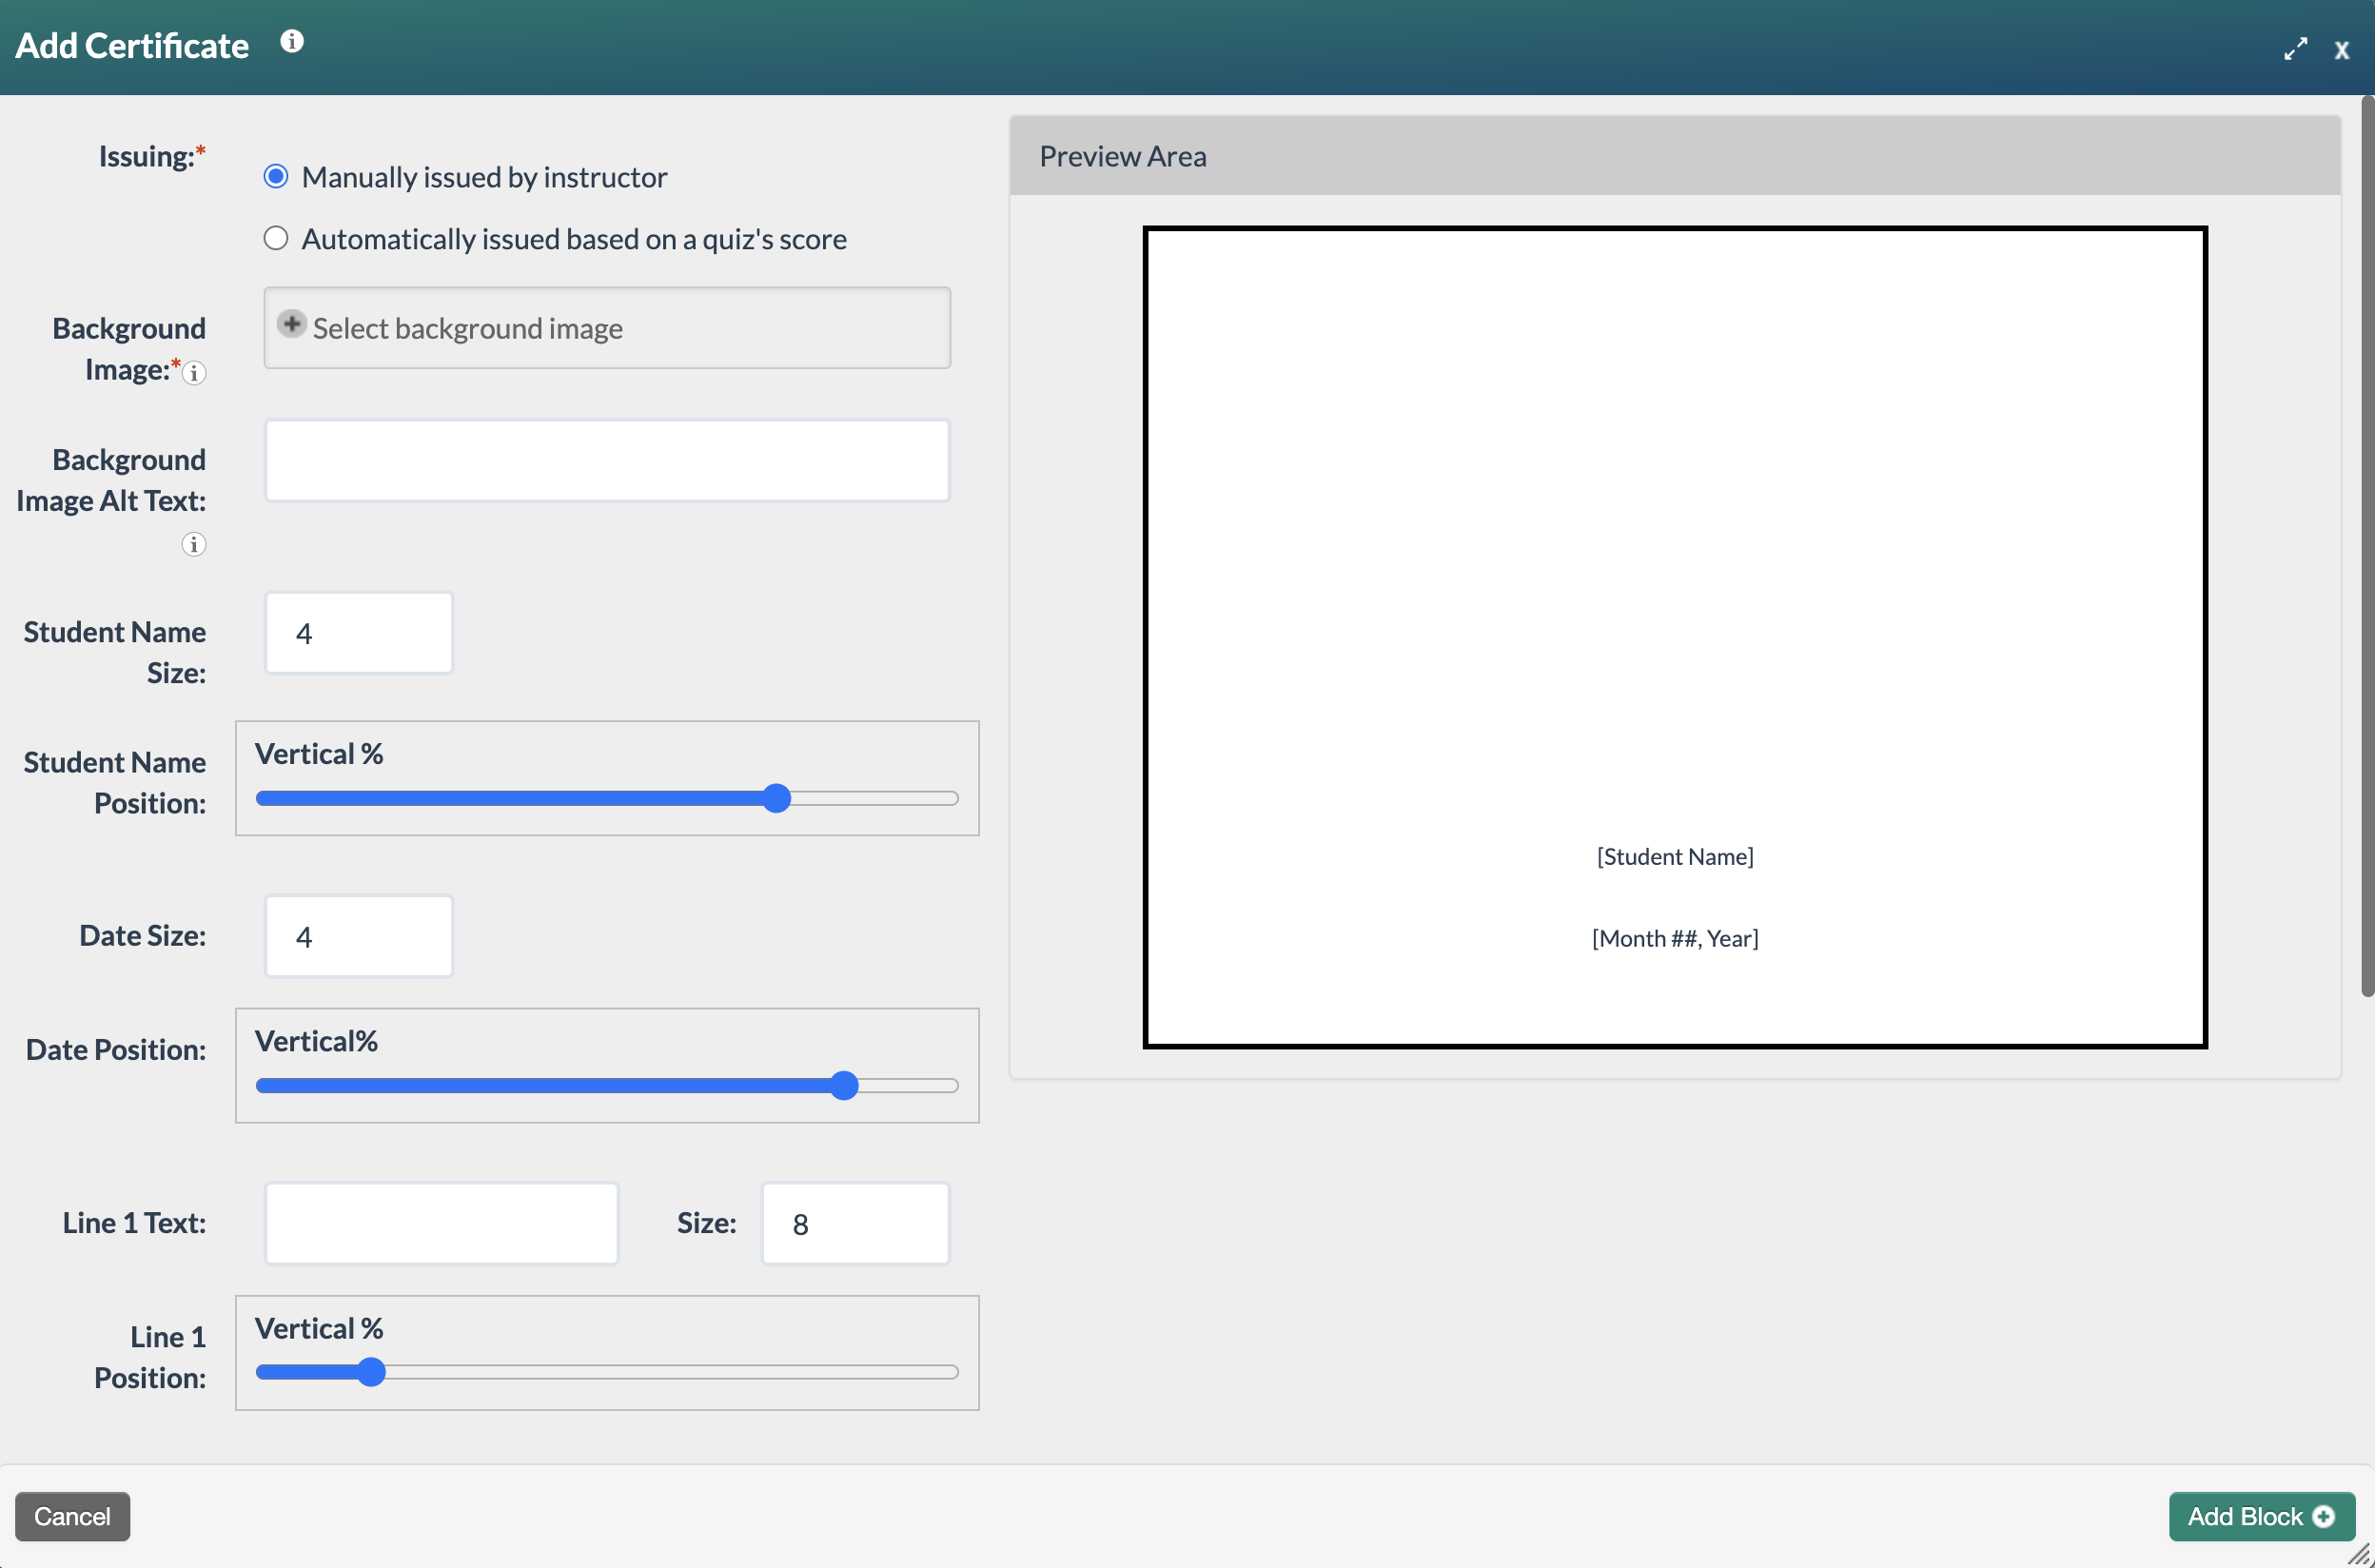
- Select the Certificate block. The Add Certificate form will open. The form has two areas: the Editing Pane and the Preview Pane. Changes made in the Editing Pane will show in the Preview Pane so that the certificate can be visualized as it is being built.
Manually Issuing a Certificate
- Issuing:* Select Manually issued by an instructor.
- Background Image:* Click the field to select an image from the File Manager. The background graphic will display in the Preview Area with placeholders for the default fields: [Student Name] and [Month ##, Year].
Background Image Alt Text: This field is not required, but may be configured if there's a need to describe the certificate's background image via screen reader. Alternative text is read by screen readers, allowing the content and function of an image to be accessible to those with visual or certain cognitive disabilities. To learn more about alternative text, visit WebAIM's Alternative Text.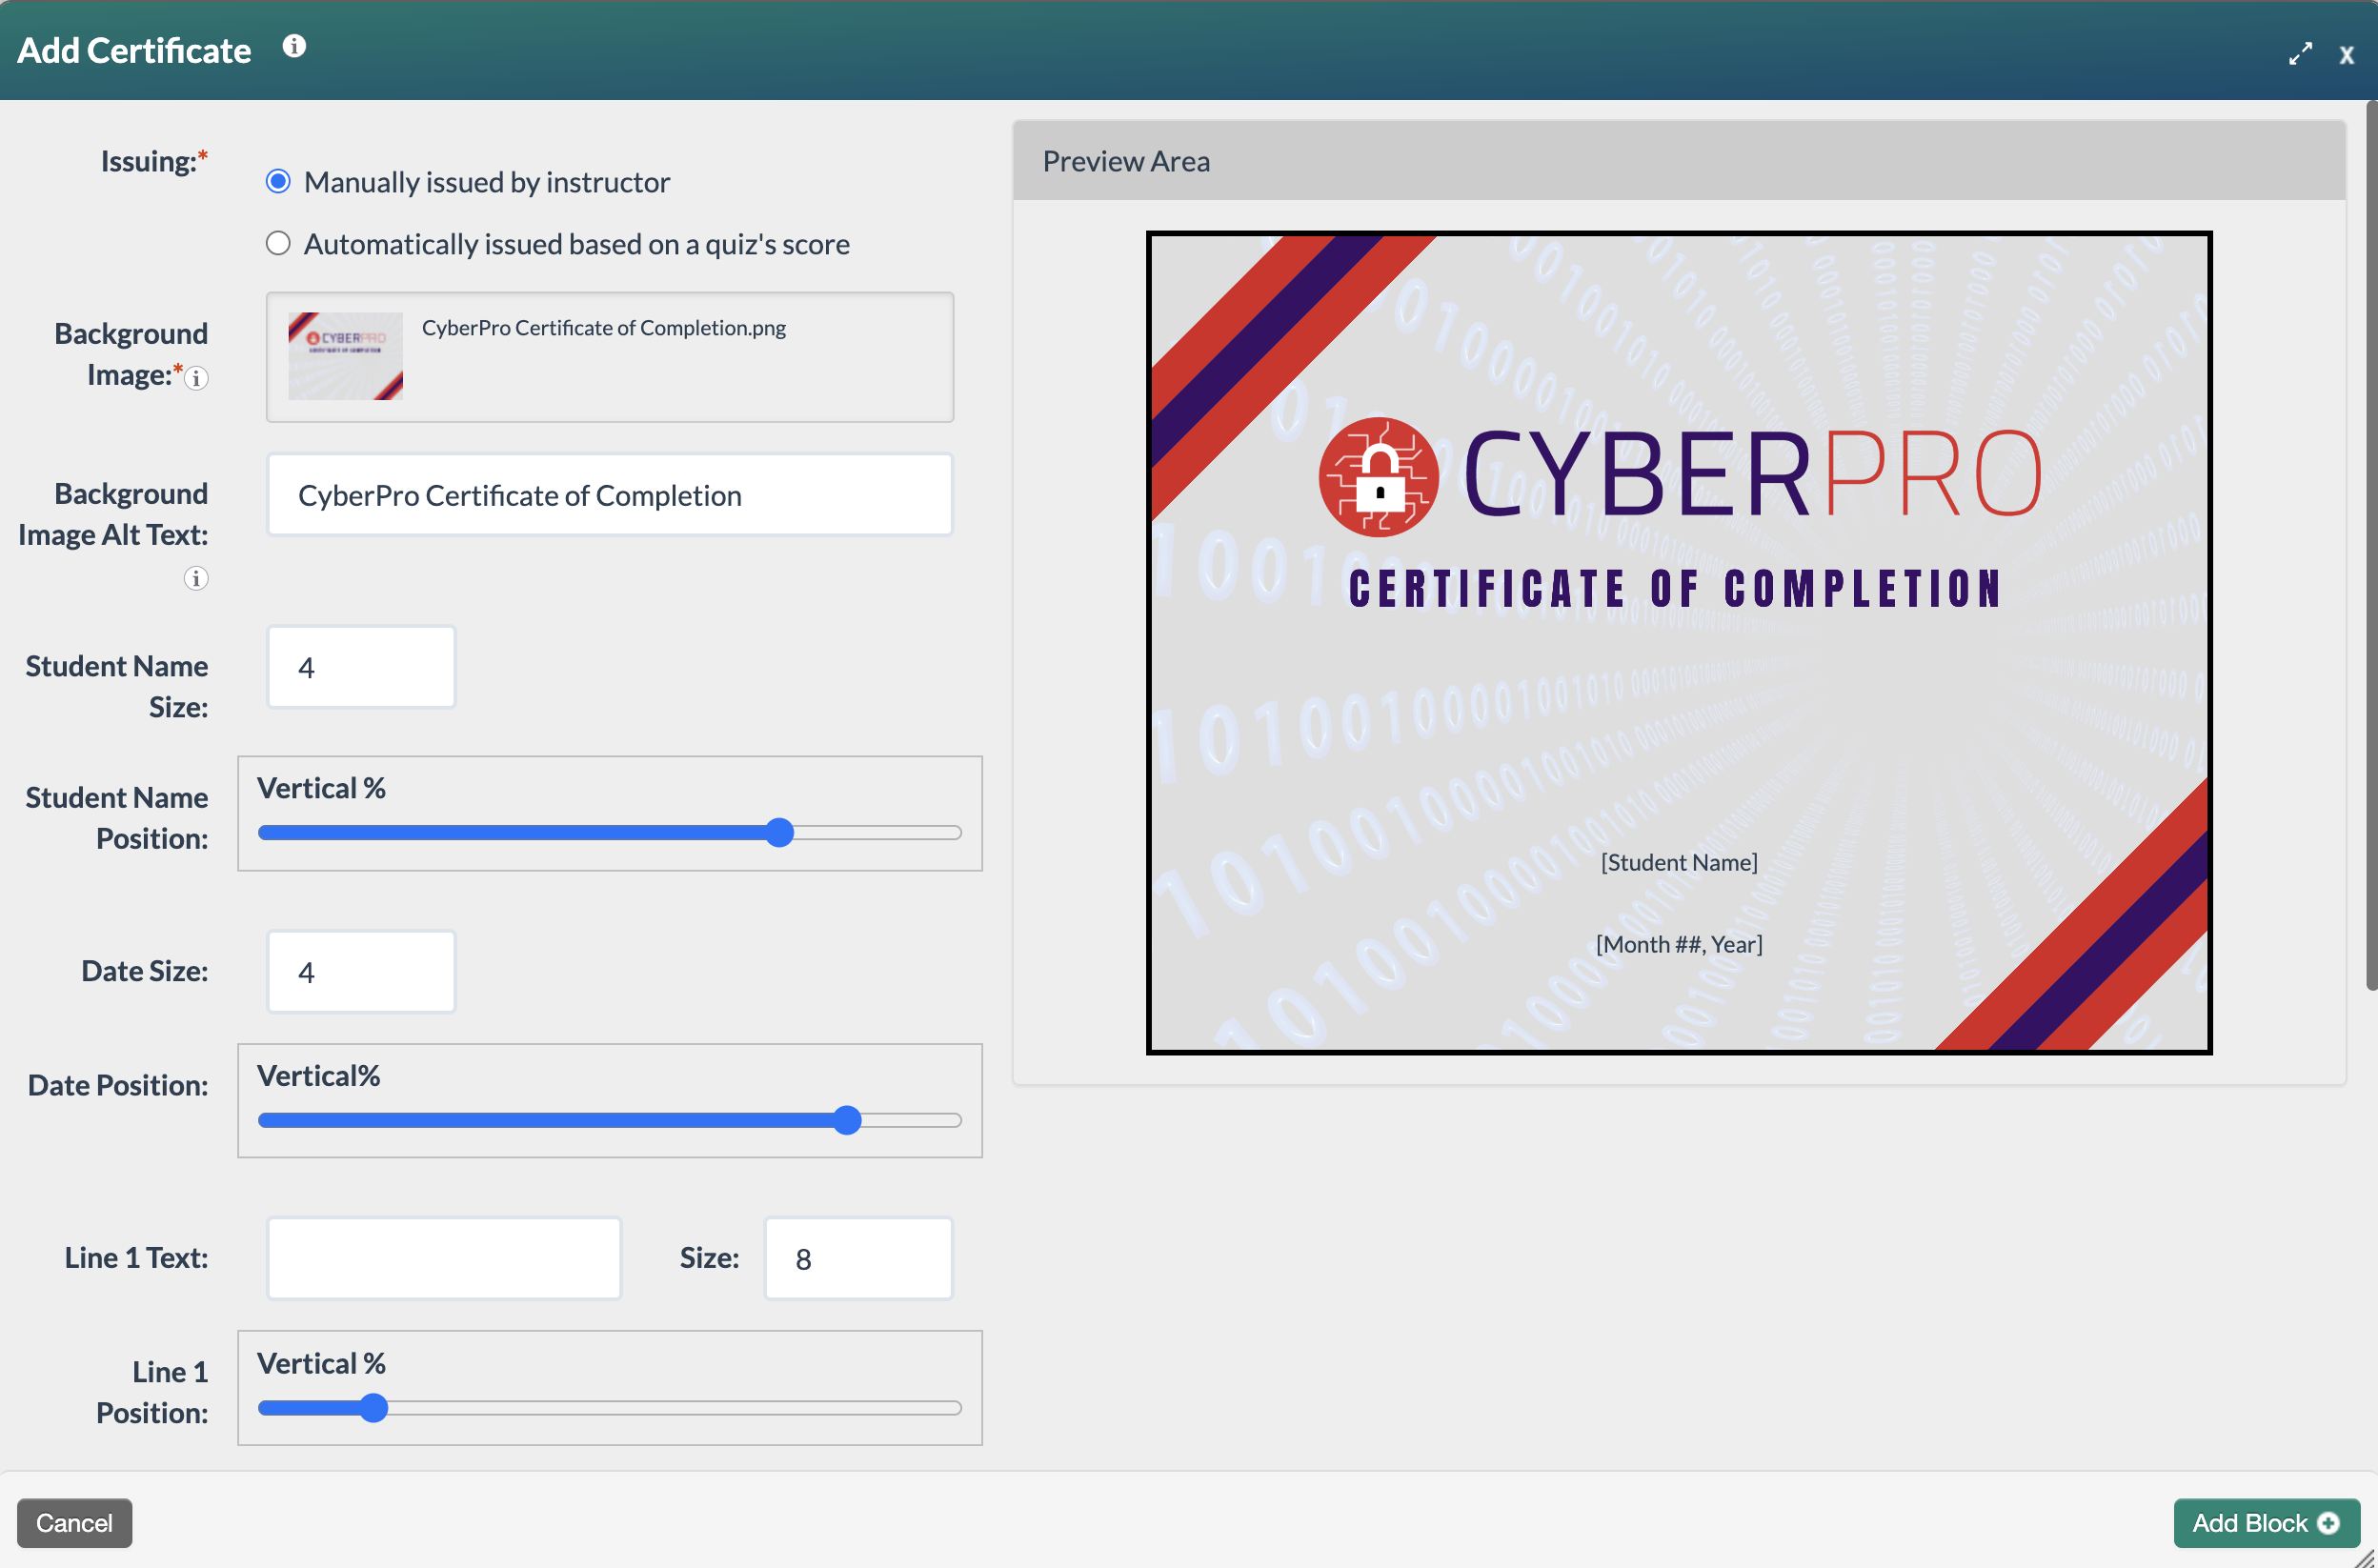
- Complete the Certificate Settings with the following information:
- Student Name and Date: These are the only fields that appear on the certificate by default, and both are populated automatically with the corresponding data (student name and current date). Adjust their position and size as needed:
- Student Name Size/Date Size: Enter a value to adjust the text size.
- Student Name Position/Date Position: Use the corresponding Vertical% slider to adjust placement.
- Line 1, 2, and 3 Text: Use these fields to add any additional custom text to the certificate. Each line is optional.
- Line 1, 2, and 3 Size: Adjust the size of each added line of text as needed, using the same method as above.
- Line 1, 2, and 3 Position: Adjust the position of each added line of text as needed, using the same Vertical% slider method as above.
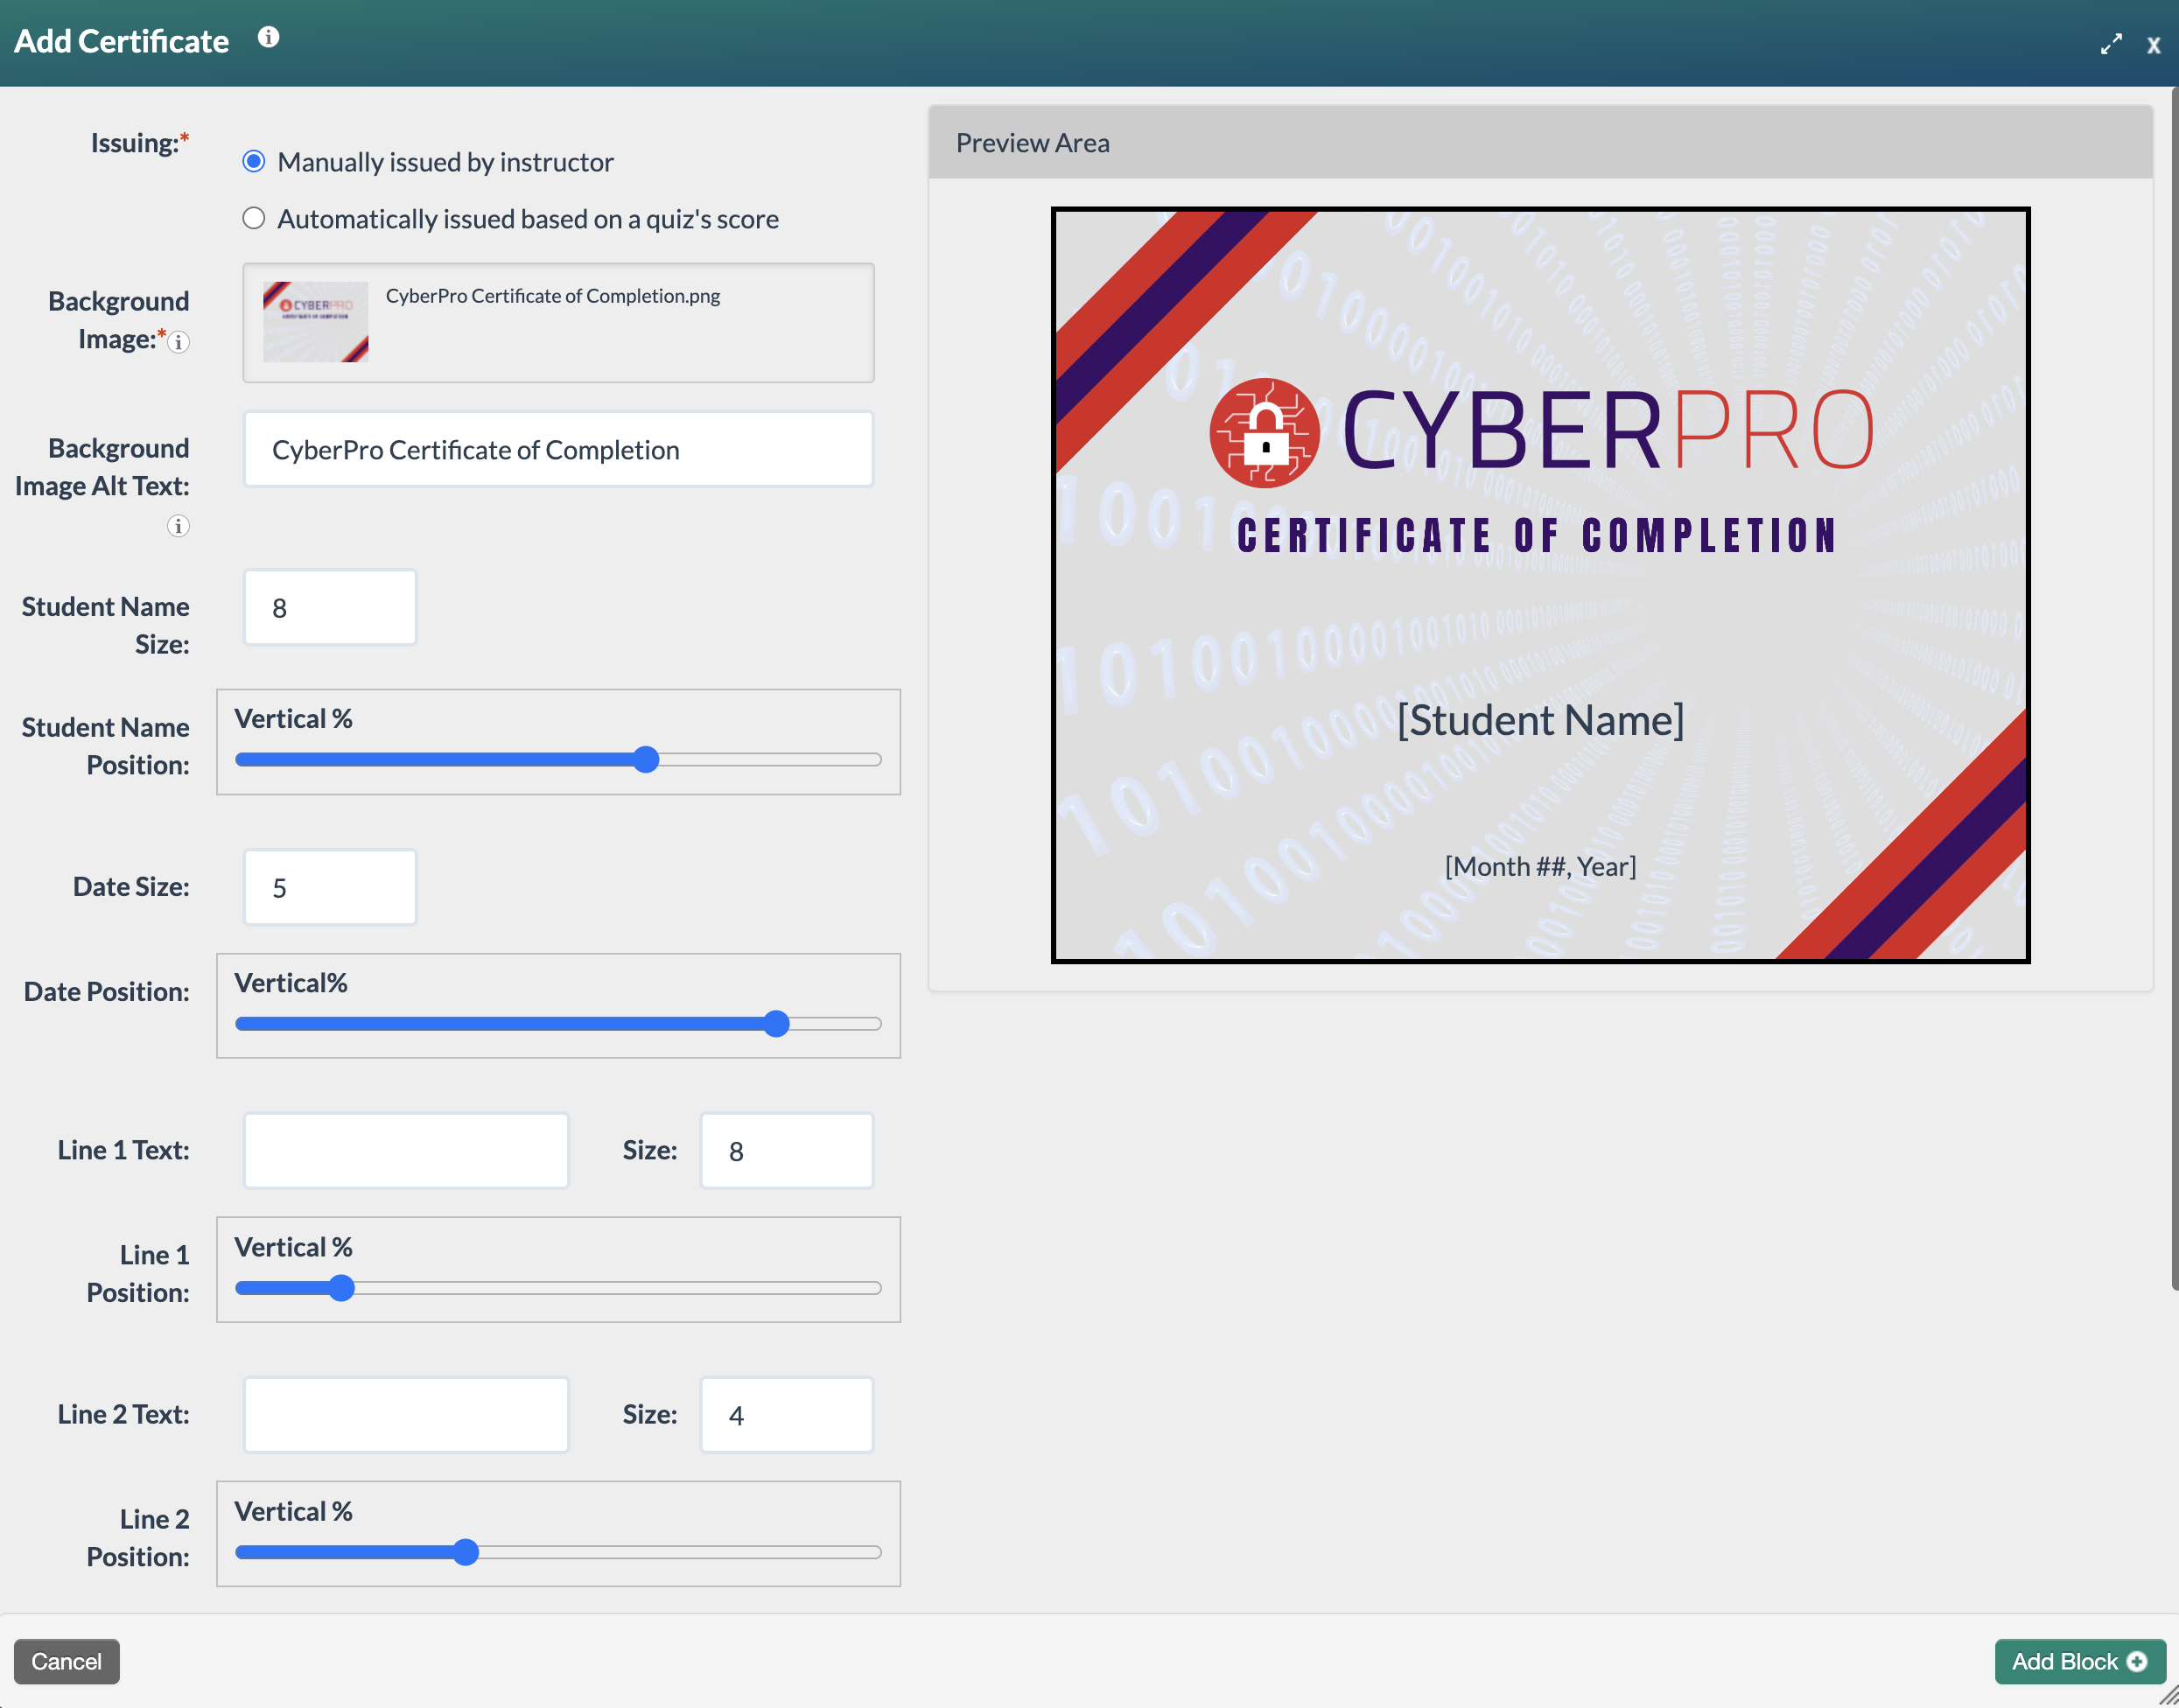
- Student Name and Date: These are the only fields that appear on the certificate by default, and both are populated automatically with the corresponding data (student name and current date). Adjust their position and size as needed:
- Once all the required sections have been saved, select the Add Block+ button to save the block to the page.
- The new block will appear on the page in Edit Mode with a red, dotted outline indicating it's editable.
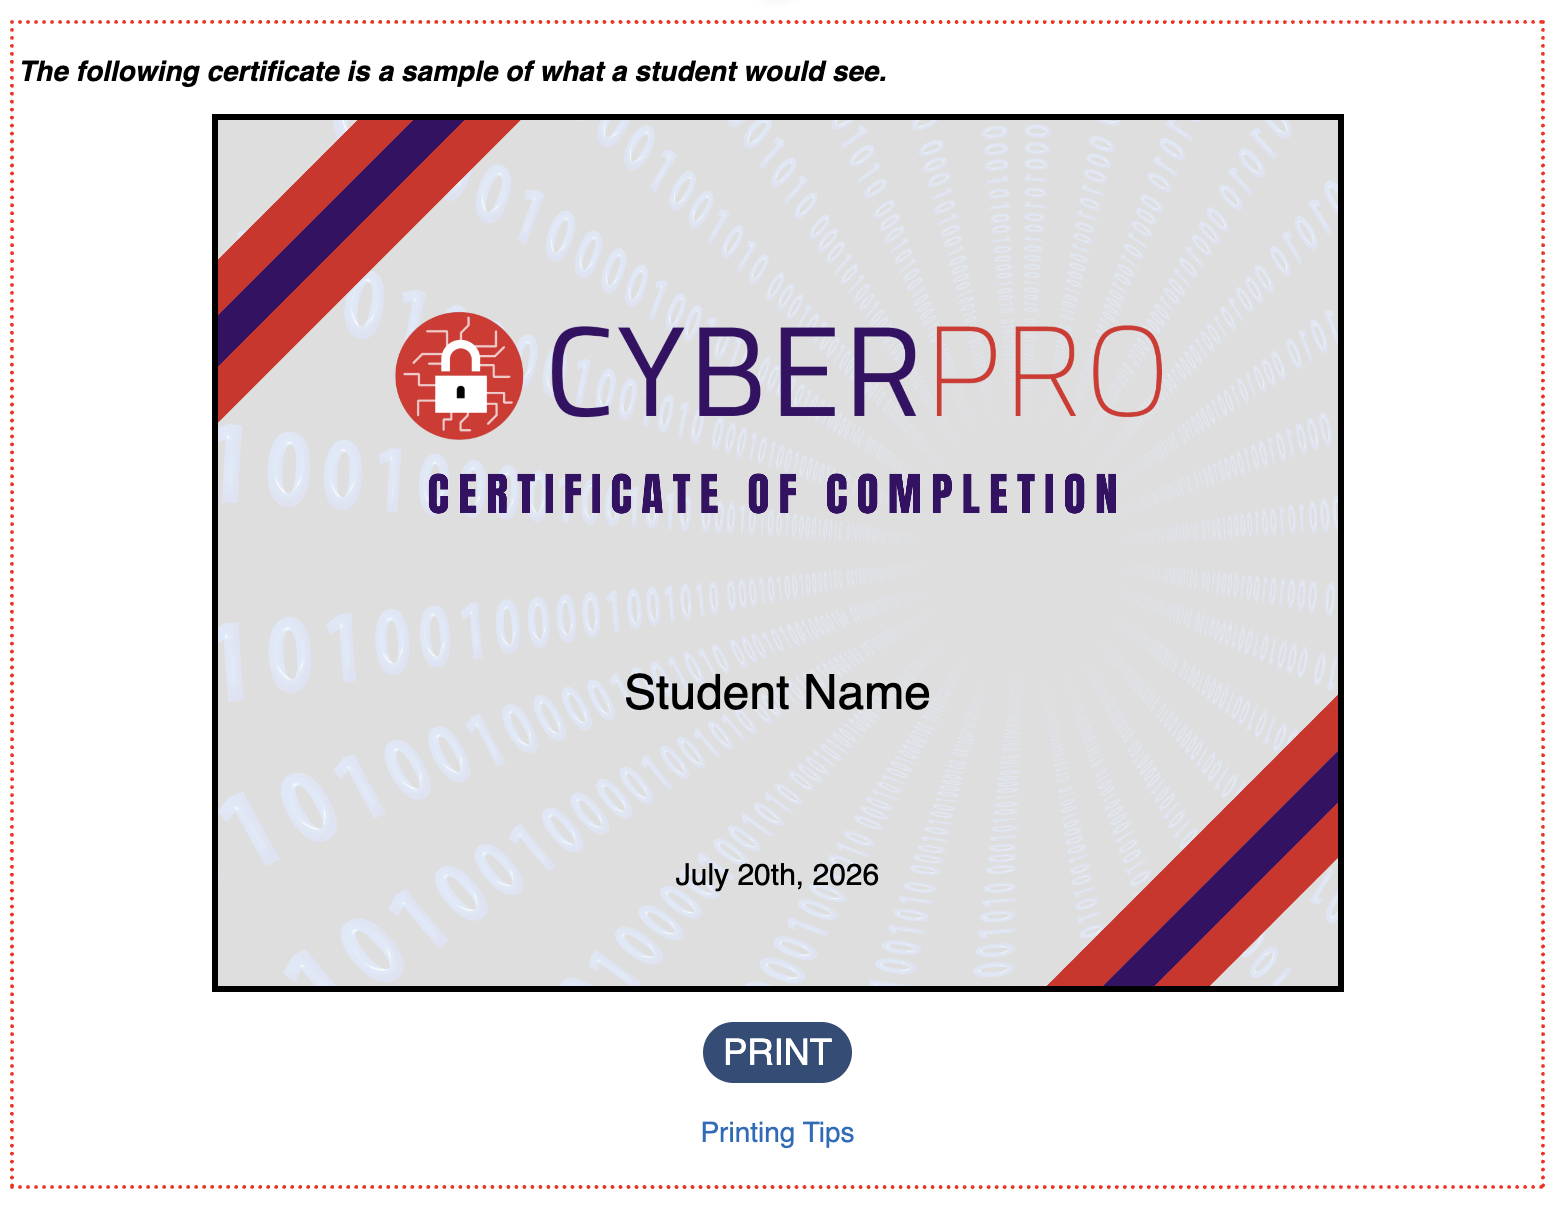
- Select the Publish My Edits button to save the block to the course page and see the content as it will appear to learners.
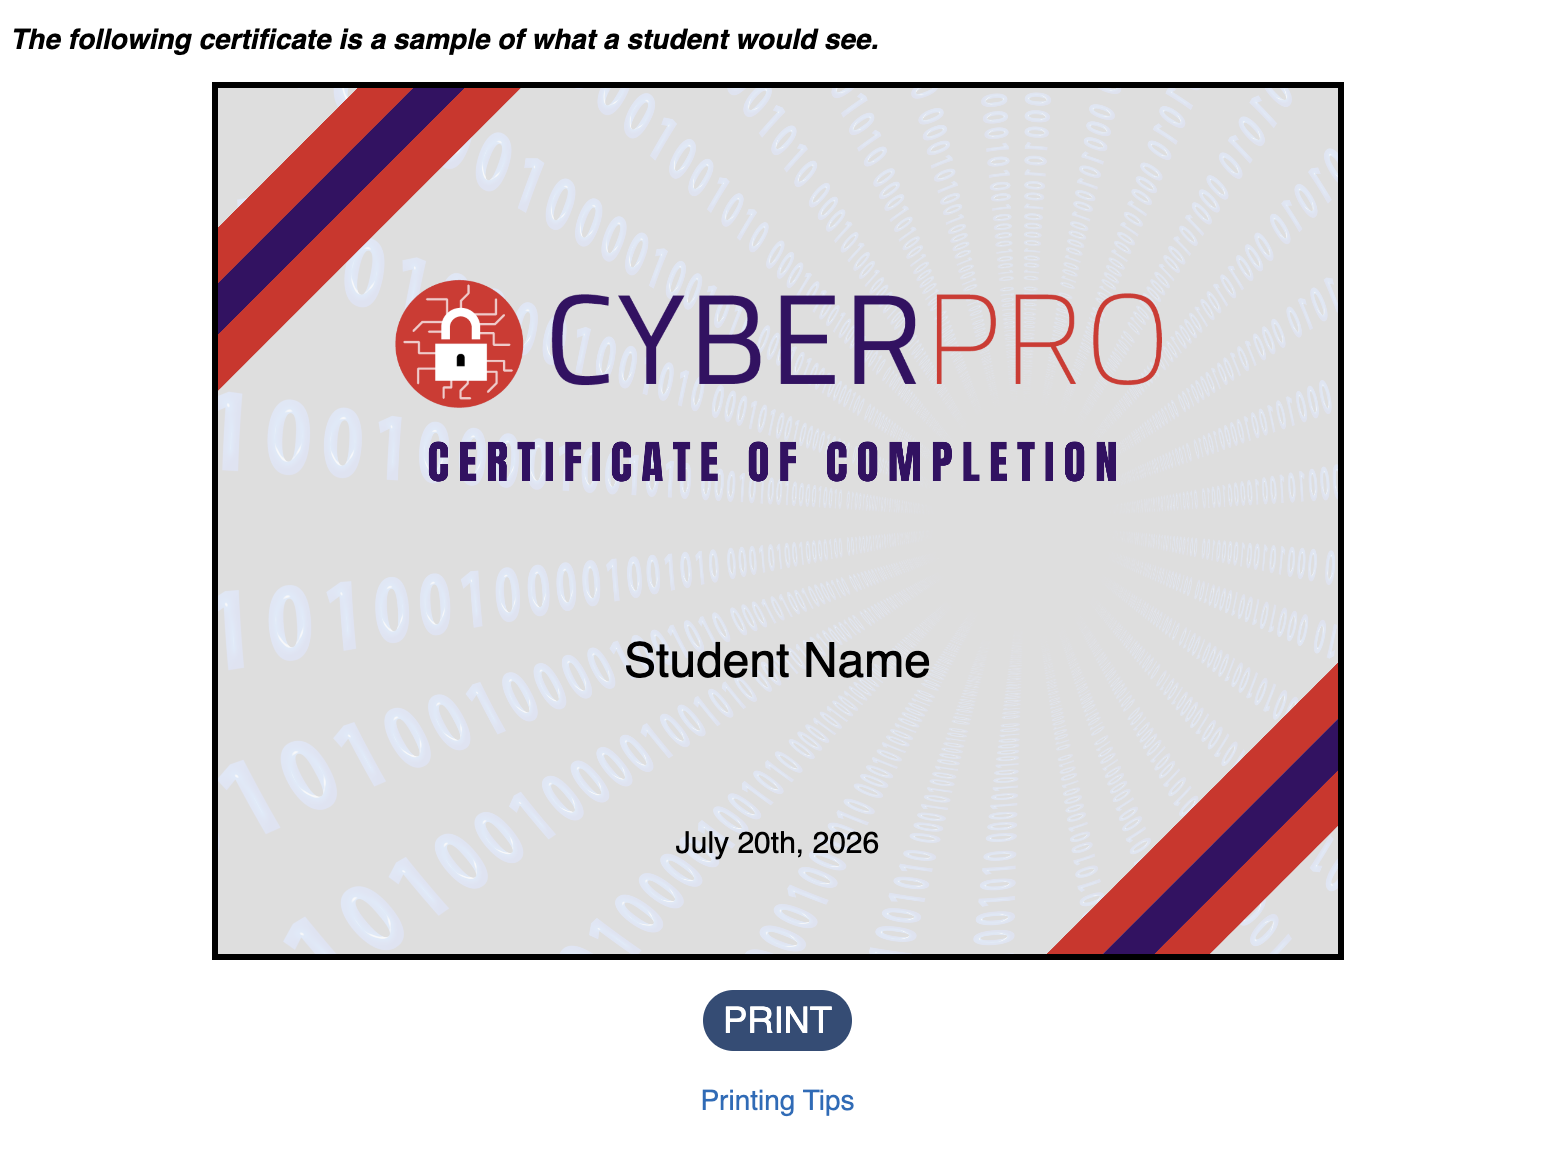
- The learner view of a certificate includes a link to Certificate Block Printing Tips. Any learner that has not been issued a certificate by the instructor will see the following message displayed on the page in place of the certificate: You have not yet been issued this certificate. Please check back later.

Automatically Issuing a Certificate
- Issuing:* Select Automatically issued based on a quiz score.
- Background Image:* Click the field to select an image from the File Manager. The background graphic will display in the Preview Area with placeholders for the default fields: [Student Name] and [Month ##, Year].
Background Image Alt Text: This field is not required, but may be configured if there's a need to describe the certificate's background image via screen reader. Alternative text is read by screen readers, allowing the content and function of an image to be accessible to those with visual or certain cognitive disabilities. To learn more about alternative text, visit WebAIM's Alternative Text.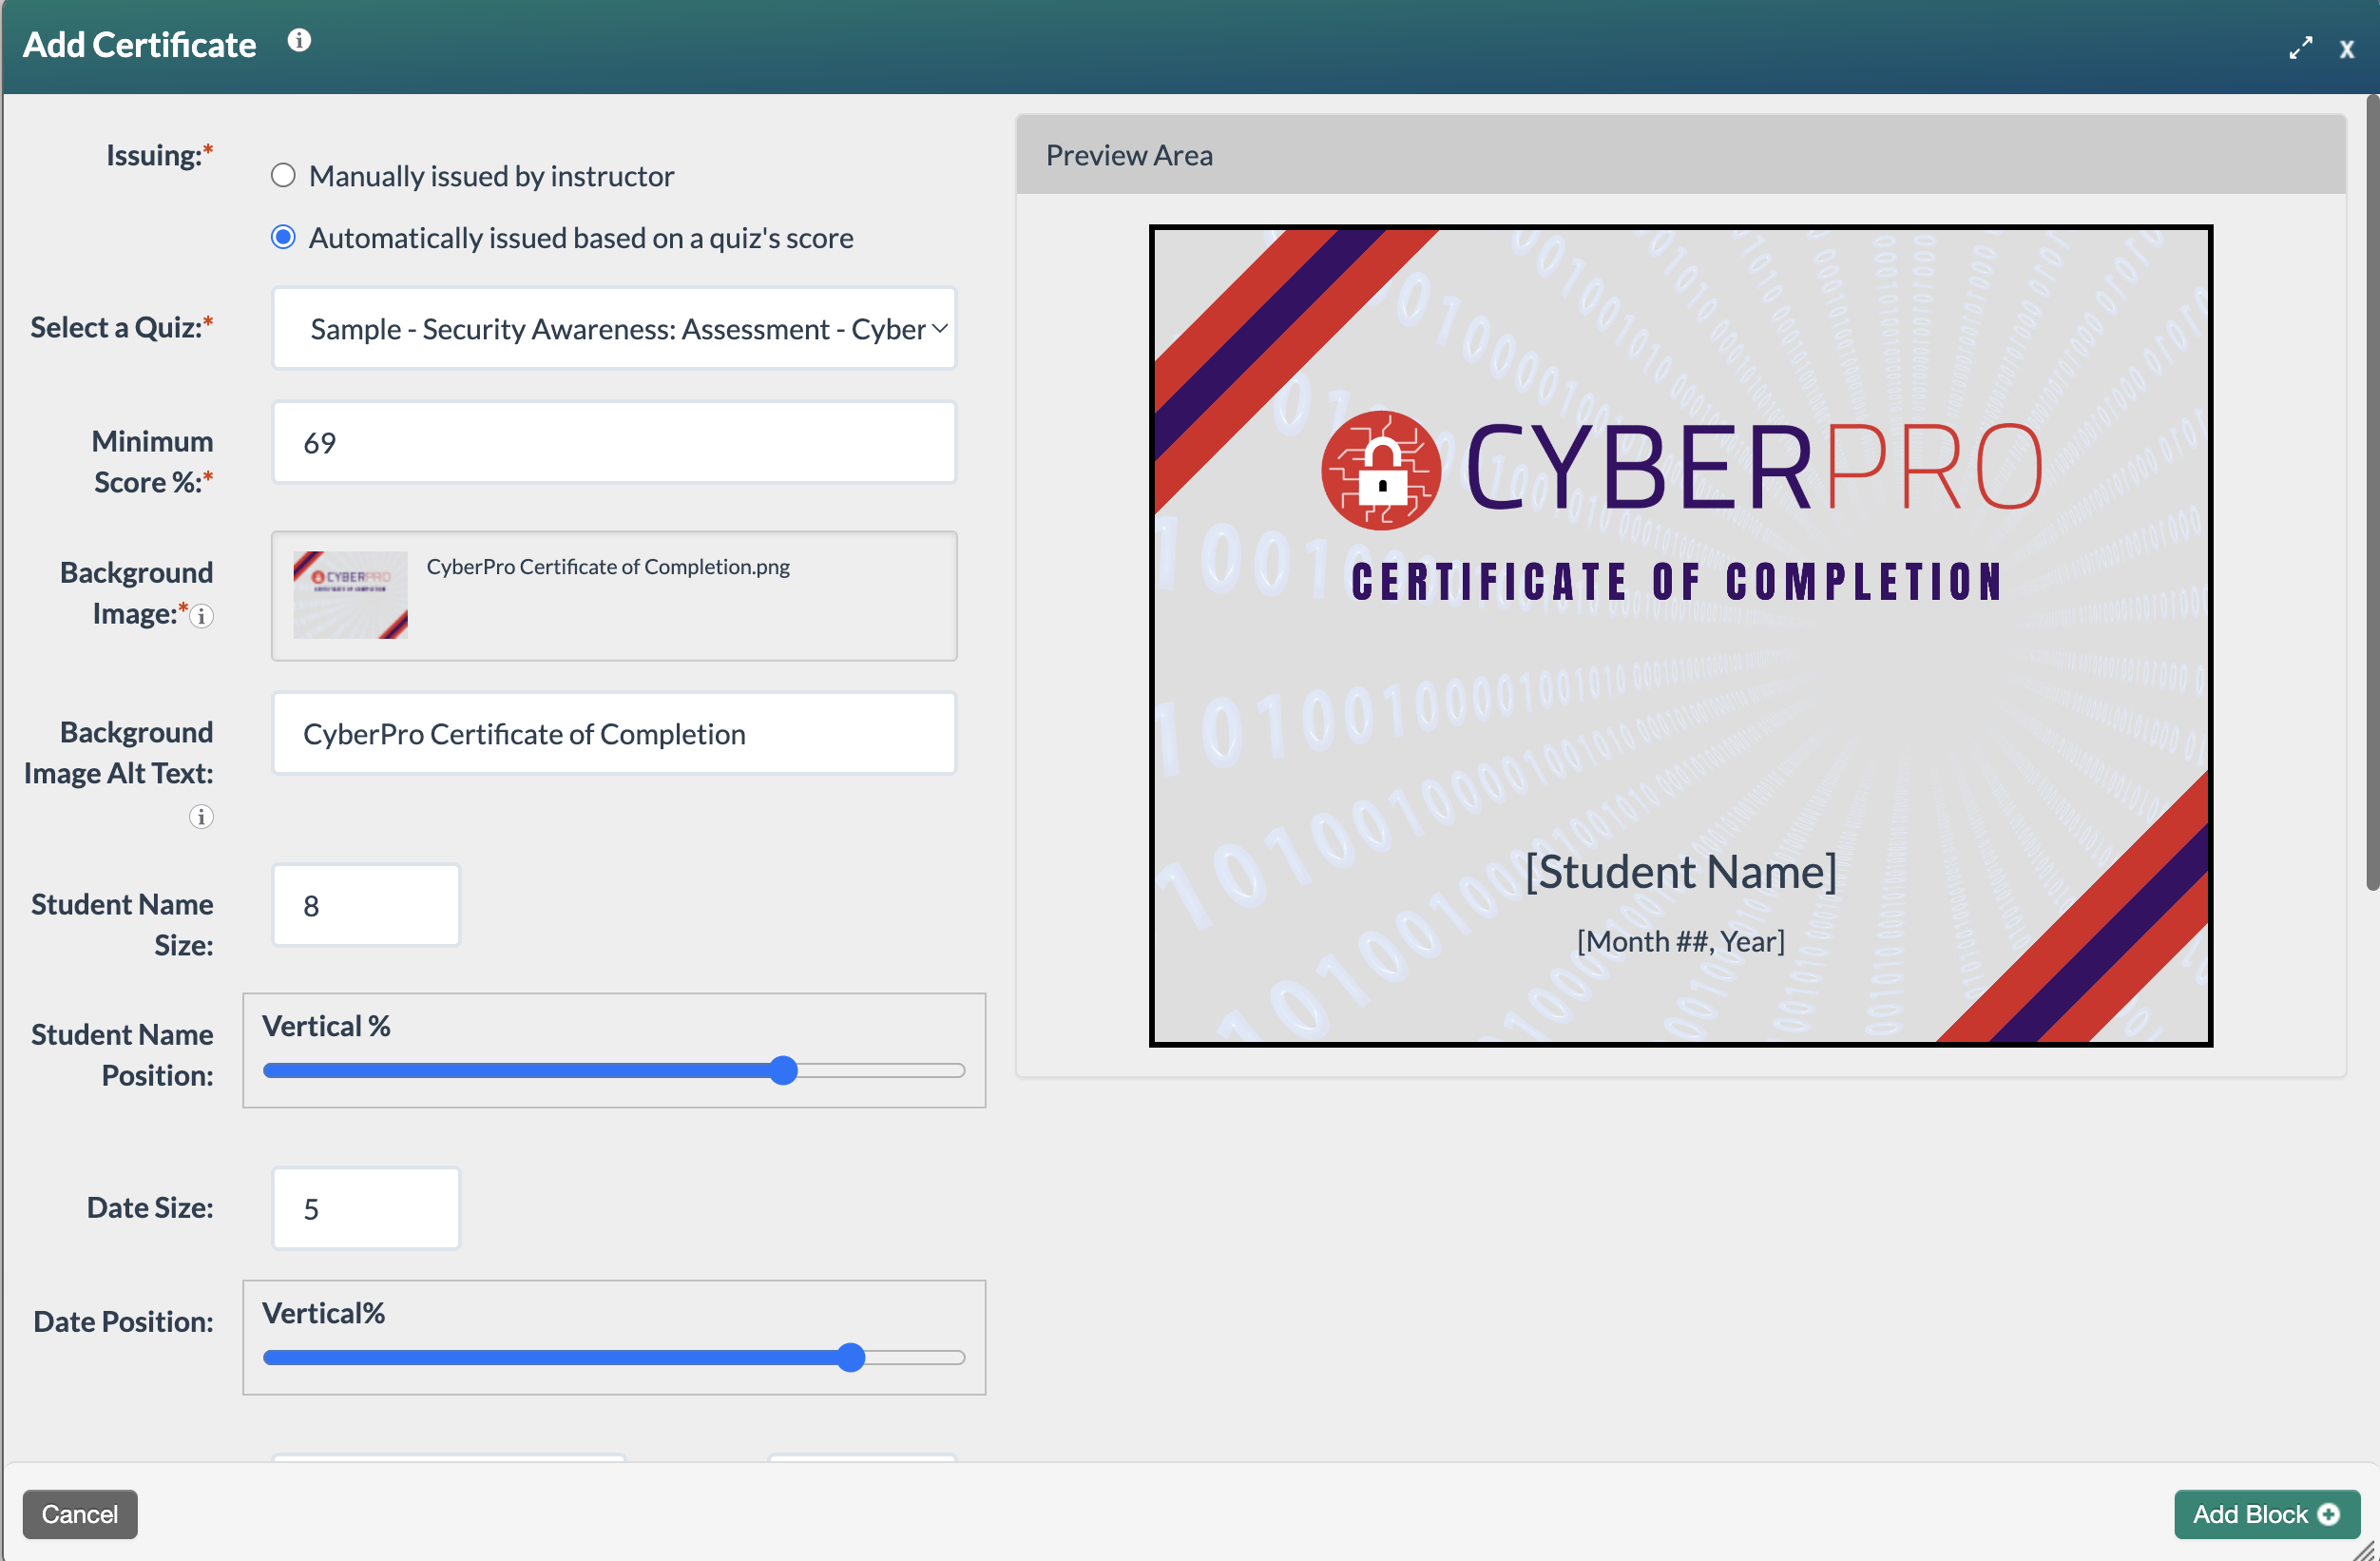
- Follow Steps 3 to 7 above.
For more information about issuing certificates, see the following articles:
- To learn how to issue a certificate to a learner, refer to How do I issue a certificate to a learner?
- The Certificate block can import an image to use as a background. For guidance on creating a background image to use with a Certificate block, check out How do I create a background image for use in a Certificate block?
- For certificate printing tips, refer to Certificate Block Printing Tips.
Was this article helpful?
That’s Great!
Thank you for your feedback
Sorry! We couldn't be helpful
Thank you for your feedback
Feedback sent
We appreciate your effort and will try to fix the article