Note: All AI features are an optional add-on that can be purchased with your CourseArc subscription.
Writing high-quality alt text and long descriptions is a critical part of designing inclusive content, but it's also one of the most time-consuming steps in the process. The Magic Image Description tool takes care of the heavy lifting for you. Whether you're uploading a simple icon or a complex data visualization, CourseArc's AI will suggest meaningful alt text and, when appropriate, a long description prompt to guide users to additional context. The result: less time on repetitive tasks, and more consistency across your courses.
The Magic Image Descriptions feature is available as a standalone tool in your Tools menu. It allows you to generate alt text and long descriptions for images that are not stored in CourseArc's File Manager, such as a diagram from another tool, a chart pulled from a report, or an image from a slide deck or LMS page. Just upload the image, add optional instructions for additional context, and receive editable alt text and a long description that you can copy wherever you need it.
The Magic Image Description tool is available to users with the AI Access global role.
- From the Dashboard, click the Tools dropdown and select Magic Image Description.
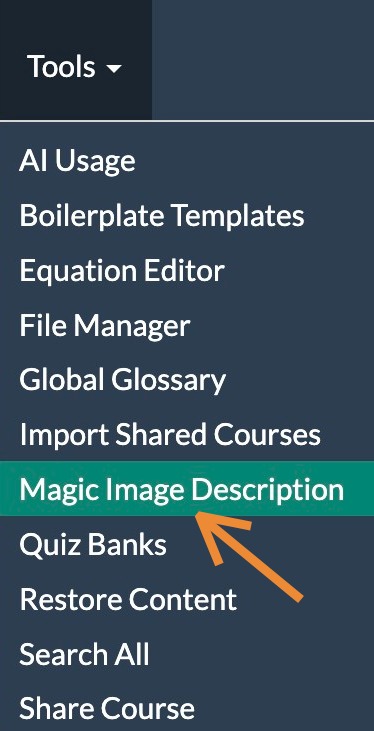
- The Magic Image Description page will open with two panes:
- Input pane - where you upload your image and set generation options.
- Image Description pane - where your generated alt text and long description will appear once processing is complete.
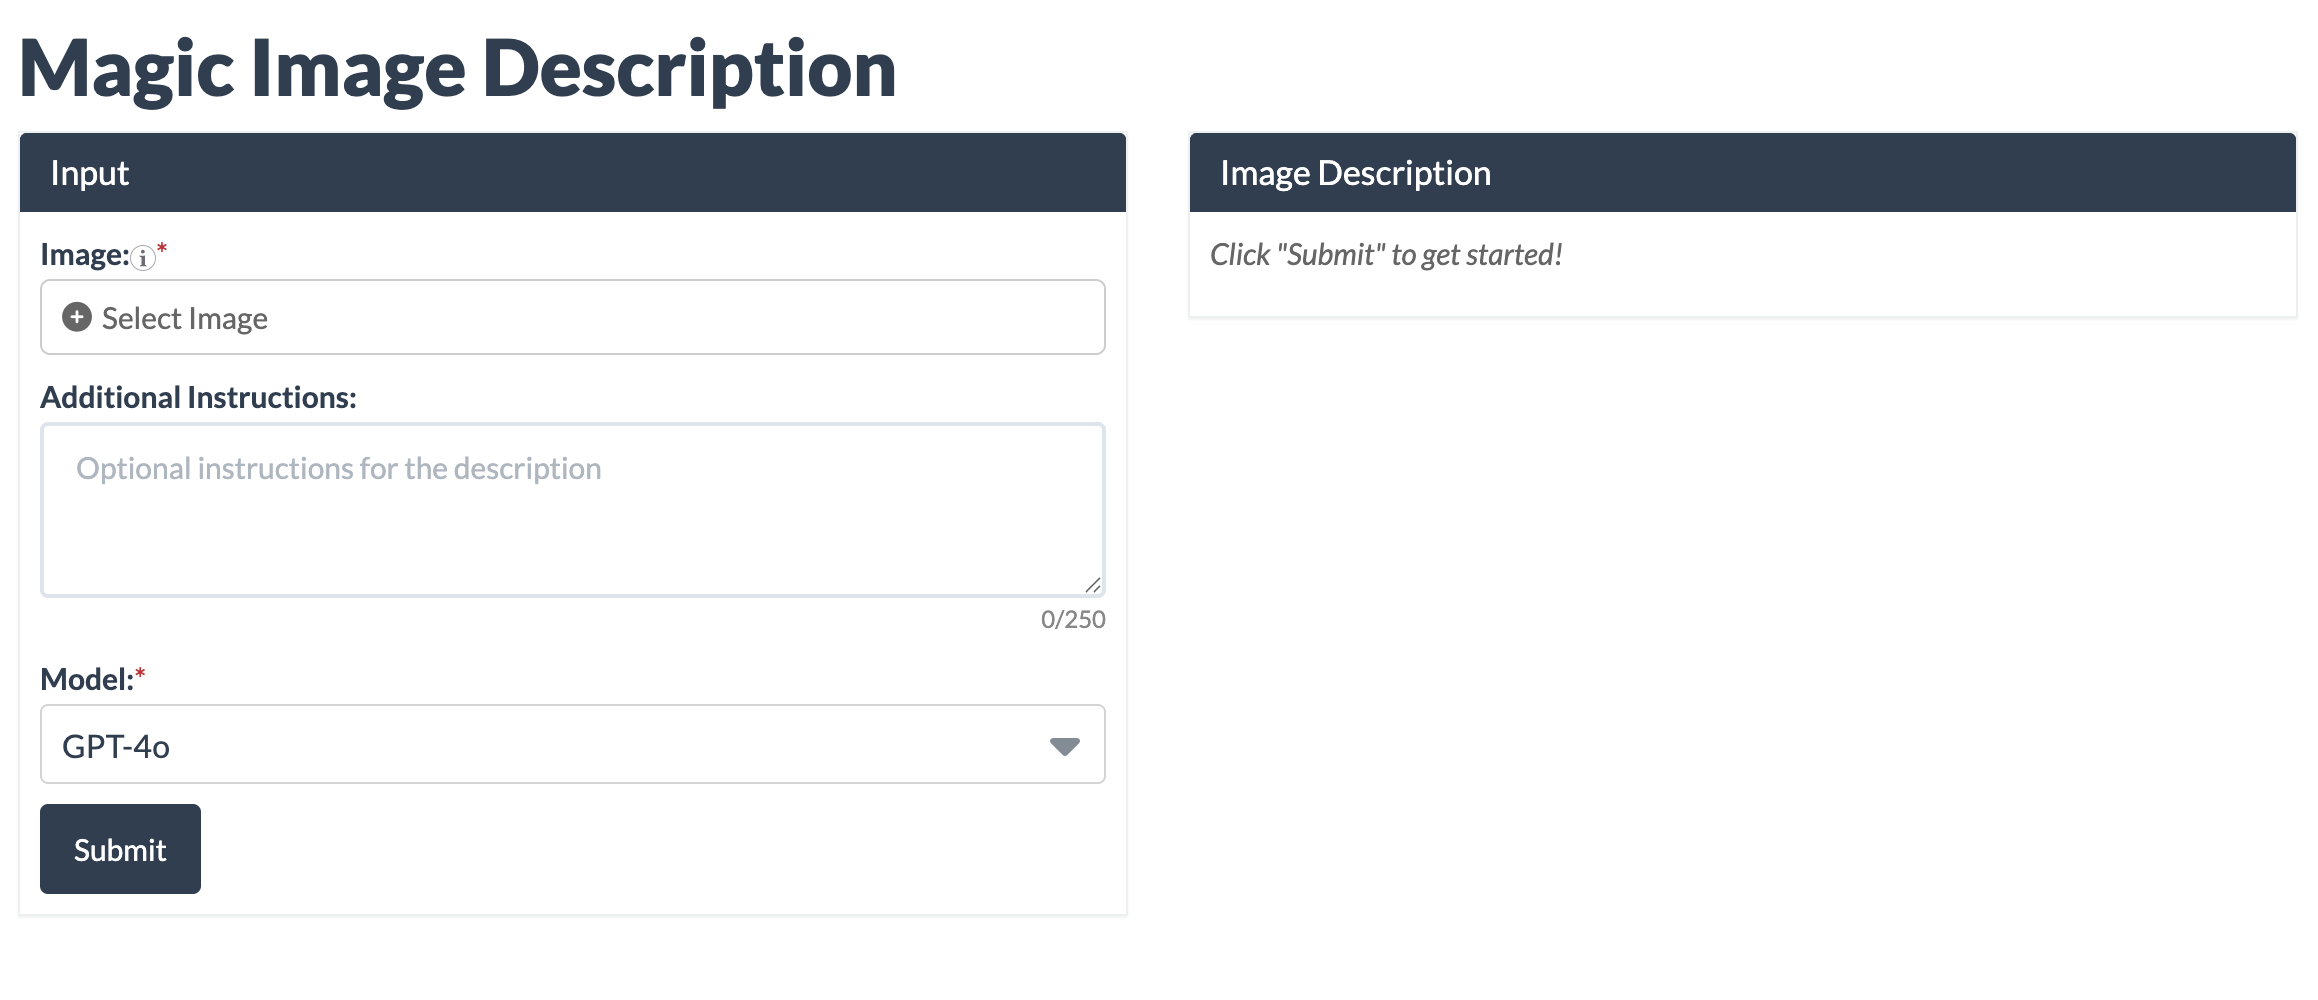
- In the Input pane, complete the form:
- Image: Click to select the image that needs alt text and/or a long description.
- Additional Instructions: (optional) Provide any extra guidance for the AI, such as tone, formatting preferences, or context the AI can't infer from the image alone (for example, "this chart shows quarterly revenue").
- Model: Select the AI model to use for generation. The default, gpt-4o, meets most needs and uses the fewest credits. If your content includes math (with MathML) or if you need more rigorous output, consider one of the following options:
- gpt-4o (Default) – Best for simple, straightforward requests. Fastest and most credit-efficient. Also, better for more complex content that does not involve math.
- gpt-5 – Best for complex content where details are being omitted or oversimplified. Slower and higher credit cost.
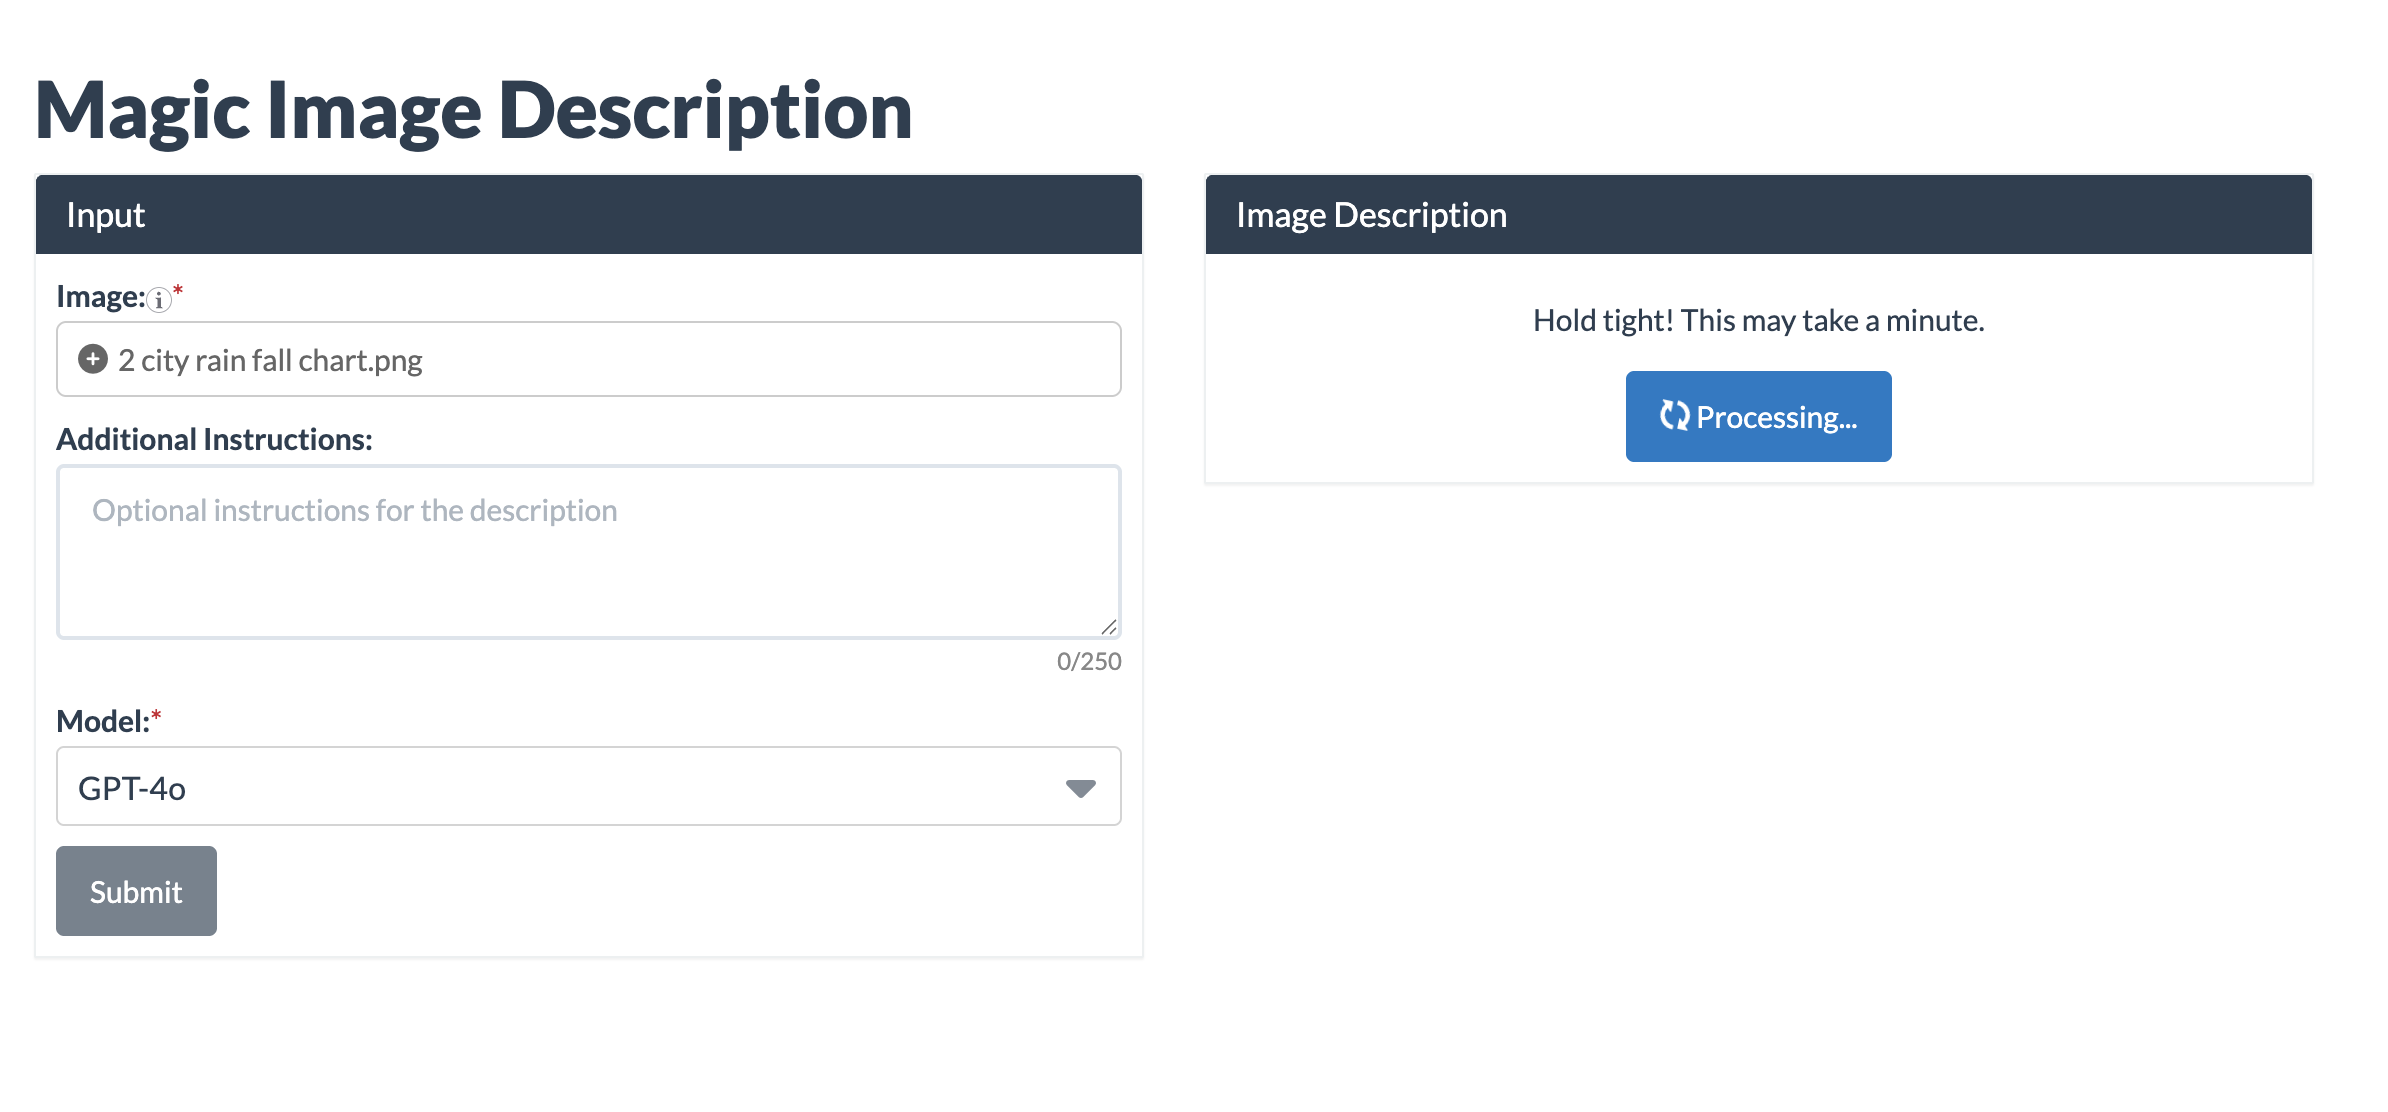
- Select the Submit button. The Image Description pane will show a loading indicator while your request is processed.
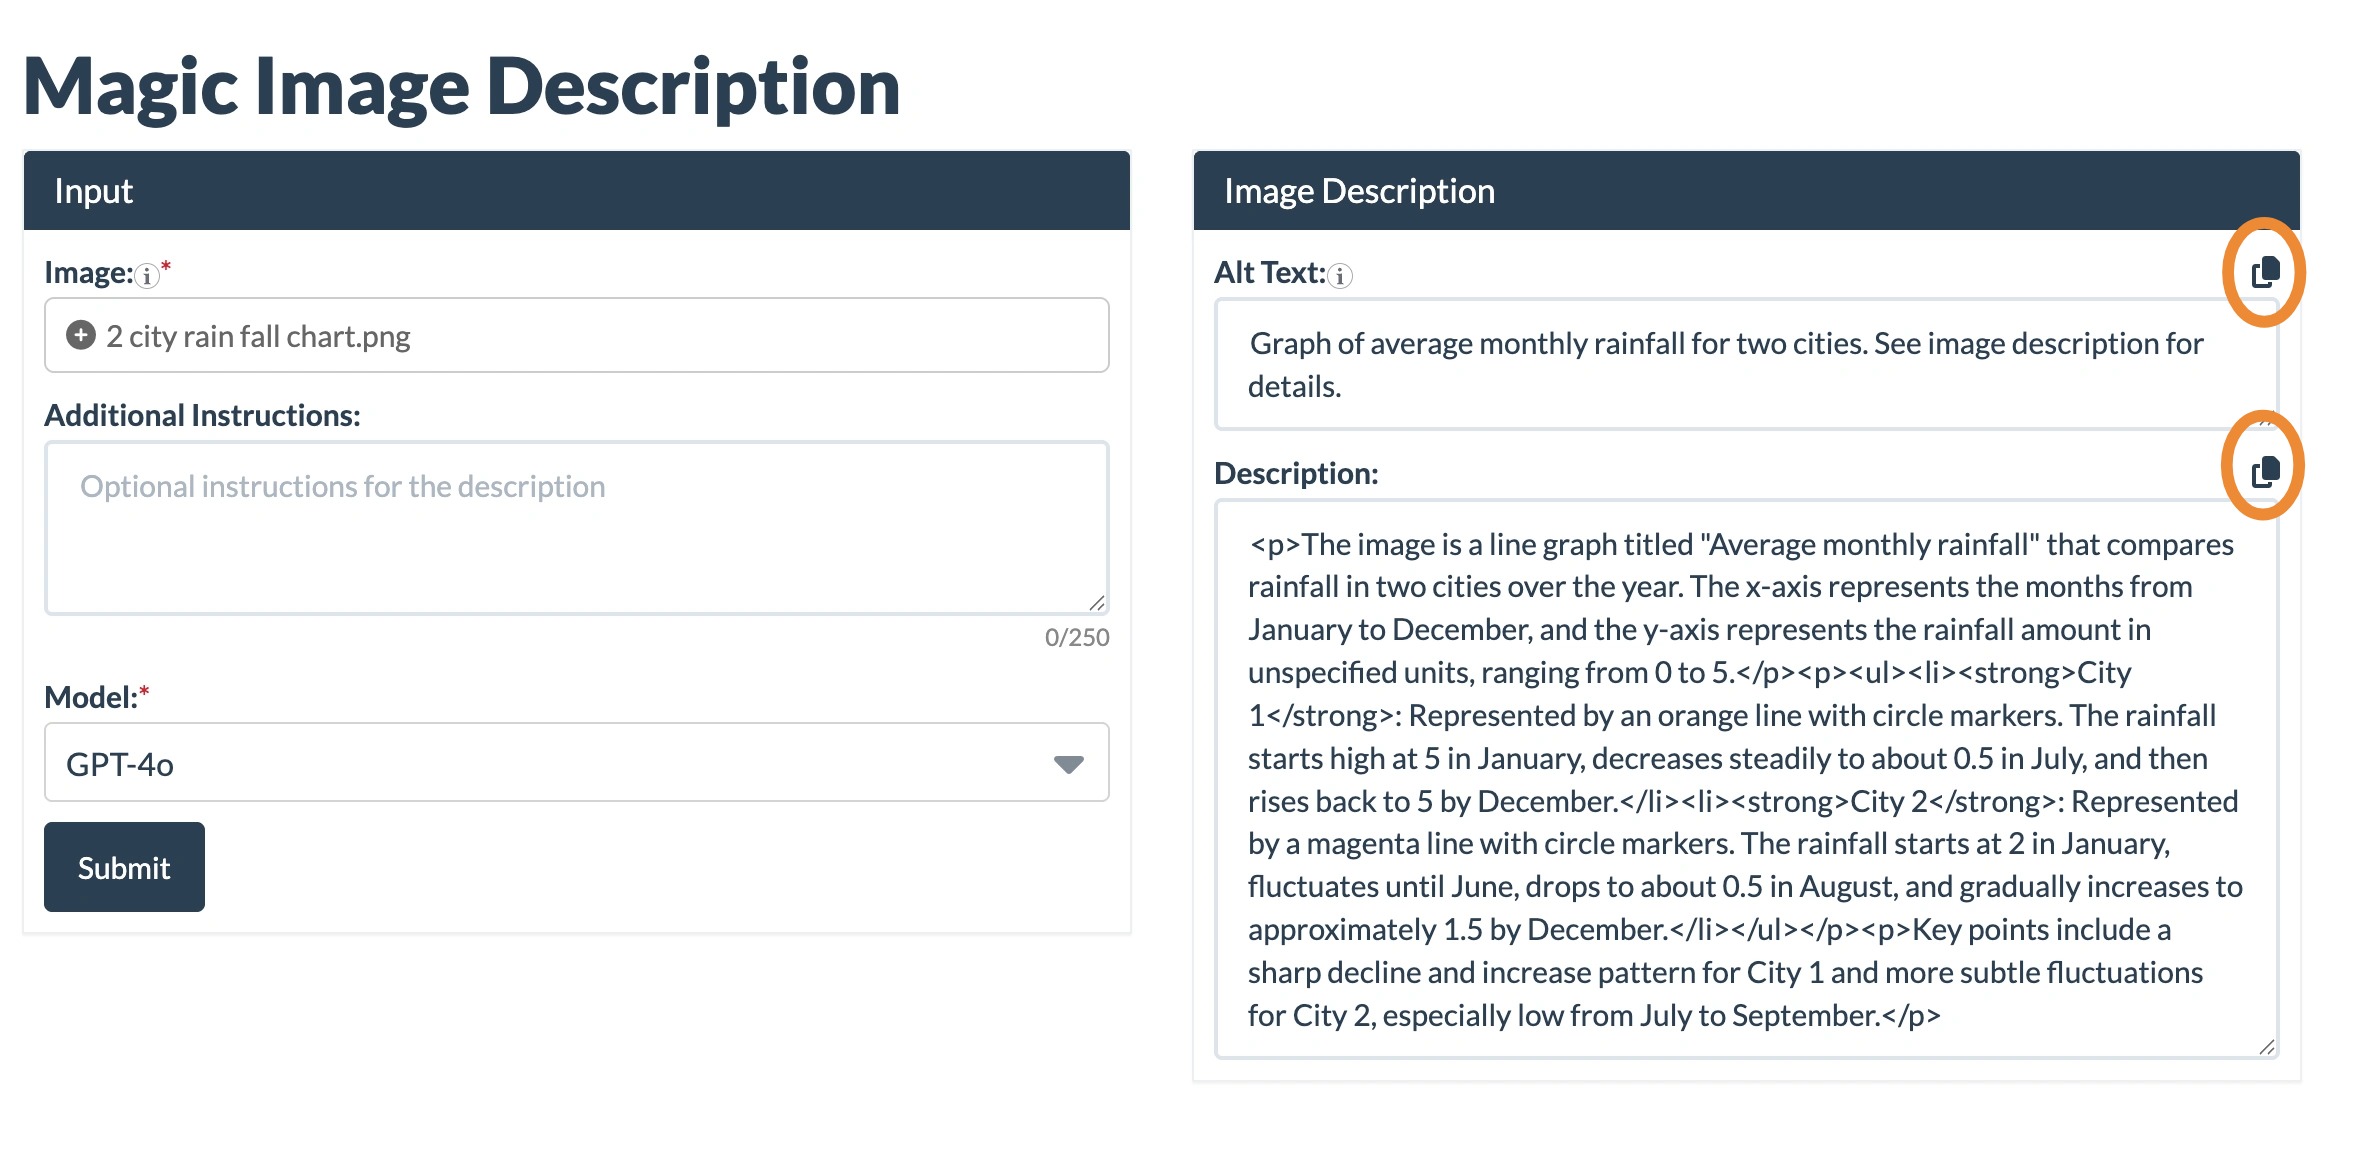
- Once the processing is complete, your results appear in the Image Description pane. The Alt Text appears in its respective field. A long description will be automatically generated if the AI determines the image needs one. Carefully review both fields for accuracy and clarity. Edit as needed to comply with your organization's accessibility standards. When you're ready, use the Copy button next to each field to copy the text.
- Paste the copied alt text and/or long description wherever it's needed - into a CourseArc Image block, or into an external image, such as in a slide deck, report, or third-party LMS page.
For more information about adding alternative (alt) text and long descriptions to images, please review the following articles:
Was this article helpful?
That’s Great!
Thank you for your feedback
Sorry! We couldn't be helpful
Thank you for your feedback
Feedback sent
We appreciate your effort and will try to fix the article